

SIRROMMOTORSPORTS
-
Posts
31 -
Joined
-
Last visited
-
Days Won
4
Content Type
Profiles
Forums
Gallery
Posts posted by SIRROMMOTORSPORTS
-
-
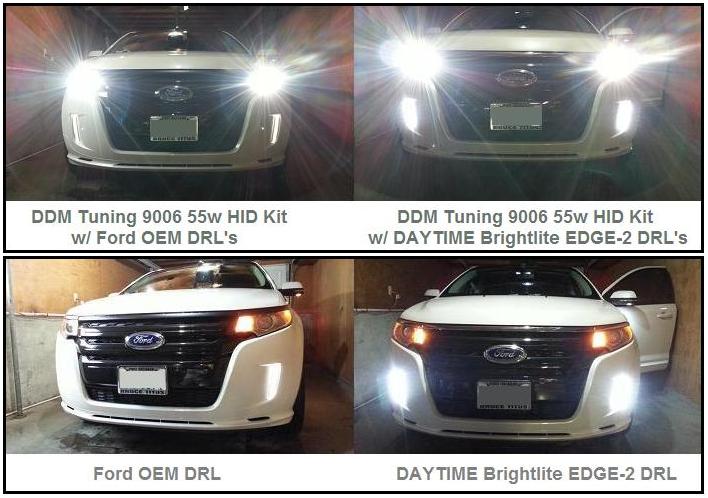
Here's a couple short videos. DRL are obviously Dan's Edge-2 Daytime Brightlites, HID's are DDM Tuning's 4500K 50watt 9006 kit (yes they're on low beam).
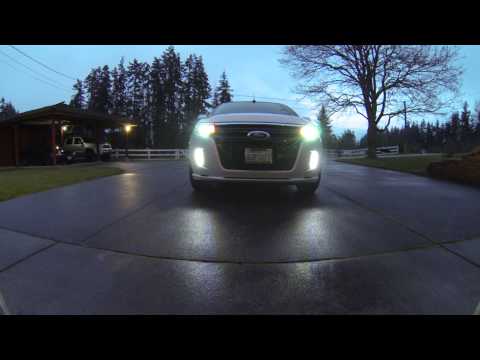
https://www.youtube.com/watch?v=XTdsgrEC1N0&feature=youtu.be

https://www.youtube.com/watch?v=RdbQRdzd80k&feature=youtu.be
-
 1
1
-
-
If you want the EDGE-2 DRL's to work as the factory DRL's did you'll need to hook it up this way: (this will allow your DRL's to be on ONLY if parking and/or headlights are on)
1) Long yellow wire from control box connects to passenger side YELLOW/PURPLE parking light wire
2) Shorter yellow wire from control box connects to drivers side BLUE/GREEN parking light wire
3) Red wire from control box connects to battery +, Black to battery -
3) White wire from control box can do 1 or 2 things.... a) keep unhooked and DRL white lights will always be 100% brightness.. or
 what ever you splice it to it'll be 70% brightness when that function is on. ie. hook it to high beam, they'll dim on high beam, hook to low beam like the kit suggests, the lights will dim when low beam is on, hook to parking lights, they'll be 70% when parking lights are on, etc..
4) Red Wire with FUSE from control box hooks to the middle parking light wire on the drivers side.
Hooking the fuse red wire to the middle of the 3 parking light wires will make the DRL's turn on if your parking lights or headlights are on.. Basically this fuse wire is the main power source wire. So whatever function you hook this wire too, the lights will turn on.
-
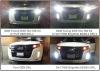
Comparison photo between factory DRL's and Dan's DAYTIME Brightlight EDGE-2 DRL... Video coming soon.
-
Well the way I wanted my particular set up has been accomplished. Yes I wanted the lights to operate like factory only they'd be brighter, LED, and I liked the additional turn signal, etc... The solution: rather than connect the fuse supplied red wire to the fuse box (#90-91-92) I tapped that wire into the center wire of the parking light. Now the DRL's operate at full brightness light mentioned above when the parking lights only are on, and they'll dim slightly to 70% when the headlights are on. If one was wanting the DRL to continue at full brightness, they'd just disconnect the dimmer wire from the headlights as noted above in the last post.
-
1
-
-
Are you saying connect the red power wire from the kit to the factory running light plug? Or simply remove the power wire and just use the factory harness? I'll take a look at it tomorrow, thanks for the input. Completely forgot about the factory harness. Duh!
and yes.. I'd like these lights to work as the factory running lights did.
-
So I finally received my EDGE-2 daytime running light kit from Dan after months of wait time... They're AWESOME!! excellent fitment, bright, clear, very nice quality. The issue I'm having now is that the running light portion (white LEDs) are always on regardless of headlights being on, parking lights, etc.. Obviously its the Red Wire (power source) thats connected straight to the battery that keeps them on when the car is running. I like how the factory DRL's would be off if the headlights were off, then they'd activate when the lights were on.
So here's my question... Any idea's where on the fuse panel or another wire where I can connect the "power source" wire so that the DRL's come on at bare minimum when the parking lights are on? I was hoping that the parking light fuse was under the hood though that's not the case. I also thought maybe splicing into the power wire of the parking light which would solve the problem though I don't know if there's enough voltage to activate the DRL's. Maybe Dan will chime in since it's his design.
-
looks good. so, +1 vote for having a backup ballast handy. i'm assuming you didn't have to use their Error Eliminators either with your setup?
No eliminator... Just need the 9006 and its a plug and play setup. Buying two kits isn't a bad idea actually since their quite a bit cheaper than the other kits out there. Thats what I did "should" I ever have a bulb or ballast ever go out.
-
Like Dan said above... generally a 50 watt 6 Ohm resister will solve the hyper flash
-
Thanks for the write up, I ordered these bulbs yesterday myself. (along with the map/dome light bulbs).
I replaced all my bulbs with LED bulbs for less than $100.00 total.
-
1
-
-
I have DDM 55w kits in all my vehicles and toys and have never had a problem with them other than 1 ballast going bad.. HOWEVER, DDM exchanged the ballast free of charge and I've yet to have another problem since in 3ish years that I've ran them. DDM Tuning offers a lifetime warranty if I'm not mistaking. I will continue to buy from DDM Tuning..
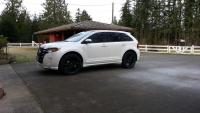
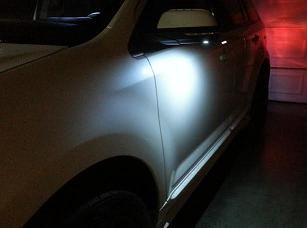
The ONLY downside is depending where you're located, it can take up to 2 weeks for delivery since they generally come from China if your not lucky enough to get a kit outta their California office. We have the 4500k 9006 55w kit on our Edge Sport. Lighting is crystal white, excellent lighting and the wife LOVES them. Check my pictures for examples.
-
Thanks for your efforts. May I add a few suggestions?
- Philips makes a 30mm LED Festoon replacement bulb that is great fit. http://www.amazon.com/Philips-129416000KX1-XtremeVision-Interior-Exterior/dp/B009NOZ5BI/ref=pd_sim_auto_7
- You can use some acetone (nail polish remover) to help remove the glue that joining the lens to the housing, would make separating them a little easier.
Perfect, Thanks... Anything that helps make the project easier is always a bonus..
-
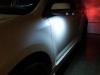
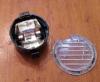
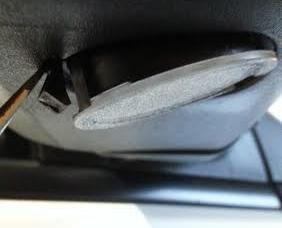
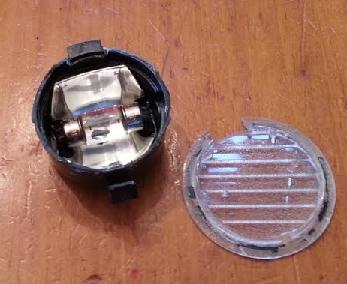
For starters... This post is in no way to take away business from other companies that may or may not have LED puddle light direct replacements. I'm a "do it yourself" type of person so this is only a guide to help those that may want to take on the challenge themselves.
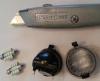
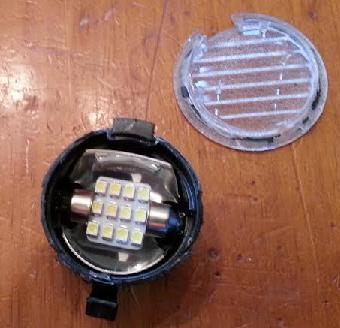
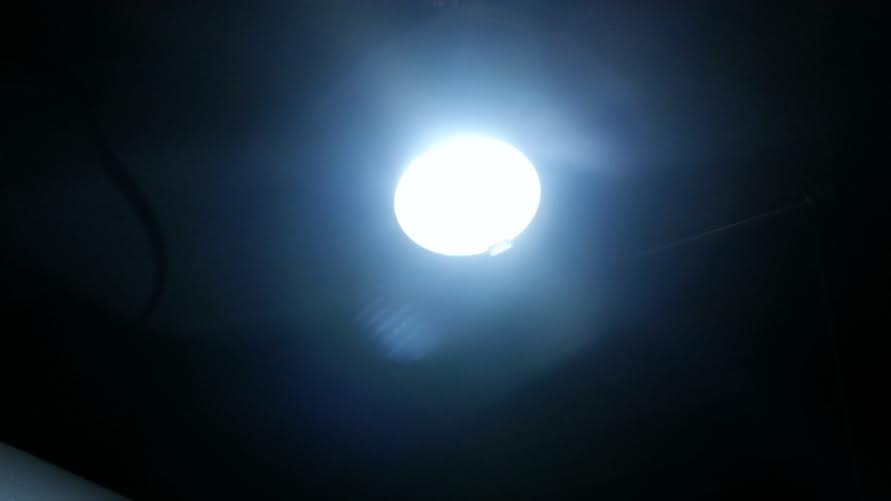
Lets begin.. The Ford Edge has a little clear #3021 bulb underneath the OEM lense which you'll see in the pictures I'll enclose below (Apparently I can't use image extensions to save bandwidth) . Now what bulb replacement you choose to use is solely up to you, I however used a 31mm 1210 Festoon Interior LED bulb (6000K White) for this particular install that I purchased off Ebay for under $5.00. You'll need two (2) of these bulbs to complete the project.
So what tools, etc.. you'll need:
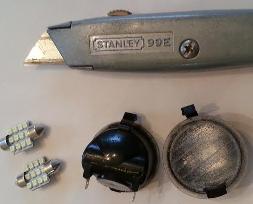
(2) replacement bulbs
(1) Razorblade Knive (or) Dremel Tool (or) Another Cutting Device
(1) Clear Epoxy of some sort - I used a 60sec 2500lb epoxy that you can get at any hardware store
(2) Clamps (or something to hold pressure on the OEM housing during dry time)
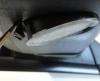
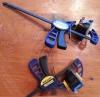
Step 1: Remove the OEM Puddle Light from the mirror. There is a tab on one end of the light that you can use a small flat head screw driver to help pry the light down.
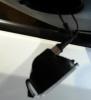
Step 2: Once the puddle light is hanging remove the 2 wires from the light fixture. (re-installing the light you'll re-connect the wires to the light...should the light not work, simply reverse the wires and the light should turn on.)
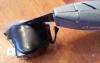
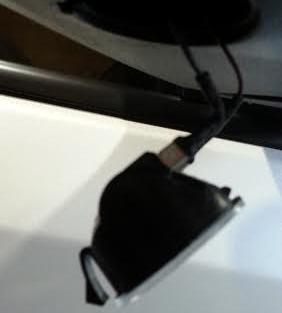
Step 3: Use your knife and carefully cut between the clear lense and housing... (Careful not to cut your finger off) This is the part that if you don't feel comfortable with the knife, you might opt for a dremel tool or other cutting devise.
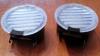
Step 4: Once you have the lense separated from the housing (Remember what lense came from what housing). Now replace the OEM bulb with the bulb of your choice. This also would be a good time to clean up the clear lense and black housing of any debris that may hinder a good seal once we move to the next step.
Step 5: Run a thin amount of clear epoxy around the outside of the clear OEM lense, then snap in back into place on the housing that it originally came from. Remove any epoxy that may have over flown so you have a clean appealing look. Now use your clamps and apply pressure to the fixture and allow dry time.
Step 6: Finally... remove the clamps and return to your car to plug them back in. Prior to you clipping them back into the mirror housing, open the door to assure that the wires are on the correct prong and the puddle light works. If they work, your done.. If the light does not light up, flip the 2 wires around and this should resolve the issue...
Good Luck!!


-
3
-
-
Many, Including myself have asked or pondered about changing a light bulb or two in our edge with either a different bulb or LED replacement. Here is a quick and easy chart that'll help you out when trying to figure out what bulb number is the correct replacement.
Source -- How Many Bulbs Total -- OEM Bulb Number
HEADLAMPS -- 2 -- HIR2 or 9012 (Many who choose to change their factory bulb with an aftermarket HID will use a 9006 kit)
HID Equipped Model -- 2 -- D3S
Front Parking/Turn Signal -- 2 -- 3457 NAK (**Amber**)
Rear Turn Signal -- 2 -- 3757 NAK (**Amber**)
Stop / Tail / Side Marker -- 4 -- 3157K LCP (or) 3157K
Reverse Back Up -- 2 -- 921
License Plate -- 2 -- 168
Interior Map Light -- 2 -- W5W
Second Row Dome Light -- 3 -- 578
Rear Courtesy / Trunk -- 1 -- 578
Head Visor Vanity Light -- 1 -- 37
Mirror Puddle Light -- 2 -- 3021 (I replaced mine with 31mm 1210 Festoon Interior Dome White LED for you DIY'ers, or you can order the premades from companies like daytimebrightlites.com, etc...)
**ALL BULBS ARE CLEAR IN COLOR UNLESS NOTED**
-
3
-
-
Looking for a nice looking set of mudflaps/guards for the sport. I can't stand a clean car with only mud spit up from the front tire as it turned a corner.
-
Each time I drive the wife's car I check her computer and it usually is in the 18-19 mph range town driving running up and down the hill, etc... We're at the 1500 miles mark so its a really new car, also the AWD model. Last longer road trip we took to the city I got the average up to 22.8 though yeehaa lol
-
I'll be plasti-dipping my wife's white sport wheels and rear badging and using glossifier on them as well this time. I'll post pictures when I'm done. I've worked with plasti-dip quite a bit trying new things... everyone thought I was weird dipping most things I have and now that is all the townsmen wanna do these days is dip their things.. lol
-
Youll be surprised how well the AWD sport will do in the snow even with the Pirellis... I wouldn't worry too much about it, the sport does very will in snow.
-
I really like the DupliColor Tire shine that comes in a white rattle can. Roughly $10 available at O'Reileys or Auto Zone.
-
I have 9006 4500K 55w DDM Tuning HID's on my sport and love them. No issues.
-
I've used DDM Tuning 55w HID's on all my vehicles and bikes for years now without any problems... Actually I had one ballast stop working though they replaced it free of charge. Their warrantee is great and they've always taken care of me with any questions, concerns etc... They only down fall I'd say to them is there shipping is slow. If you can wait out the 10 day or so shipping time, you'll love them.. Don't let their cheaper than their competitor prices differ you.


Installed Factory/Thule roof rack on a vista BAMR
in Cargo, Hauling, Roof Racks & Towing
Posted
Excellent write up