


Whiteknight08
-
Posts
47 -
Joined
-
Last visited
-
Days Won
1
Content Type
Profiles
Forums
Gallery
Posts posted by Whiteknight08
-
-
So I am guessing this is the new one huh. only difference is that it has WiFi capabilities so you dont have to plug it into your usb computer.
http://www.autoanything.com/performance-chips/sct-x4-power-flash-programmer-49-state-legal
-
For high-octane performance, tune your ride with the high-tech SCT X4 Power Flash Programmer (49-State Legal) - Preloaded with an impressive set of dyno-proven and track-tested tunes for your year, make and model
- The easiest way to crank up your horsepower, boost torque and enhance throttle response
- Create and store up to 10 custom tunes optimized for your particular driving style
- Offers a wide range of adjustability to critical vehicle parameters, including rev limiter, shift points, idle speed and more (varies by vehicle)
- Increases fuel efficiency when you’re not pushing the pedal to the metal
- The SCT X4 Power Programmer features a smaller, more ergonomic design compared to the X3
- Easy-to-read full color LCD screen that runs in landscape and portrait modes
- Auto-dimming for optimal contrast night and day
- Logs and displays PCM data in real-time while you drive, or review your runs at home using SCT’s LiveLink software
- Connects to your computer via built-in WiFi for easy updating
- Equipped with two analog inputs
- Measures 2.75” by 5.5”
- Street legal in all states except California
- Your SCT X4 Power Flash Programmer (49-State Legal) includes a 1-Year Warranty
DescriptionThe digital revolution has just arrived on your dashboard. Celebrate technology at its finest with a SCT X4 Power Flash Programmer (49-State Legal), the most innovative tuner in the SCT lineup. More compact and ergonomic than the X3, the X4 boasts a brilliant full-color LCD display that puts huge horsepower, torque and throttle response gains right at your fingertips.
Packed with dyno-proven tunes tailor made for your ride, the SCT X4 Tuner unleashes your full performance potential. But that’s just the beginning. With full control over a wide range of critical engine parameters, you can built and store up to 10 custom tunes for any situation, from towing trailers up steep grades to passing slowpokes on the highway.
You don’t have to get your hands dirty installing the SCT X4 Flash Tuner. Just plug it into your OBD-II port, follow the on-screen prompts and you’re ready for action. Plus, it doubles as a digital gauge set, giving you real-time readouts of all your key speed stats. And with WiFi built in, you can update your X4 without ever connecting it to your PC. It even comes with a 1-Year Warranty. -
-
Try Ebay?
-
Thankb you all so very much. Greatly appreciated
-
Ok next questions are
1) for a 2008 edge sel is the sensor on the valve stem or some where else. or in the actual wheel.
2.) If i get the tires mounted and balanced by the website. Then go on ebay to get the FORD tpms, will I have to dismount the tires from the wheels, then remount n balance them?
-
You bet she does. She just turned two on the 25th.
-
So im looking online at some different sites selling wheel and tire packages. They try to get you to buy 200.00 worth of tpms stuff. This sensor only tells you if your tire pressure is low, right? So do I REALLY NEED this sensor? Will it just give me an annoying light on my dash if I don't have it? Will the vehicle perform differently if I don't have it.
main thing is if I dont NEED this sensor then I cant justify spending 200.00 on it. The wheel will still work the same as if it did not have it correct?
Thanks in Advance!
-
This is totally awesome!!!! great job.
-
-
I like it. Good job.
-
Nice Surfer1.
Any one else want to post their aftermarket rims and tire specs?
-
Just an update;
Installed/replaced all map and dome lights to LED ones. Also the plate lights were interchange as well as reverse lights.
Today I installed my HID's. 5000K 35watt low beams from a reputable ebay seller. Orangemika, i have dealt with him with all my HID installs and have had no problems. 30 bucks for 2 bulbs and ultra slim ballasts, fast shipping too.
Will post pictures when it gets dark out.
Thanks for looking
-
So nobody wants to post their aftermarket wheels/tire set up?
Maybe after taxes come back then there will be some pictures.
-
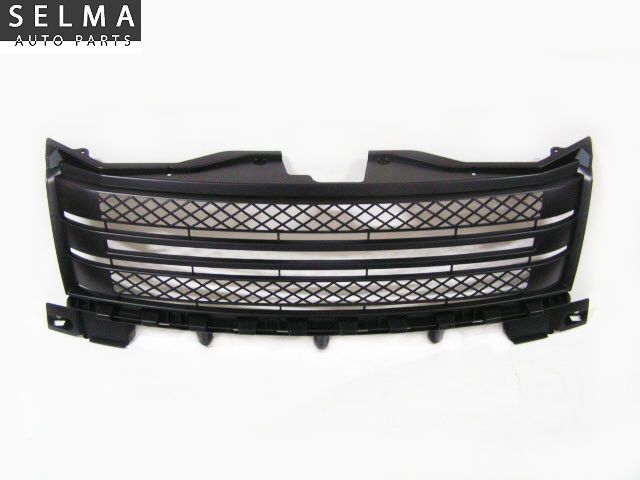
Yes they are the same light n will fit. Try eBay for the tails. For a grille also try ebay too.
If you dont like the chrome. You could always paint the tails your self. I did a DIY for it. Look it up.
-
No problem. Here to help.
-
-
The Basic "Mods" for the Edge are SCT programmer, Springs, Cat back exhaust, And Short ram intake. (close to 290 hp) That is pretty much all you can do. Some have tried forced induction, but that didn't last long.
-
Welcome elamigodavi. Glad to meet you.
 Enjoy your 2010 Edge. This site has tons of info, just dont be afraid to ask questions.
Also you can make your own new thread if you want too.
-
That looks Legit!!!! Best one I have seen for aftermarket.
-
Just lean from my mistakes and you are golden!!!!
If I dont care for them anymore, ill just have to bite the bullet and spend the money on OEM Sport ones.
-
-
Pictures as requested
Dont do 320 degrees for 15-20 min or you will warp the F%$k out of the plastic like i did. Now I have to live with it for as long as I own the Edge. FML
-
 1
1
-
-
-
Old Thread but I figured I would post this any ways
http://www.f150forum.com/f53/97-03-04-08-raptor-style-grill-overlays-151588/
-
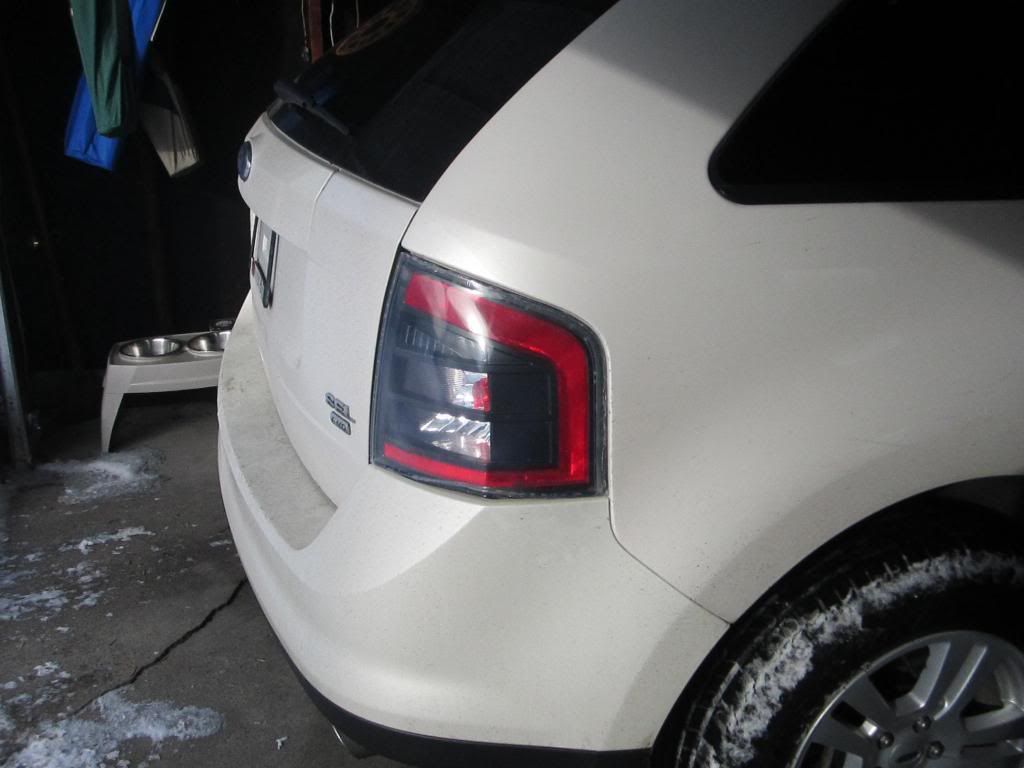
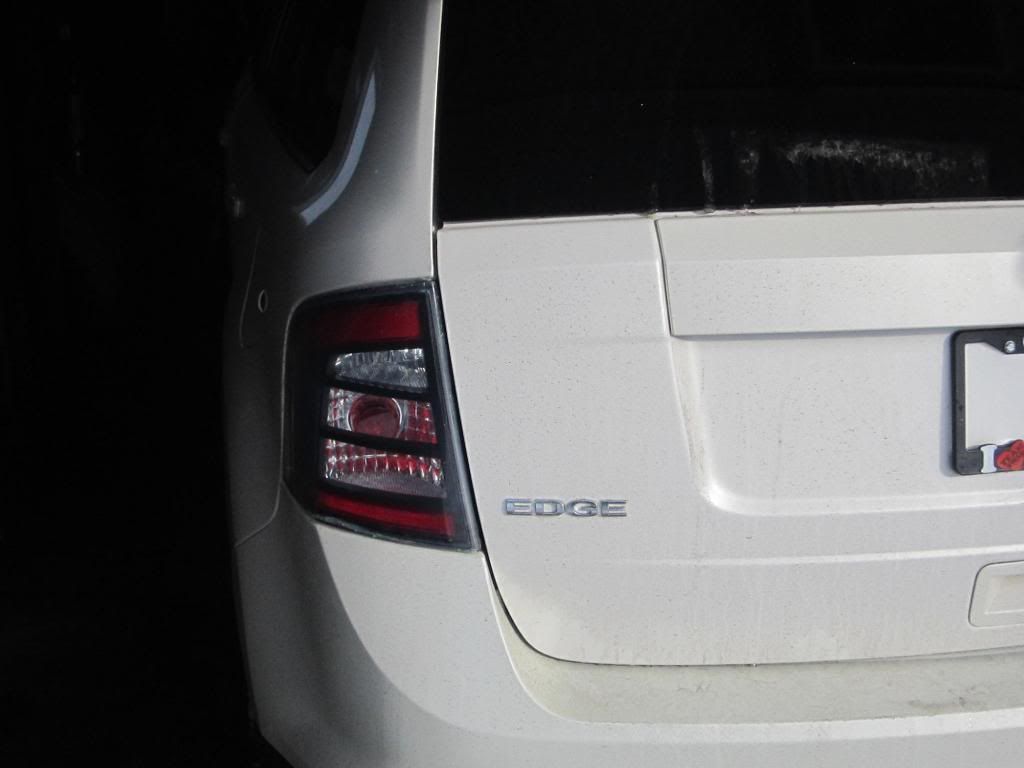
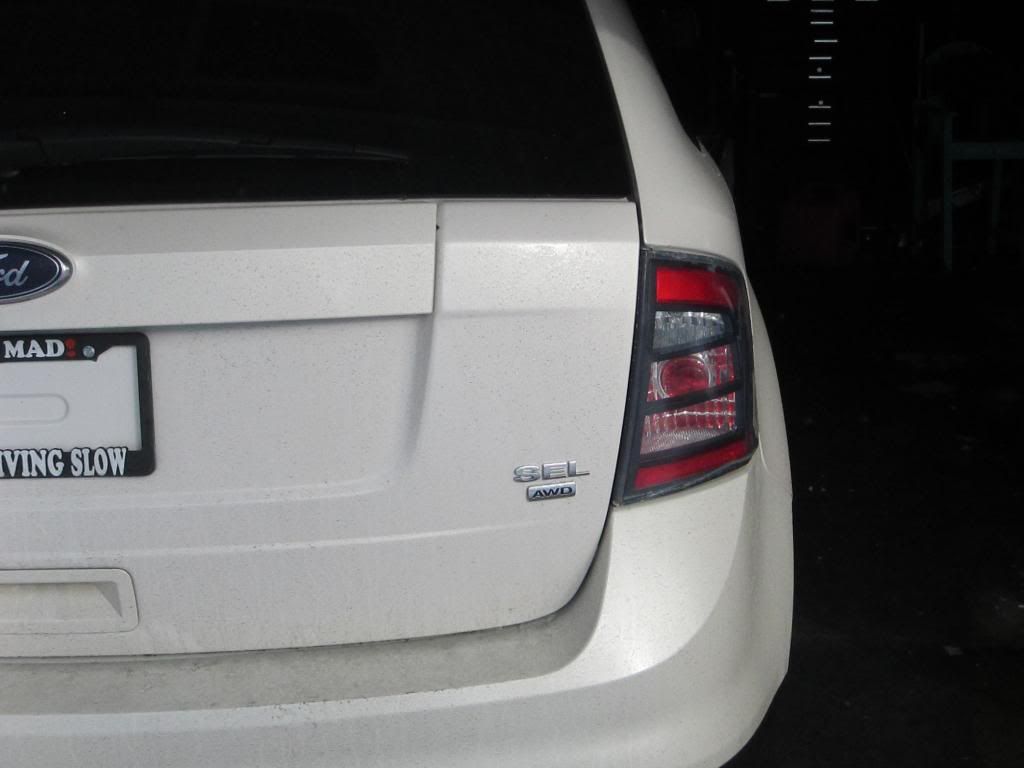
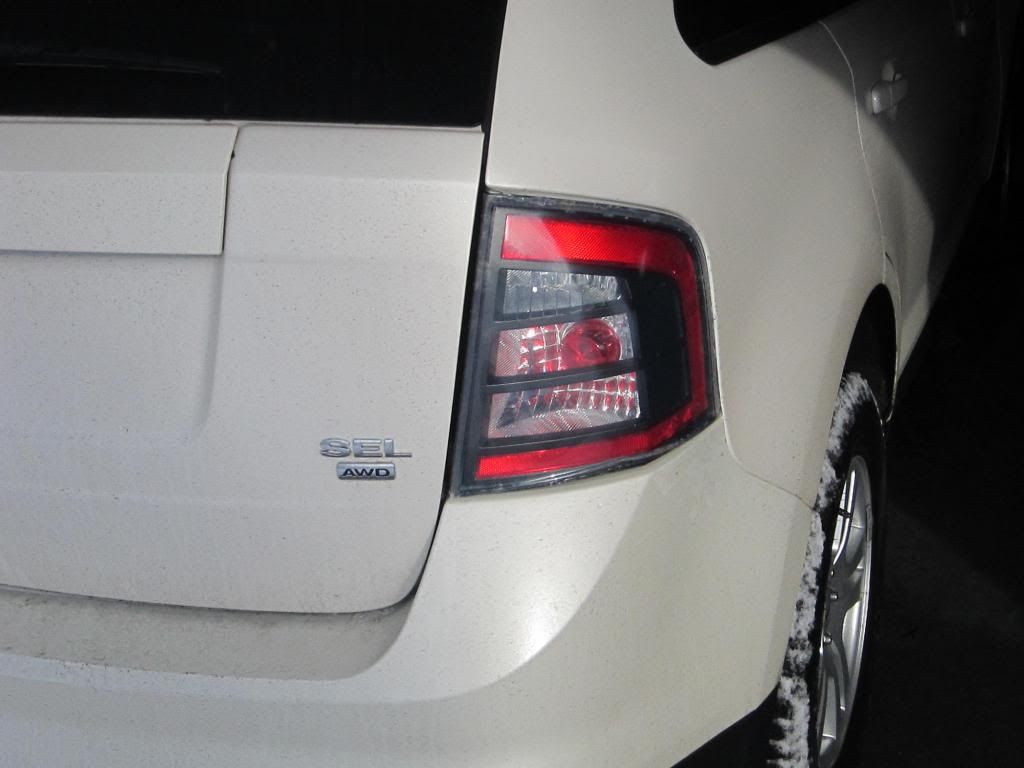
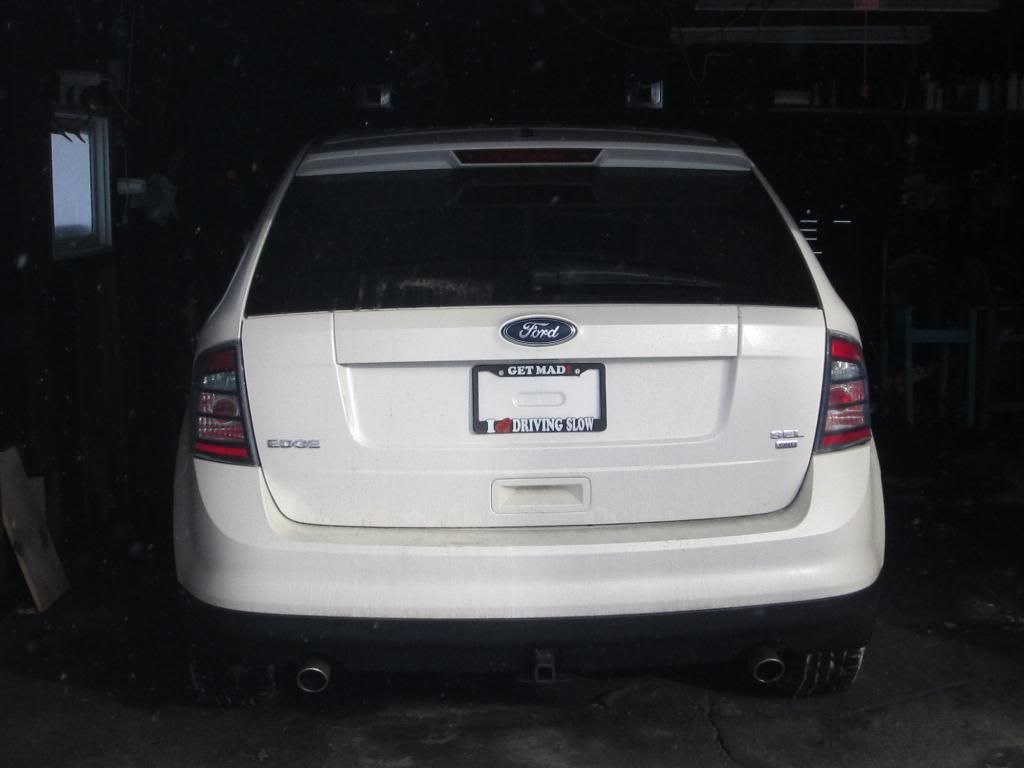
So I decided to paint the chrome of my tail lights black, because I wanted the look of the Sport lights without paying 160.00 per light.
Here is a little DIY.
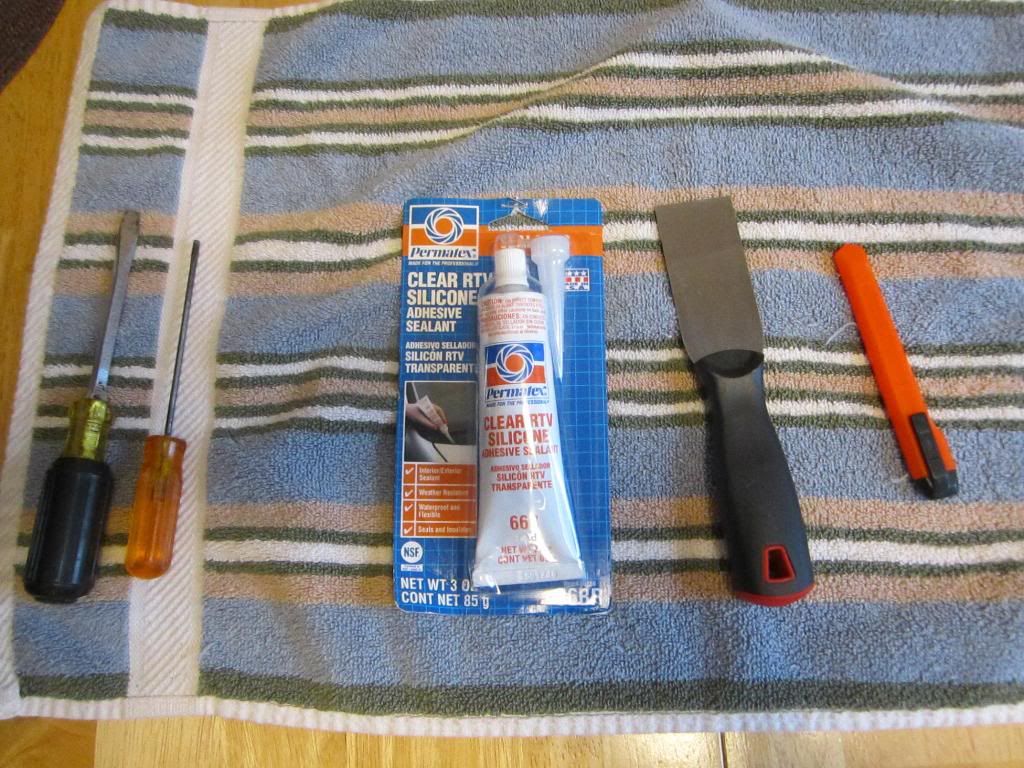
Tools Needed:
-Flat head screw driver
-RTV Silicone sealant
-Oven
-Star looking screw driver
-Painters tape
Okay, so I Pre heated my oven a little to high . (320 for 15 min- DO NOT DO) I would recommend 250-270 degrees and work from there.
First I did about 15 min.....a bit too long.......so say 6-10 min to start.
Obviously take the light off of the SUV. Place it on a cookie sheet, while oven is pre heating.
Once oven is ready, stick the light in and set the timer. (10 min)
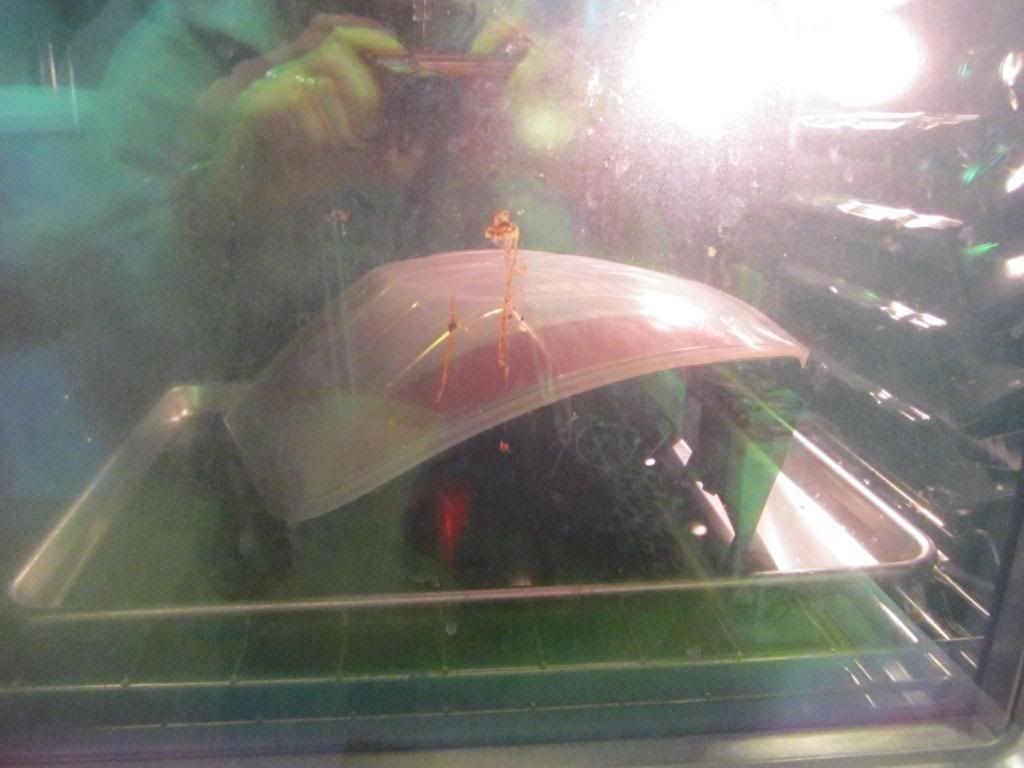
As it cooks, get your supplies ready if you have not done so.
Take light out and place it on a table or counter. (work space)....here you can turn the oven off if you want to let it cool a bit.
Let the light cool for a minute so you don't start warping the hot plastic.
Once its cool to the touch take flat head screw driver and start at the top. Work your way around twisting the screwdriver. You will hear some popping and cracking.
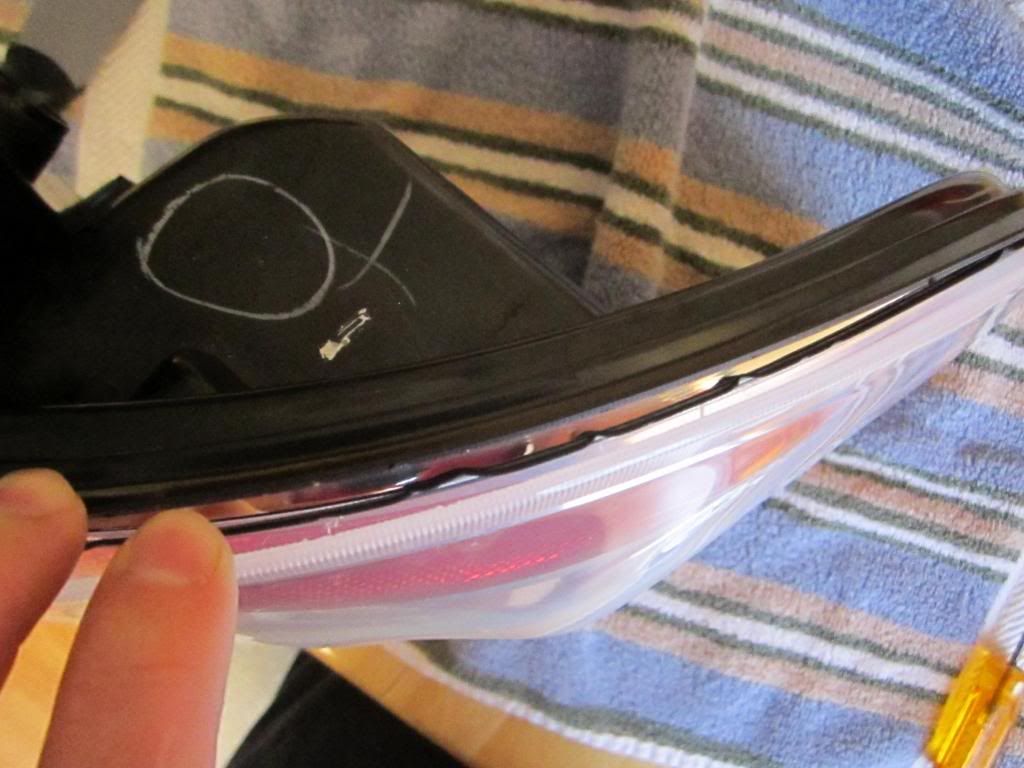
That's just the glue separating from the light. Don't freak out.
Side note: If the glue is not separating PLEASE put the light back in the oven for a couple of minutes, while the oven is cooling. Dont want to crack the plastic.
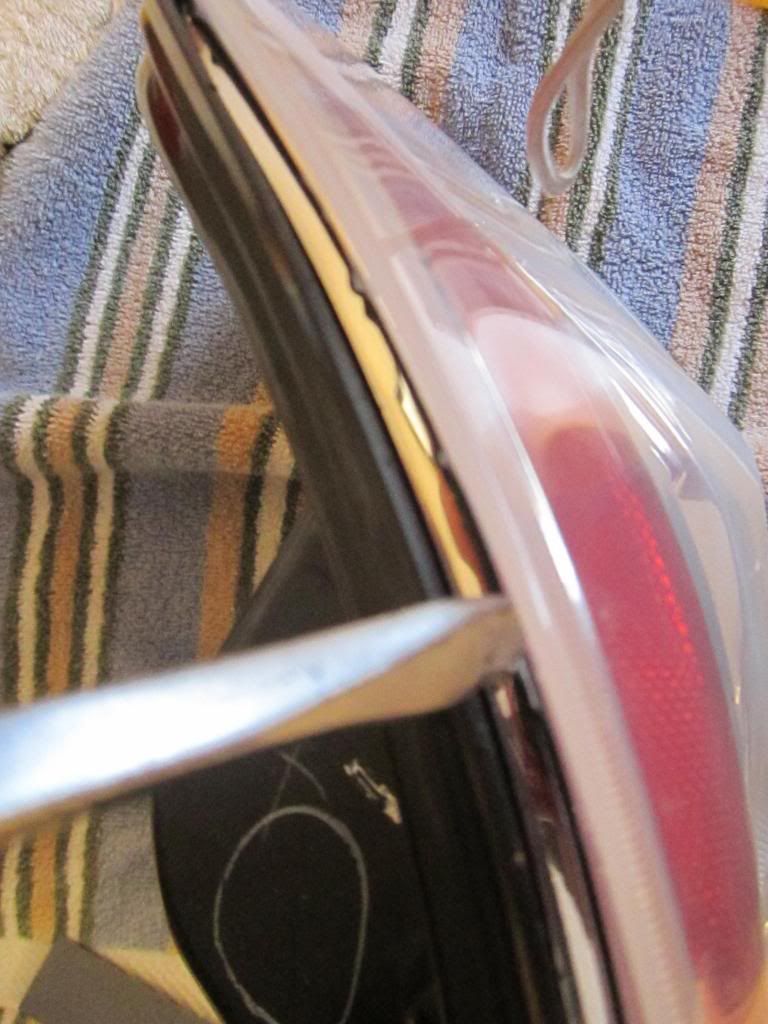
Once the cover is off, you can now flip over the light to the back. There is three (3) star shaped screws that need to be removed.
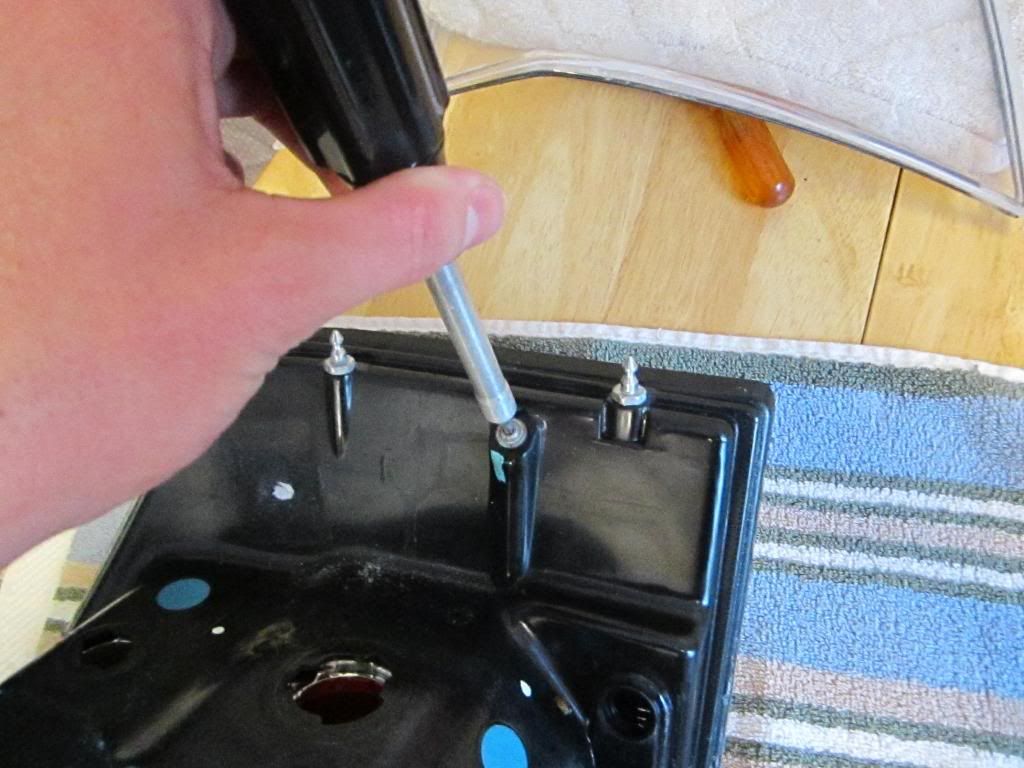
Unscrew them and place them in a safe place. Now take the chrome insert and start taping the areas you dont want painted. I used a utility knife to get as close as i could to the edges.
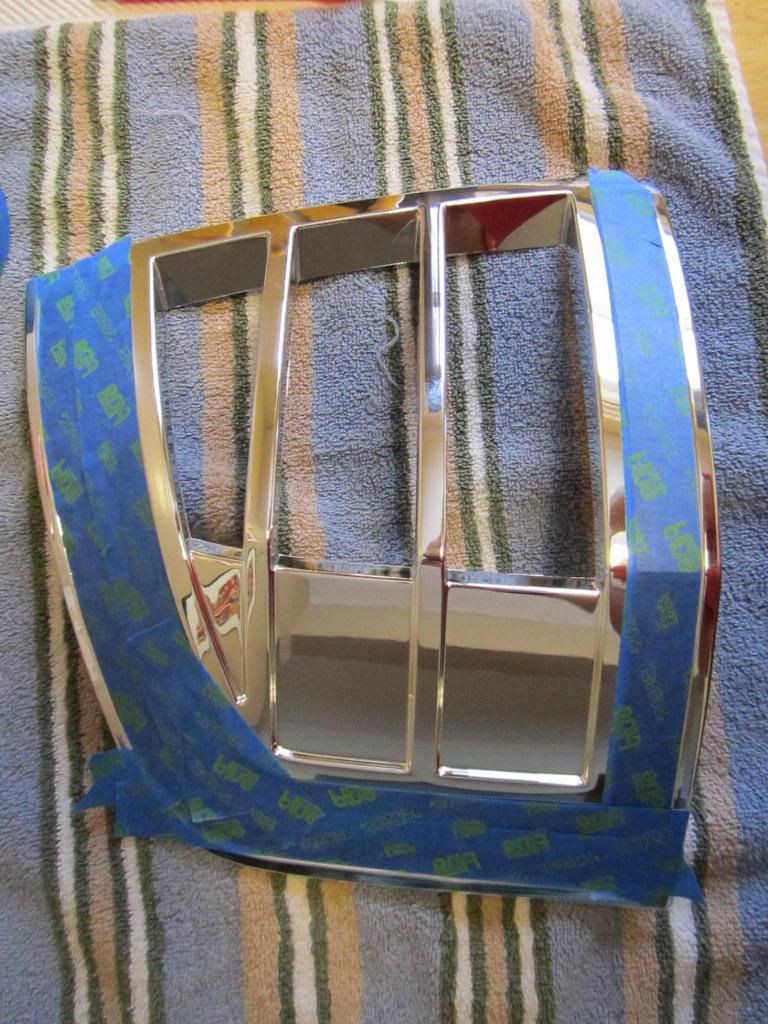
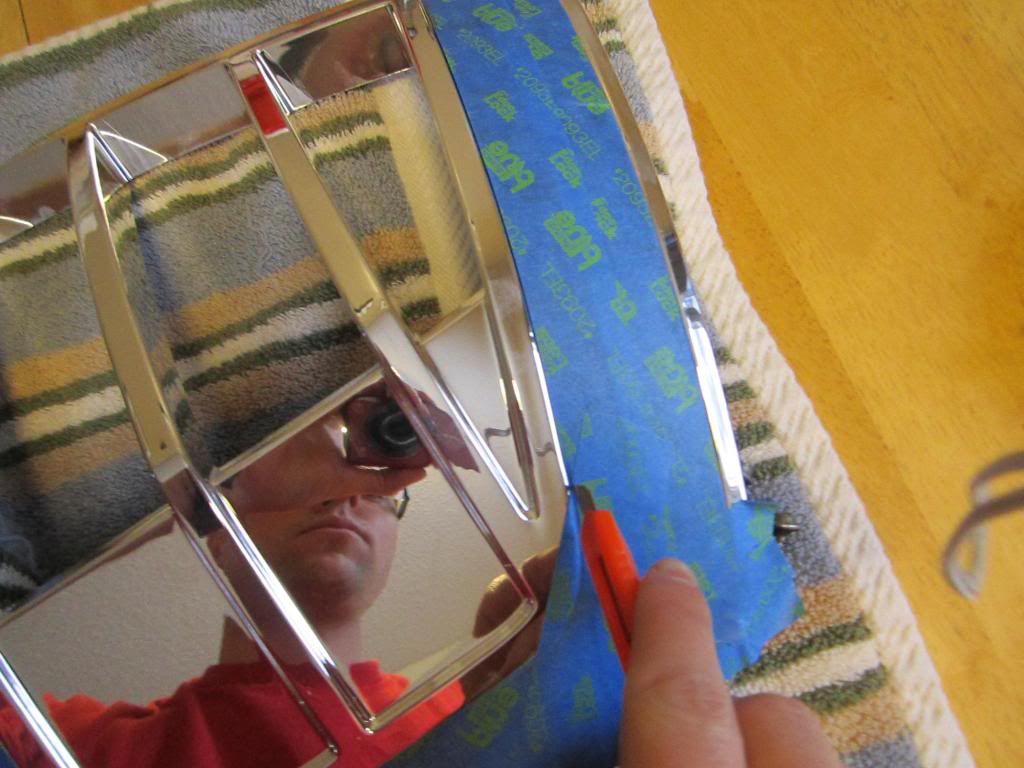
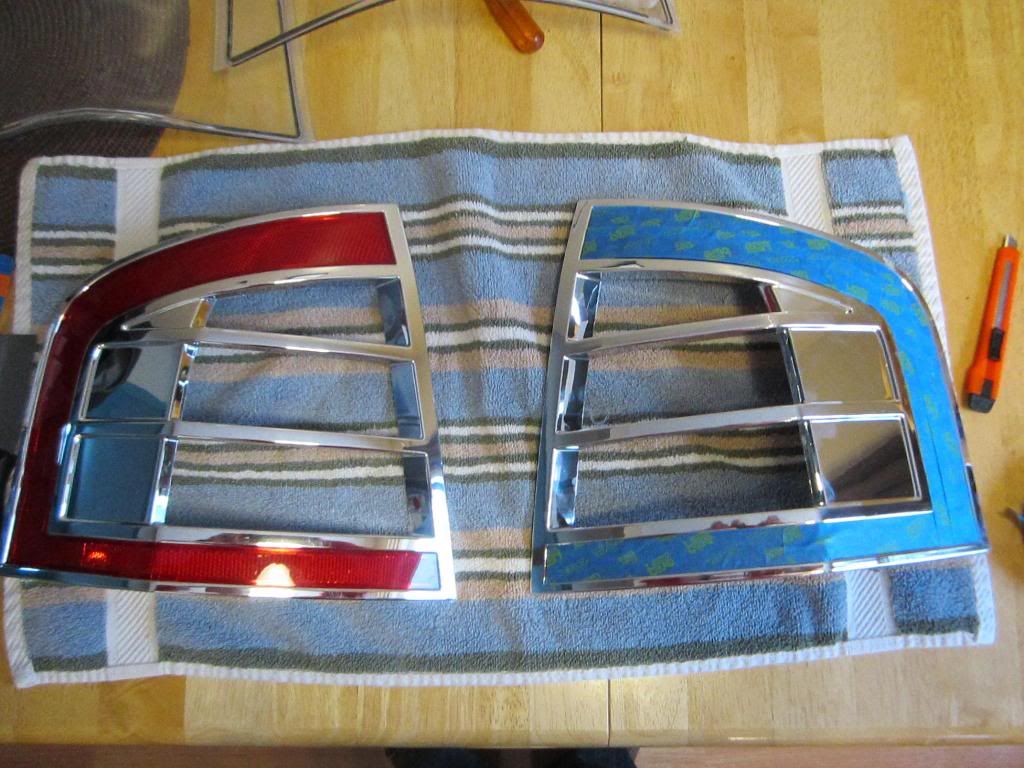
Now you are ready to paint.
I used Plast Dip, because I like how it adheres to plastic, and can be removed if you mess up.
Also I painted my lights in the basement, not the best idea if you live with other people. IE your wife : /
For plasit dip i applied my first coat about 50%, just to let the paint stick to the chrome plastic.
waited 15-20 between coats and applied second coat. This coat was about 80% coverage.
Third and fourth were 100%.
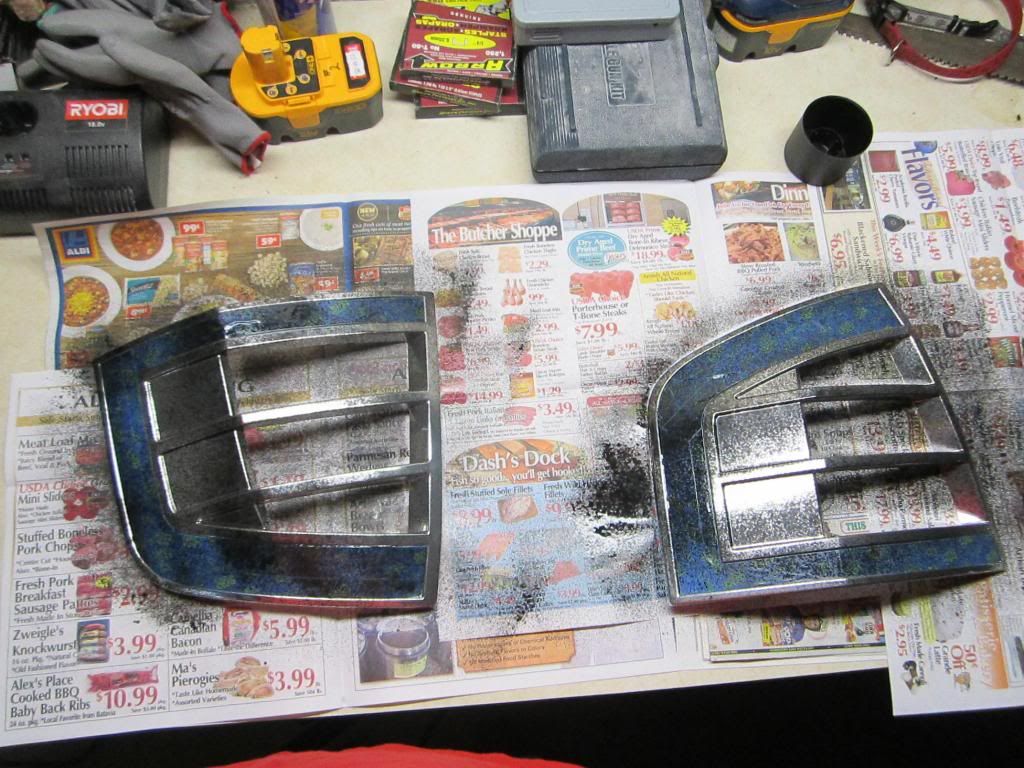
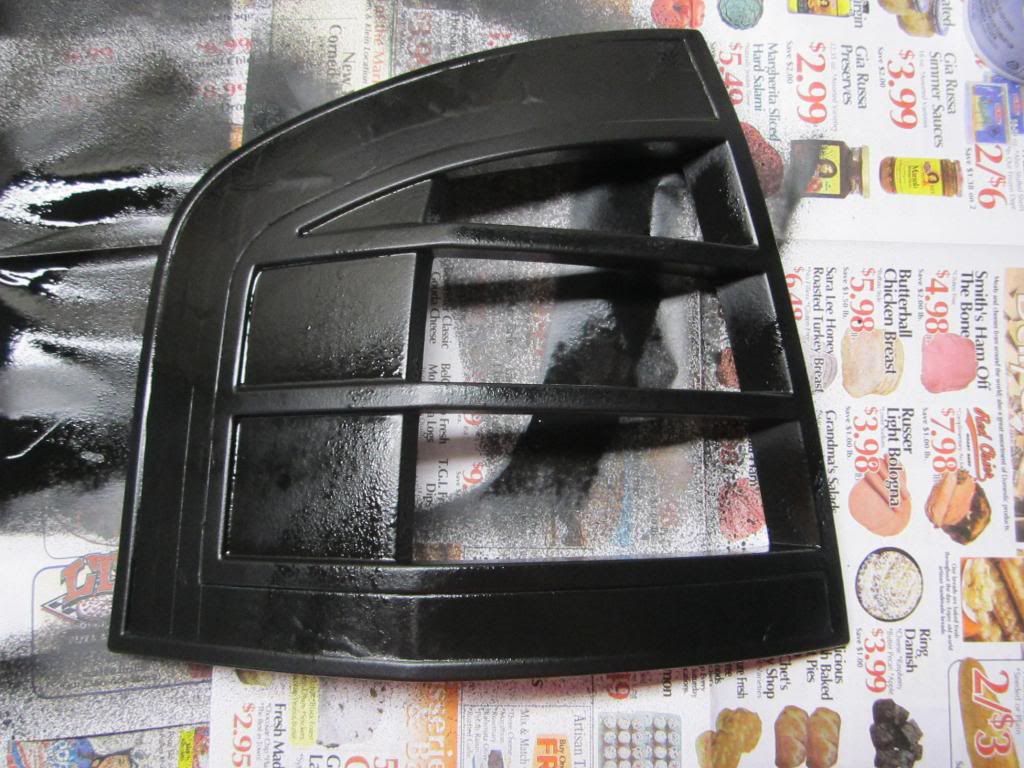
I would recommend at least 4 coats for good coverage.
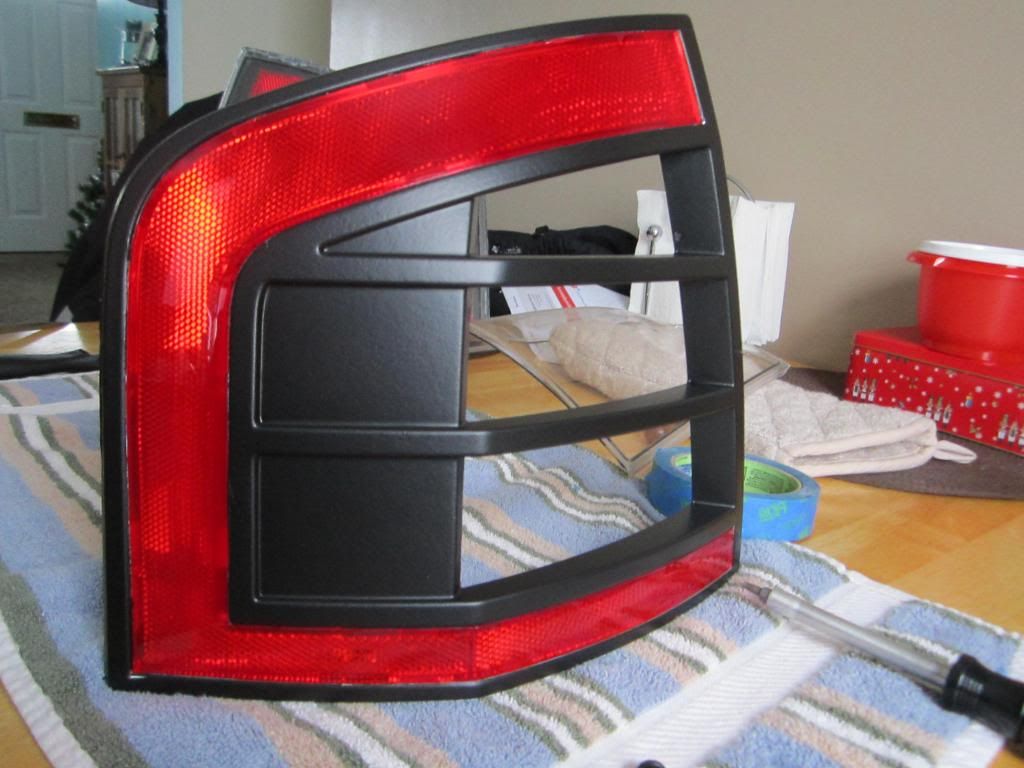
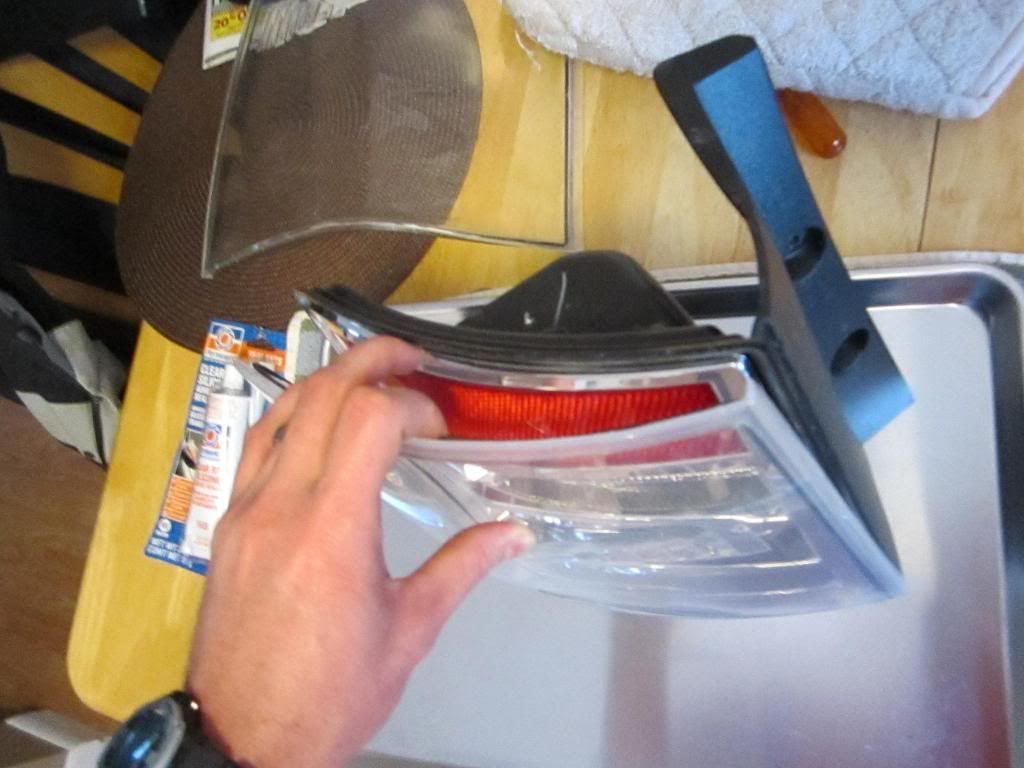
Silicone time:
Once you are done painting and fixing your mess ups. Its time to take the tape off and apply the silicone.
Im using clear silicone, there are alot of other brands and types so its really personal preference.
Cut the top to desired bead and apply it to the edge of the actual light. not the lens. I followed the original glue pattern.
Push clear lens and light together so they become as one.
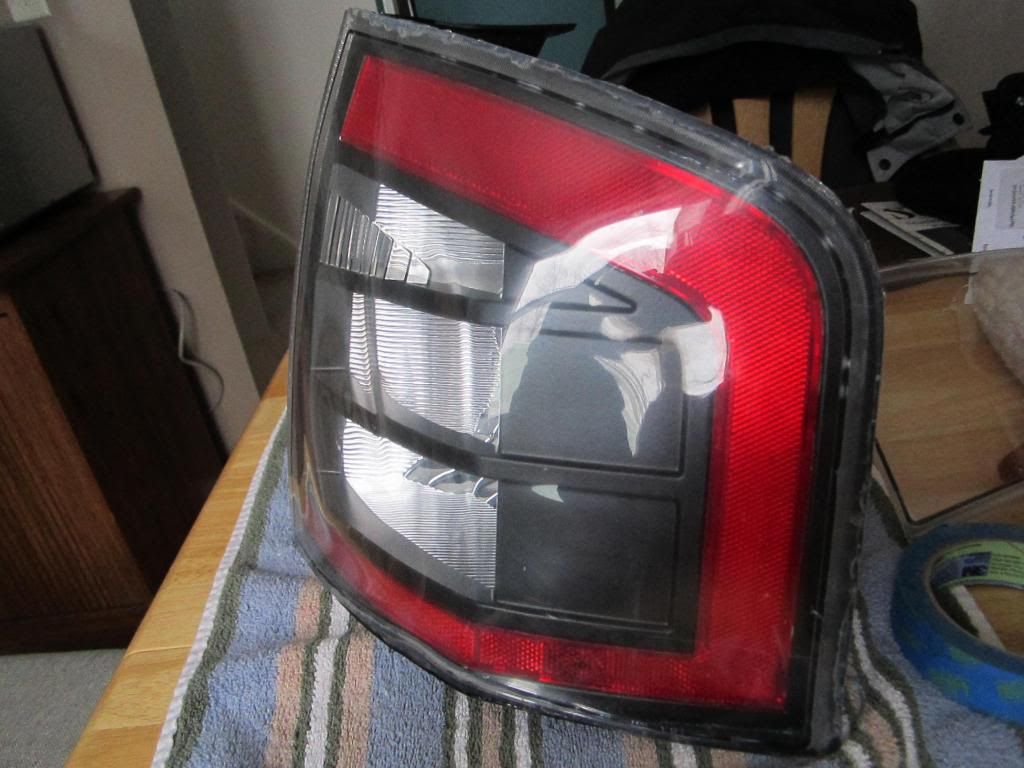

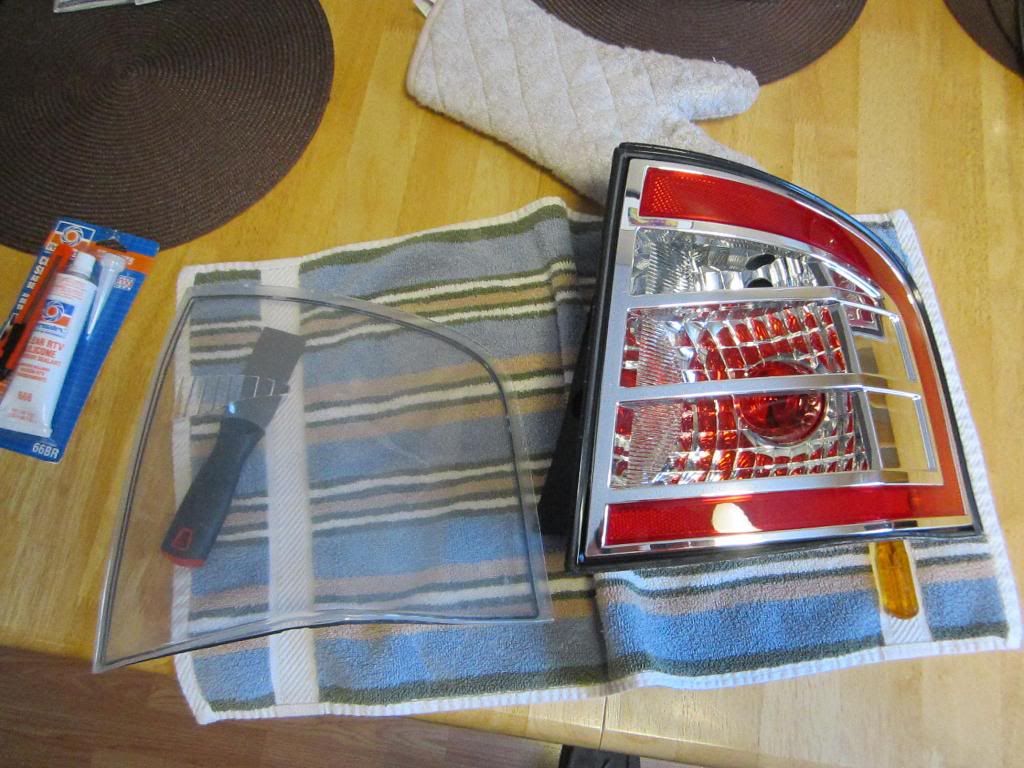
Ill post pictures later as i am writing this as my paint is drying
-
2
-


DIY Tail light painting
in Accessories & Modifications
Posted
Yeah the ILDS is mostly people who like to dress up their vehicles in their own way and Lowered vehicles.
http://ilovedrivingslow.com/http:/ilovedrivingslow.bigcartel.com/ilds
'Driving slow is a lifestyle. It's the way you drive, the way you dress and carry yourself. Most importantly the way you dress your car.'