


dfreeman332
-
Posts
19 -
Joined
-
Last visited
-
Days Won
1
Content Type
Profiles
Forums
Gallery
Posts posted by dfreeman332
-
-
Or you overcharged the system and when its hot outside or driving around the engine compartment heats up causing the High Pressure switch to trip. When the system stops working see if the AC clutch is engaged if its not the AC High Pressure switch tripped, if the AC works after the car has cooled down or the outside temperature is lower it is definitely over charged. If this is the case get a cheap gauge; on on a refill can will work; with the car running AC on MAX; car doors open bleed low pressure side to between 30 - 35 PSI
-
Do yourself a favor get rid of the FORD OEM lug nuts....and buy solid nuts
-
 1
1
-
-
Bottom line - You are fine going from 265 to 275
-
Bought TPMS replacements and the coder tool from American Muscle or Ebay / Amazon typically cost $67 for all four sensors and replace them every 8 years
-
2
-
-
PM you
I too am in the ATL area/ OTP - NE Lawrenceville area and would like to buy the floor mats
-
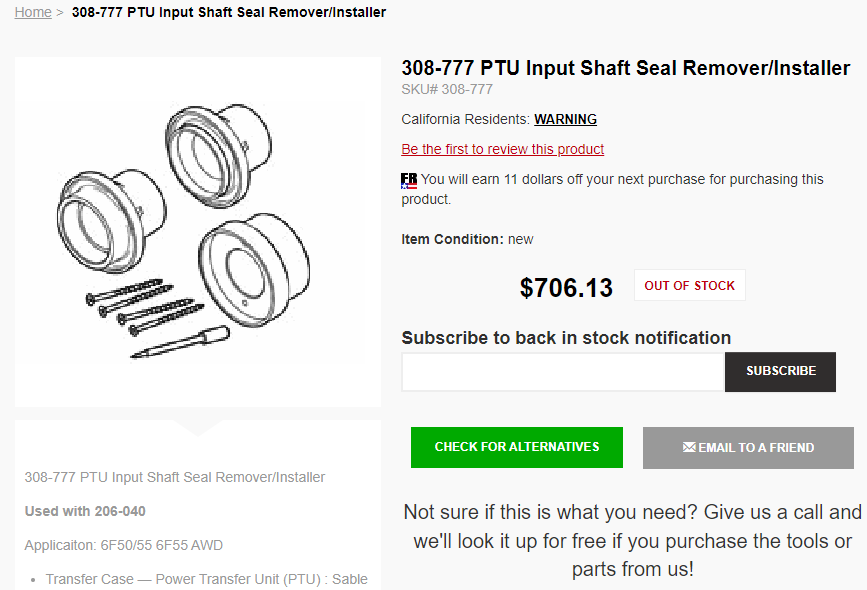
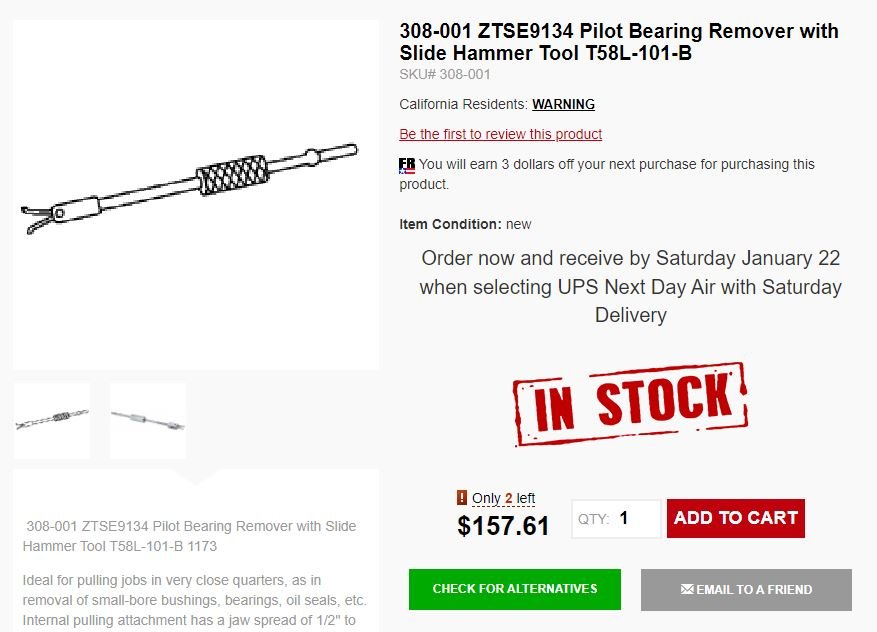
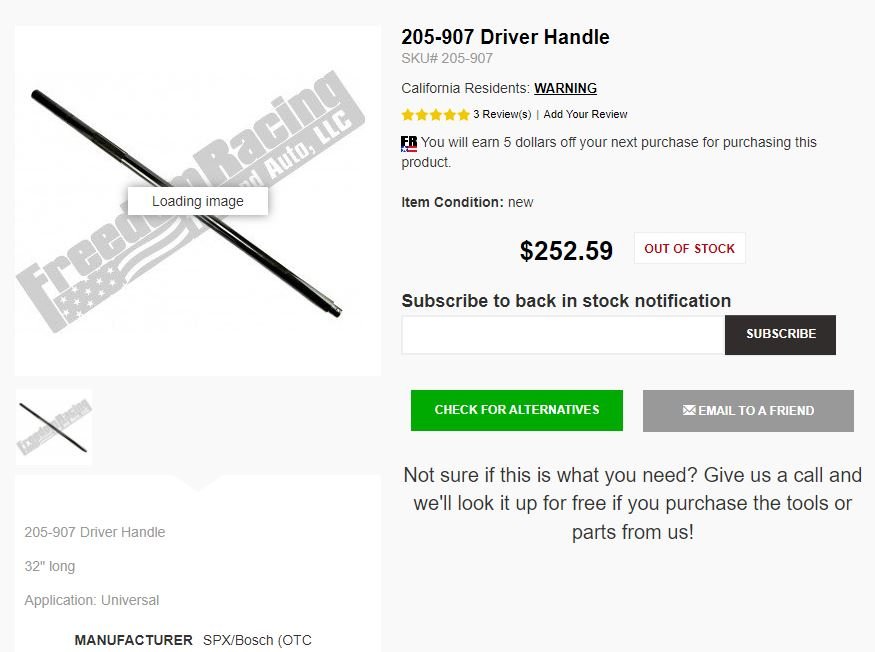
Here are the tools to do the left hand side AWD replacement; I fabricated the extension 205-907 to be 39" is needed for all repairs;
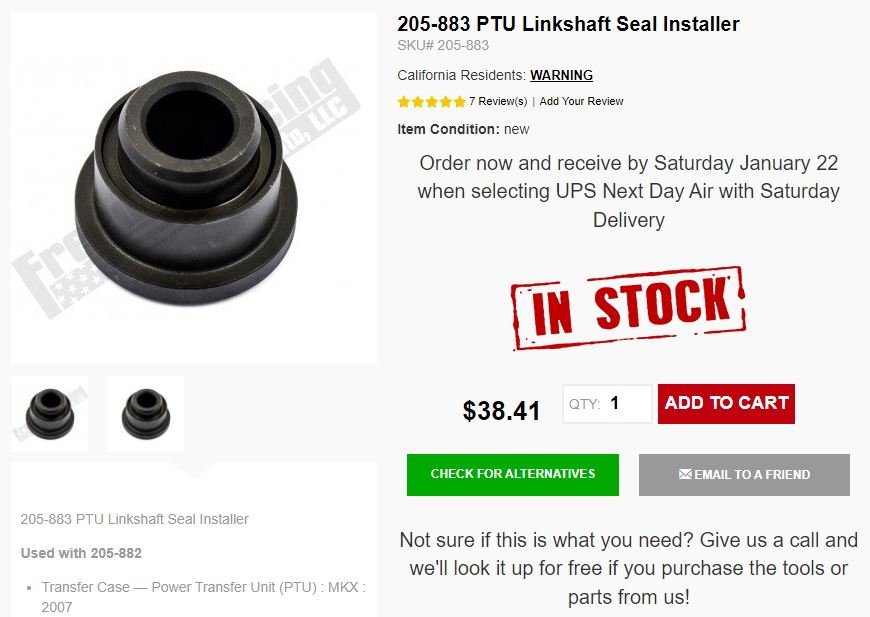
RH PTU - Brown/clear gear oil leaks - Heat Gun; 308-001 with 27" extension, 205-907, 308-777 required replacing right PTU cover seal, 205-882 to press back the plastic dust cover
RH PTU - Red/Dexron leaks - tools needed: Heat Gun; 308-001 with 27" extension, 305-907, 205-882, 205-883
To remove the plastic cover seal use heat gun high for 10 minutes to soften, I stuff aluminum foil in the hole to prevent heat from damaging the jack shaft seals; use 308-001 to pull once HOT 200+ degrees


-
1
-
 1
1
-
-
the first time I had the issue was in 2019 on my 2011 Edge with 120,000 the second time was on my friends 2017 Edge in 2020 with 47,000 miles
-
I went OEM for all mounts
-
As KING of Ford Edge, Flex, Fusion, Taurus and Mercury MKX AWD PTU repairs;
I have pulled out, upgraded, replaced or fixed these units as Ford dealerships refuse to service them on cars more than 10 years old/100,000+ miles. I was tired of hearing it costs $1,800+ as this is a non-serviceable unit. New/rebuilt units can be purchased for less than $700 and installed in 4 - 5 hours if you have hand tools, 2 hours was removing the exhaust pipe and the rear catalytic converter. Upon reassembly you will need the exhaust gaskets and one catalytic converter metal ring. If I replace a PTU I take the case apart drill a 1/2" hole and weld a threaded bung for a drain. I have also retrofitted a transaxle oil pump to a cooler in front of the AC condenser to prolong the life of the PTU; this was an additional $400 in parts and I question if was worth it as a tapped 1/8" NPT drain hole and changing the fluid every 20,000 miles should be sufficient till the Edge dies.
Leaking "black/brown" fluid on the passenger side you need a PTU Cover seal and the dust cover seal kit; this is PTU fluid: ($68 in parts)
Leaking "red" it is Mercon transmission fluid you will need the dust cover seal kit, ($40 in parts) also you need to inspect the "jack shaft" to make sure the race that rides in the inner oil seal is not pitted; passenger side "jack shaft" driveshaft to the CV joint on the passenger side is about $120 from online OEM sellers, which is less than advanceauto , oreillys etc.
Repairing PTU both red/brown passenger side shaft seal leaks is relatively simple, and can be performed in about 2 hours; if you do not have lots of corrosion on nuts and suspension components. It is important to have the specialty tools to seat the oil seals properly and re-install the plastic dust shield otherwise the leak will stop for a few weeks or month and reappear. After learning this I purchased the FORD specialty tools and since performed 5 different repairs on these PTU's
I may be enticed to rent out the tools to off-set my investment as the I have over $1,000 in the PTU seal tools and they sit on the shelf a lot; here are some repair sheets
Halfshaft Seal - LH (Seals and Gaskets) - ALLDATA Repair.pdf
Input Shaft Seal Installation (Seals and Gaskets) - ALLDATA Repair.pdf
Here is a video to help you:
Another great document
-
1
-
2
-
-
Had the same situation; replaced both upped engine mounts and "dog bone" resolved the vibration issue as ralepine described.
-
1
-
-
Recently I had to replace the Ford 4wd PTU when I put it all back together I too had the same "rotor knock" coming to a slow stop in the passenger side; I retorqued the wheels and the knock disappeared, also the back of the rotors were greased when I removed them from the hubs.
-
I fabricated my own mounting kit for my 2011 EDGE; where do you want to mount the bar? What bar do you have?
-
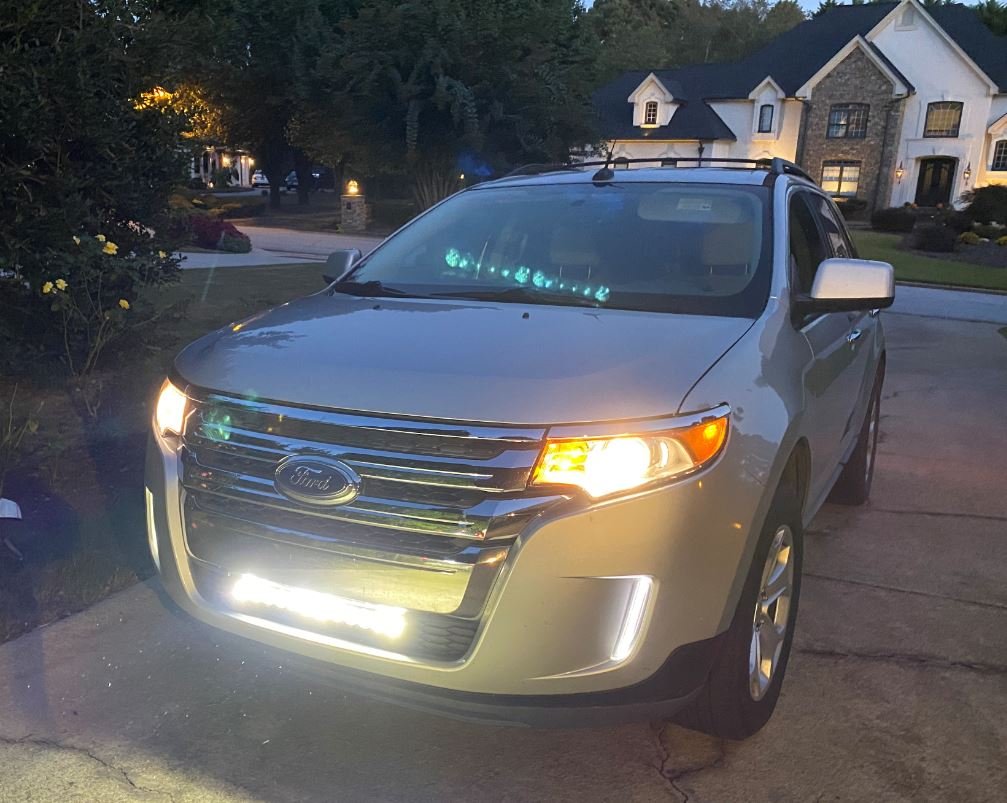
Rusty Thanks for the great deal; I got it installed and all is good.... now if I could just find adequate headlights
Dave
-
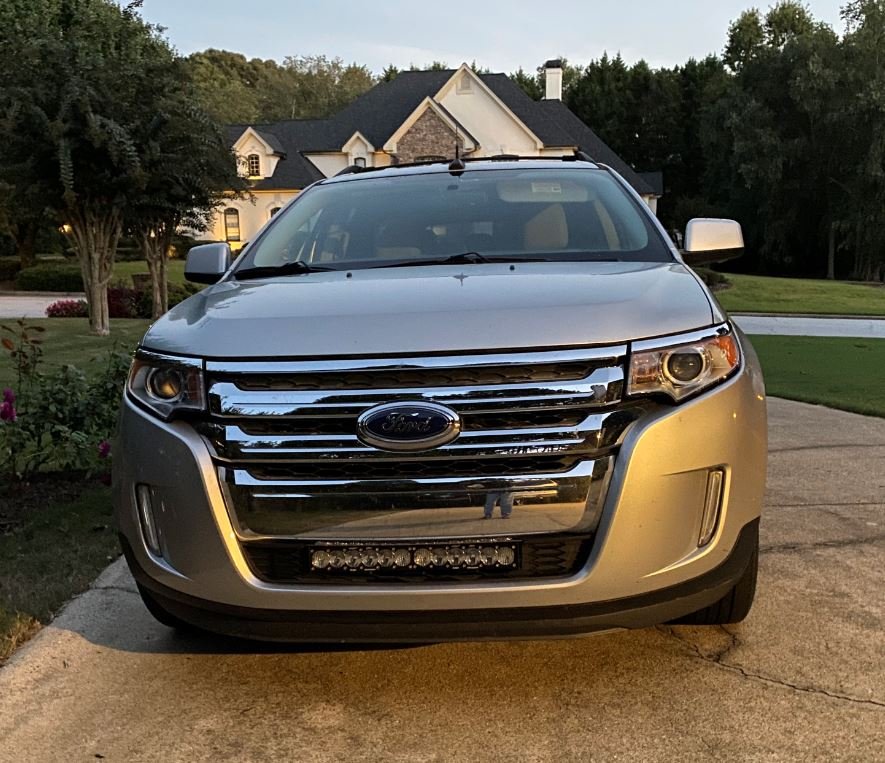
I purchased the car for $1800; it was in a front end collision before I purchased, the insurance company completed the work and used non-OEM/COPO bumper, grills, headlights and DRLS.
After putting in the light bar I upgraded the DRL - daytime running lights with a kit; they are brighter LEDS and intensity increases when the headlights are on; the kit interfaces with the turn signals and flash orange the direction you are turning. The headlights are sub-par quality and do not put out much light, they are non-HID and I know it is the quality of the reflectors and lens more than anything. I keep thinking I will search LQK for a set of Ford OEM lens, as low beams are really dim.
-
1
-
-
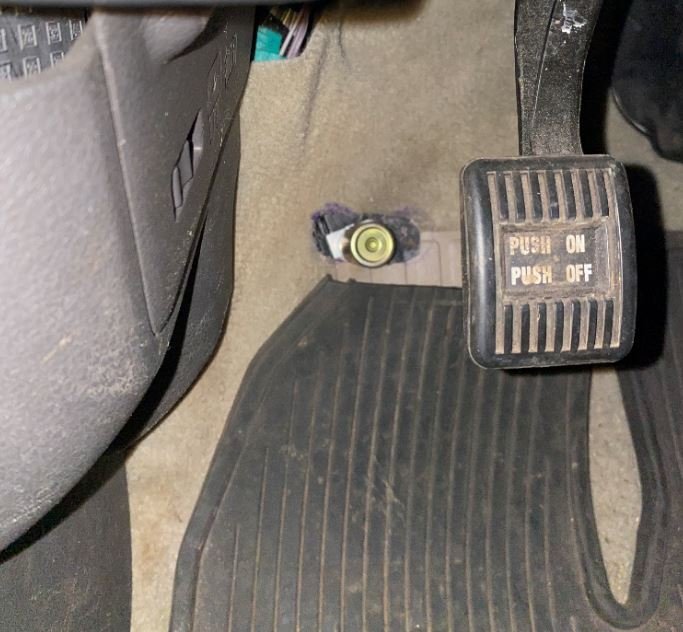
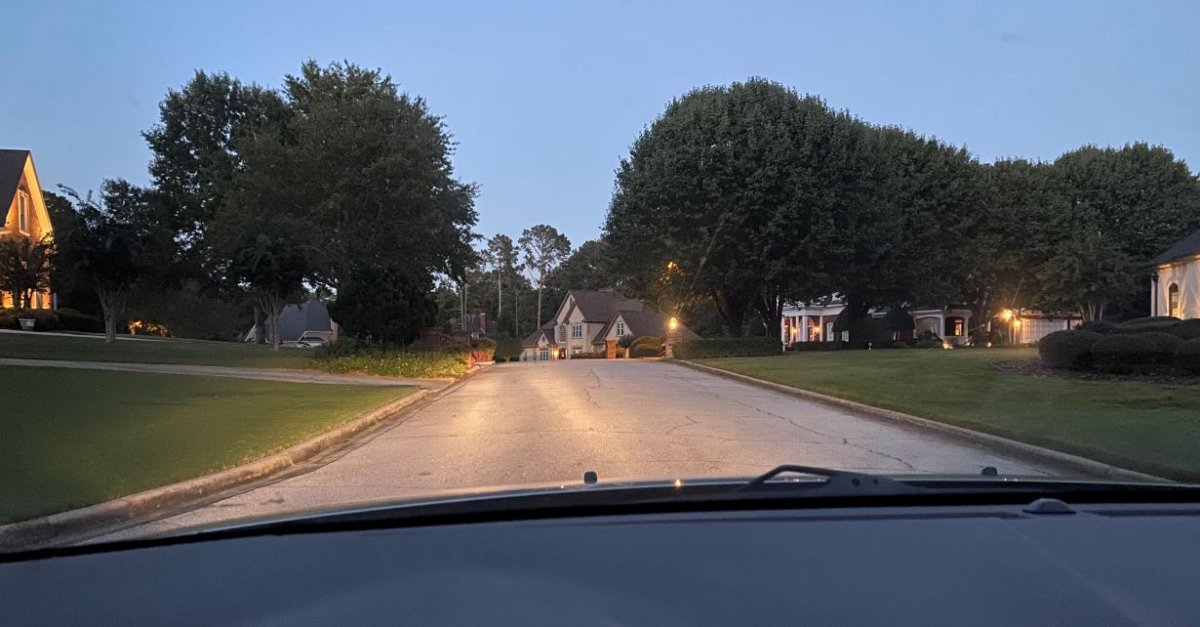
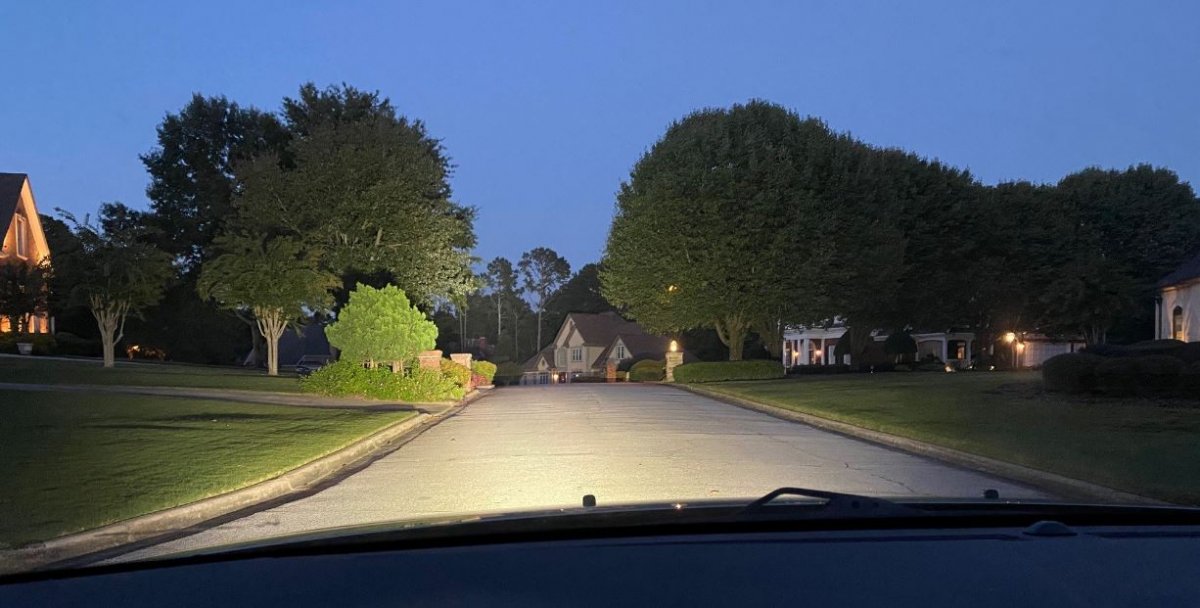
enigma-2; Yes, I had this switch in a 1965 Chevy Impala. The switch is mounted in the cab and will not be exposed to the elements so corrosion should not an issue. I LOVE IT, took a 6 hour drive last weekend with one leg from 10:00PM - 11:30PM; the lights were flawless, when no traffic was around the lights illuminated the road and sides for a mile allowing me to see deer well in advance. The advantage of turning the on without removing my hands from the steering wheel was a plus.
-
1
-
-
It would be cost effective $7K to swap your engine with SuperSixmoptorsports.com long block 3.5L bored and stroked to squeeze out just over 400hp; and it will slip right in with no chassis modifications
-
1 minute ago, 1004ron said:
Is it configured to only switch on when the high beams are on?
On my daily commute to work there's a few pickup trucks with those lights that have no consideration for other road users, blinding the oncoming road users.
Yes, but the foot pedal allows me to use the light bar as needed without removing my hand from the steering wheel. I agree too many people use light bars a running lights which is obnoxious, but a flash of these and they will typically turn their light bars off.
-
1
-
-
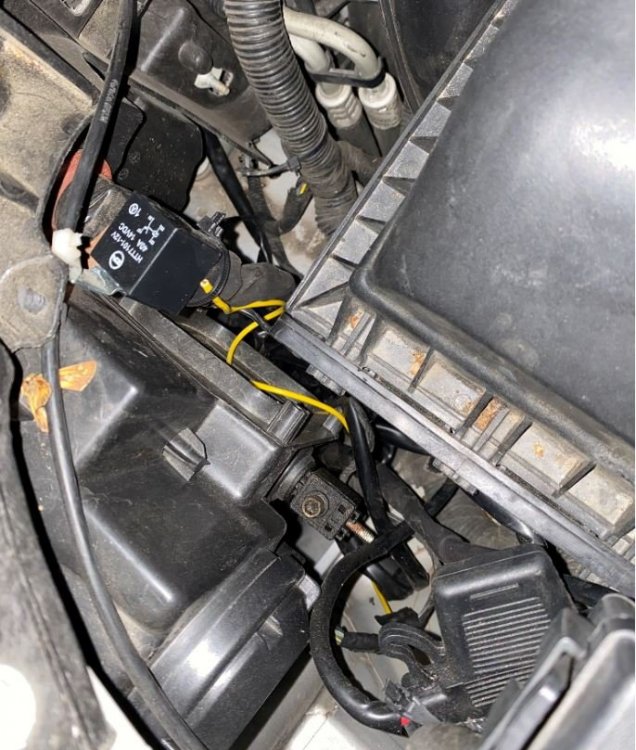
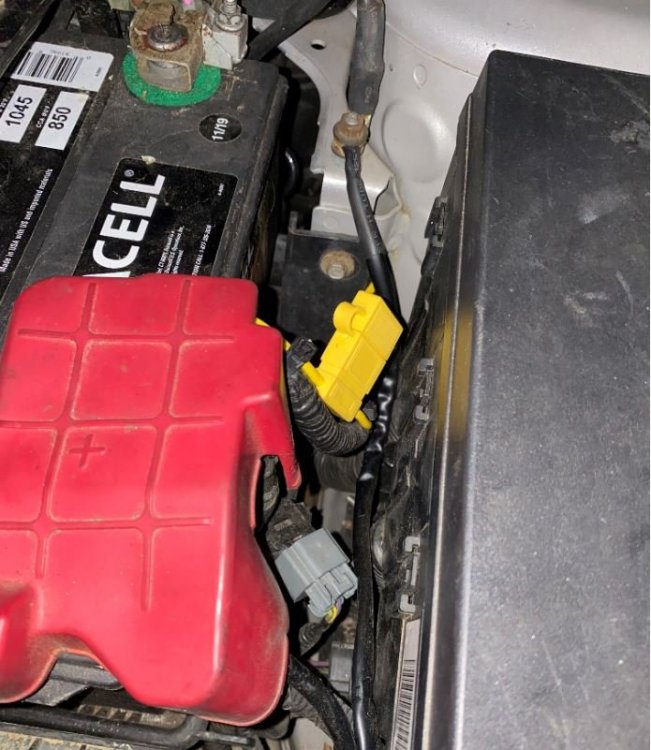
I installed a Baja Designs light bar on a 2011 Ford Edge and man what a difference! I purchased the baja designs light bar and wiring harness from 4WD.com less than $700 https://www.bajadesigns.com/products/onx6-20-driving-combo-led-light-bar.asp and a foot pedal switch from Amazon for $12.96 Amazon - AC Delco D808. It is easy to remove the front bumper to install, you will have to trim the back lip of the crash bar, I used a grinder with a cut-off wheel, so the light bar can adjust elevation.


-
3
-
1
-


Weathertech Mats, Cargo Cover, Trailer Wiring 2011-2014 For Sale
in Classifieds
Posted
Still looking to buy the floor mats let me know and I will paypal you the money