


rwbronco
-
Posts
75 -
Joined
-
Last visited
-
Days Won
2
Content Type
Profiles
Forums
Gallery
Posts posted by rwbronco
-
-
wrong forum - can I get a mod to move this to the Interior section?
-
Had another member message me asking if I could measure where my net hooks were located in the rear so they could add them to their 2008 model.
If anyone else is interested in these measurements or is thinking about adding them themselves, here's what I sent the member (note I had to use imgur to host the images because I don't think you can attach pictures to a PM or at least I couldn't see where):
There are two sets of hooks in the back. I had access to a 2010 with the black interior so I measured it for you on that one.
I can't seem to upload pictures to a message on here so I took pictures of the measurements and am using imgur.com
For the front-most hook:
From the window down it's 12" (actually like 11.8" and following the contour of the rear panel). I measured to the center of the hook.
From the weather stripping forward it's 17" almost on the nose. I measured to the edge of the base of the hook.
For the rear-most hook:
From top of the black/grey trim it's 2" (just past the center of the base)
From the weather stripping forward it's 1.5" In the picture I wasn't quite touching it so I added an extra tenth of an inch.
-
I have a question / problem....
After reading this post, I liked what I saw in the "Misc Wallpapers", there were a bunch I wanted to have for my Edge e.g. classic windows screen and of course..the cracked screen!
After seeing how many downloads had been done on this one, I figured, why not and tried to download it as well. I tried to open and it would not open the zip file. I did a "save as" to my desk top and was still unable to open it??
I did a left click, and wanted to see if I had some sort of WinZip or something but when I went to "open with", it suggested internet explorer and so I chose that one. Immediately after doing so my computer when bizzerk??!? Tons of windows started opening up, I couldn't control anything and the computer just froze up? When I rebooted, all I got was a blank screen and the computer told me it was trying to search and repair damaged files. It just kept showing thousands of ".tmp" files and was doing things I never saw it do, even or hard shut downs in the past.
After the black screen closed, I loaded windows and my Norton Anti Virus was completely corrupted and shut done, gone from my computer. I needed a Norton tech via internet to help me re-load it and even at that, they were totally unable to gain remote access to my computer.
Question...for those of you who had downloaded this file, what the heck did you do and have you had any problems??
I am going nuts now trying to figure out if I got some sort of major virus on my computer or not before I go and spend money to have someone do a professional check on it as I am not confident for some reason that all is ok with it now

Help please!
that's crazy - you might've had something before you downloaded the wallpapers - they don't have any viruses in them (just jpeg photos) and nobody else has reported anything wigging out when they downloaded them.
I like PeaZip if you don't have anything to unzip the file with. It's free and pretty easy to use. 7zip is free and a little more advanced.
not to hijack my own thread, but If you're needing to get your computer cleaned up, try running a few malware scanners like AdAware, Spybot Search & Destroy, and if you're feeling confident try Hijack this (but it can be pretty tricky to use and dangerous if you delete the wrong items so newbies beware). Then it'd be in your best interest to download something to keep your computer clean and prevent it from happening again try Avast or AVG Free. They're both free and both do a good job. Norton and McAfee and the likes are too expensive and too invasive and always screw up my computers.
-
Yeah it is still under warranty but they say that the radio guy only comes around on tuesdays and that is one of the only two days of the week that i am in school all day. I need to get it fixed but i am reluctant to put it back in shop after only having it for a few weeks.
If absolutely nothing on yours is working - then I'd take it back to the dealership and let them make sure something isn't disconnected. I'd first try pulling the Sync fuse in the fuse panel and make sure that it's not that first. Wait about 15 seconds then put it back in and crank the car and see if that fixed it. That typically fixes issues people have when trying to sync a phone or a bluetooth device that's not syncing properly.
-
I had to "downrez" some pictures to get it to show once uploaded to the Car. I found somewhere an optimal resolution noted in the docs. If you load a picture that has too many pixels, it will display as black screen. :stats:
that's odd - surely you're not talking about these pictures? I have them sized specifically for the nav screen on the new Edge.
-
I'm getting ready to add 2 Pioneer shallow mount 10's to the factory system and I'm brainstorming on configuration/locations. I'm either going to simply build a rectangular box and place it firing down and sitting flat just right behind the backseat (carpeted in factory matching carpet) or I'm thinking about the spare tire well idea also. My random other thought was to see if I could fit them under the rear seat. I've only looked under there for a moment and decided that it wouldn't work but now I'm thinking again about that idea. Under the backseat is sort of deceiving as far as room goes, it looks roomy enough but the seat's feet brackets sort of take up enough space to make it look like a pain to design a box around. Anyone try this approach yet?
Has anyone had the front center console out yet? I wonder if there is any dead space under there for a single sub. LOL, I might just have to start taking stuff apart now.
Your only problem would be the fact that the seat bottoms move when you let the seat down if I'm not mistaken. You'd be SOL on letting the seat backs down if you had a subwoofer box underneath one side. I suppose you could do the 40 split side instead of the 60 split so you could at least let the bigger side down if you needed.
-
How did you get them to load on the vehicle. I have a picture saved into the vehicle, but nothing displays?
I put mine on a flash drive - then go to Display Settings (I think that's the one) and change the background. Then you'll hit "Add" to add a new one (should have a default Ford oval already in there) browse the flash drive and add the one you want. You can only have around 30 I believe saved at one time. Once you've got it set and saved - click the home button at the bottom to go to the home screen - then press it again and select the top option (there are three options: 1 block, 4 blocks, and a third with lots of blocks... like 6 or 8). As far as I can tell, there's no way to make "1 block" the default - it will go back to the 4-square display when you shut the car off and turn it back on. (can anyone offer insight into this?)
If you're still having trouble I'll make a step-by-step with pictures.
-
 1
1
-
-
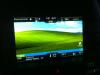
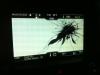
Classic Windows pics, love em!! The cracked screen would FREAK my wife out (and probably end up getting me my butt kicked!)

I freaked my girlfriend out and blamed her to hitting it with her elbow

-
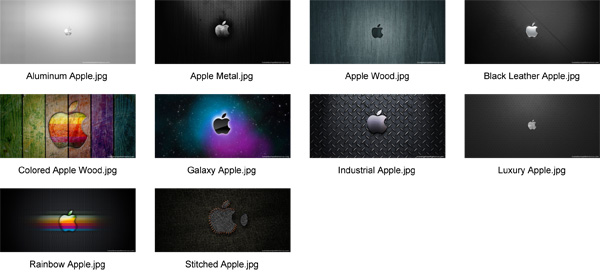
Apple Wallpapers
You've got your iPhone and you've got your iPad - turn your Nav screen into an Apple junkie just like you!

Download:
Wallpaper Wallpapers (hehe)
These are old-house wallpaper style backgrounds that add a pretty cool look to the nav screen.

Download:
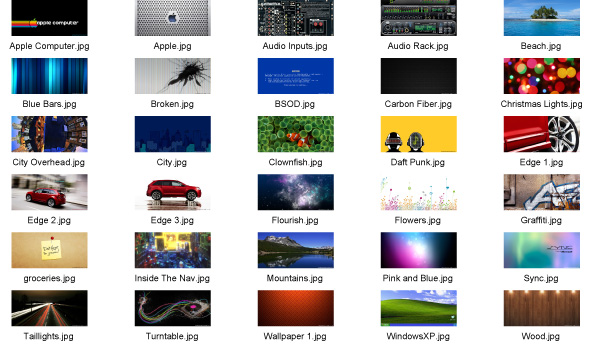
Misc Wallpapers
These are some pretty fun ones ranging from Daft Punk to the Ford Edge to graffiti. It's even got a broken LCD and the Bluescreen of Death!!

Download:
Here's two different camera phone pics of mine
 (teehee)
-
2
-
-
Do this test to make sure that it's your speaker that's blown and not something else (like paper in the side pocket)
Audio Systems Without Navigation
Turn the Audio Control Module (ACM) on...this is your head-unit.
Operate the audio system in radio tuner (AM/FM) mode.
Press and hold preset buttons 3 and 6 for 3 seconds until the speaker walk-around test begins.
The display indicates each speaker as it is tested.
NOTE: If the speaker walk-around test is the only test required, this procedure can be stopped after Step 3 by turning the ACM off.
Before the speaker walk-around test is complete, carry out any of the following actions:
Preset Button Press Diagnostic Function Display Diagnostic Function Description
Press button: 1
Diagnostic Function: ACM Self-Test
Display: SELF TEST
Description: The ACM carries out a self-test. At the end of the self-test, the display either indicates SELF PASS or scrolls through any DTCs present. Note that the self-test may not indicate all DTCs that are present. If DTCs are suspected, retrieve continuous and on-demand DTCs using the scan tool.
Press Button 2
Diagnostic Function: View DTCs
Display: NO DTCS, or scrolls through DTCs
Description: The ACM displays any DTCs that are present. To scroll through the DTCs, press the TUNE UP button. If no DTCs are present, the display reads NO DTCS.
Press Button: 3
Diagnostic: AM/FM Antenna Signal Strength
Display: SIGNAL ###
Description: The ACM displays the AM/FM antenna signal strength. To run this test, the audio system should be in AM radio tuner mode before entering the ACM self-diagnostic mode.
Press Button: 4
Diagnostic: Software Levels
Display: SOFT LEVELS
Description: The ACM displays software levels for various components of the audio system. Knowing the software levels may not aid diagnostics. Press the TUNE UP button to scroll through the software levels.
Press Button: 5
Diagnostic: Display Test
Display: DISPLAY TEST, then all segments illuminate All of the ACM segments illuminate.
Description: If the vehicle is equipped with an Front Display Interface Module (FDIM), the segments on the FDIM illuminate, rather than the ACM.
Press Button: 6
Diagnostic: Retrieve ACM Part Number
Display: RADIO CONFIG
Description: The ACM displays the ACM part number, and various configuration levels. Press the TUNE UP button to scroll to the desired function.
To exit the self-diagnostic mode, turn the ACM off.
If you have navigation, it's the same but you can press the buttons that come up on the screen.
-
CAUTION I left my cell phone charger plugged in for 24 hours and when I went to use the vehicle it would not start. The cell phone charger drained the battery.
Sounds like you have more of an issue other than leaving your cell-phone plugged in - as it cannot draw enough power from the battery to completely drain it in 24 hours. I've got a Lotus Elise with a racing battery that can become fully depleted in a week just due to the active alarm system. Ford uses larger capacity batteries than my race battery and I've never had one go out because I left a cell phone charger or GPS or radar detector plugged up. You may want to take your battery to a local shop to have it tested and make sure it's not bad. You may also want to have your alternator checked to see if it's charging your battery to it's fullest. Leaving your cell phone plugged in - even if the socket is active - shouldn't drain your battery in a week must-less 24 hours.
-
Are you sure it's not your Vista roof? I had one that rattled a bit and the dealership was able to quiet it down and remove about 75% of the rattle
-
My iphone4 connected fine when I picked up my car. The next day it would not connect. I tried everything, rebooting the phone, deleting it from SYNC and trying to re pair it, etc. Nothing worked. Then someone on these forums suggested to pull the fuse that powers SYNC and reinsert it (forcing a reboot) and I was able to pair it again. That was earlier today so we will see if it holds the connection. Obviously I should not have had to do that.
I had the same issue in my 2010. I haven't had the issue with the 2011 yet but I know it's happened before. It will work fine with my phone but I am not able to stream music to it or anything like that. Pulling the fuse (it was #3 in the 2010) and waiting 10-15 seconds before putting it back in corrected it last time. You definitely should NOT have to do that and it should probably hold the connection.
Second, the SYNC website indicated there was an update available that was not installed on my car. I did the update and the SYNC system said it was successful. Then I went to the SYNC website to send the successful install to Ford and I got an error. The SYNC online chat tech said I did not need that update. It was already installed. He said the SYNC website was wrong.
I've read this once already. There seems to be an issue with the Sync website right now regarding new 2011 models and this latest "patch" that it says it doesn't have.
Otherwise, I wish the response on the touch screen was faster. I seems to lag after you hit your selection. Before I bought the car, I watched the online video on the Lincoln website and it showed a very fast response when hitting the touchscreen. Now I am thinking they may have speeded up that video for promo purposes. Hopefully, they will be able to speed this up with software and firmware updates.
I find it lags quite a bit when you first start the car and for the first few minutes. I guess it's still loading behind the scene (because there's quite a lot of software running and they probably load the necessary bits quickly and first and display those and things like the radio stations and Travel Info load slowly). After 2-3 minutes of the car being on though I find that it's quicker and responsive. I've also found that you have to press the screen harder with your finger than you would say with your iPhone. It's not the same "touch" technology than the iPhone has. It's probably two screens that lay on top of each other and register when they're pushed together - whereas the iPhone has a different sensor for it's screens altogether.
-
definitely not - the new AC/Radio controls below the nav are incorporated into it. It's also got a completely different steering wheel control and doesn't have the same buttons that the 2010 does
-
I pretty much agree and was just trolling with my dvd comment (although it really irritates me when I have to sit through previews and CANNOT skip them. I paid for a movie, not all of this other junk.)
An argument would be "I can buy a new TomTom for the price of a new nav DVD" - but you didn't get a TomTom, you got a Ford navigation system. The information that the discs cost $200 is available to the public and yet you chose to buy a nav system that has $200 upgrade discs.
He asked if it was possible and he asked what software to use. I suggested software that would do as he asked, I didn't tell him it was illegal or wrong because #1 he probably already knows this, and #2 If someone asked me what time the tea party convention was I wouldn't start on a rant about how crazy Fox News was etc.... I'd look it up for him and tell him. Don't see how him asking how to do something and everyone telling him he's a thief is any different.
Although I'm a member of lots of forums and the discussion of such acts as burning torrented discs is usually frowned upon and can earn you a quick banhammer. I'm not going to post in this thread any more just in case

-
are you sure that you need an update? It wouldn't appear that you'd need to update a 2011 Edge with the myFordTouch yet. I know they're installing it wirelessly now as it rolls down the assembly line and they're likely using the newest updated version.
-
you wouldn't steal a car... so why would you steal a movie?!...
sorry got caught up in that anti-piracy video that I'm forced to sit through while watching all of my legitimately purchased DVDs....
-
Lex, you should link to this thread in your signature so people don't have to hunt around for it.
-
agreed - they do it for legal purposes and unless you click "Nav" you won't have to click it off. Surely you're not needing the nav map going to and from work, school, home depot, etc.
-
I'm in the UK and I know Ford over here could not and would not help us out here so i'm relying on you guys really!!
what do you mean they would not and could not help you out?
Unless it's causing an issue I don't see what the problem is. You've got an anti-theft light flashing when the car is locked or the key is in the off position, am I correct? This is what's intended I thought...
-
Hey Guys ,
I read a lot of complaints about weak A/C, try replacing the cabin air filter.
dusty61
thanks dusty! Did you have weak a/c until you changed yours?
-
HI
I know it seem early to think about spark plugs, but I was wondering about putting in better that oem. I believe that you have to take off the intake manifold to get to the rear plugs. Has anyone replaced the plugs and might know of an 'easy' way? I have 30,000 on my 2008 Edge Limited and no problems. I think the chrome plastic wheels on the limited cheap. I will add new wheels when the tires wear out.
Sorry for just now seeing this thread. You have to remove the intake manifold for the RH side plugs, yes.
LH side
1. Disconnect the crankcase vent tube quick connect coupling from the valve cover fitting and position aside.
RH side
NOTE: The upper intake manifold must be removed to access the RH spark plugs only.
2. Remove the upper intake manifold. For additional information, refer to Section 303-01.
Both sides
1. Disconnect the 6 ignition coil-on-plug electrical connectors.
NOTE: When removing the ignition coil-on-plugs, a slight twisting motion will break the seal and ease removal.
2. Remove the 6 bolts and the 6 ignition coil-on-plugs.
NOTICE: Only use hand tools when removing or installing the spark plugs or damage can occur to the cylinder head or spark plug.
NOTE: Use compressed air to remove any foreign material in the spark plug well before removing the spark plugs.
3. Remove the 6 spark plugs.
-
didn't even notice the stem hole - you did a great job congrats!
-
Google images turned up a few blue ones sprinkled among the red and black ones:

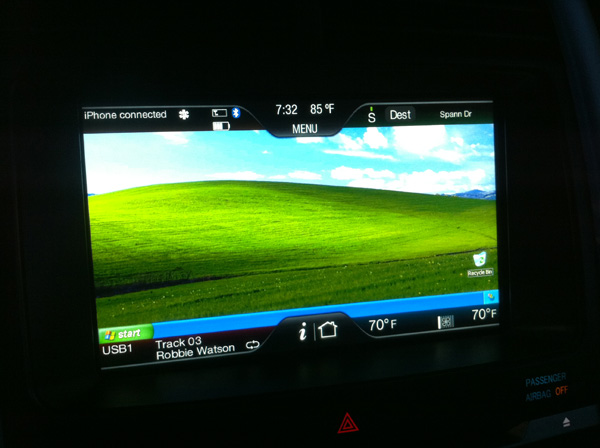

2011+ Nav Screen Wallpapers
in Audio, Backup, Navigation & SYNC
Posted · Edited by rwbronco
You inspire me to vectorize the new 2011 Edge Logo so that you can easily add it to pictures and stuff in a photo editor like Corel or Photoshop.
Since I can't attach vector EPS files to a fordedgeforum.com post I'll have to host it on my own site:
http://hometeamperformance.com/images/2011edgelogo.eps
I have Illustrator CS4 but I saved it in a legacy format so you should be able to open it no matter what version of Photoshop or Illustrator you have. Corel and GIMP users, you'll have to let me know if you can open it or not.
Here's an example of how you can drop the EPS file into Photoshop and whip yourself up a wallpaper using it: