

roots57
-
Posts
454 -
Joined
-
Last visited
-
Days Won
18
Content Type
Profiles
Forums
Gallery
Posts posted by roots57
-
-
On 12/4/2018 at 4:52 AM, 1004ron said:
Where did you buy the switchback LED's ?
I bought these ones from Amazon:
https://www.amazon.com/gp/product/B01HYVT2R4/ref=oh_aui_search_detailpage?ie=UTF8&psc=1
They worked for about 6 months, but then the white started to flicker. Turns out there wasn't quite enough voltage to them. There was only about 9 volts going to them which was just under the limit to keep them operating properly. This seems to be a common problem. I was going to try fixing it, but decided it wasn't worth the trouble, although I really liked the look.
-
 2
2
-
-
Monroe now makes an OEM replacement rear shock for Gen-II Edge. They are cheaper than the Motorcraft shocks ($32 vs $58). I'm going to give them a try. I've already had one of the OEM Motorcraft shocks fail completely, all the oil was waiting for me in my parking spot one morning, I almost slipped and fell in it.
Monroe p/n 37378
I also compared the listed specs against my leftover OEM Motorcraft shock and all looks good (extended length, travel length, lower mounting hole spacing, and stem thread). I'm hoping these Monroe's will hold up a bit better with my suspension mods (H&R springs and ADDCO sway bar).
-
2
-
 1
1
-
-
I tinted my headlight lenses with light smoke film for protection against debris/fading as well as for looks. The headlights are fairly easy to do on the difficulty scale, there are some really good dry apply films now that I found way easier to work with compared to wet apply films. The tail lights are a different story, very difficult due to the extreme 3D surface profiles, they also don't really need the same protection compared to the headlights. They also make the dry apply film in clear if you prefer. In a few years when I sell/trade I will pull it off and the lenses will be like brand new.
-
1
-
-
The body work where the mud flaps are mounted looks identical to the 15-18 sport (esp the front), theres a really good chance they will fit the ST also. If it is a must-have item, $40 isn't a huge loss if you can't make them fit, esp considering there isn't any other options. The Chinese mudflaps fit perfectly on my sport.
-
2016 Edge Sport, 19k miles. My car threw this P144C code the other day. Anyone have any experience with this one before I take it to service?
The code is apparently "P144C - Evaporative Emission System Purge Check Valve Performance"
Everything is still running fine, but the remote start feature is disabled and the check-engine warning light is still on.
-
Root & Randy, did your package say they were for a BMW?
If you have the paperwork that came with them still can you please send me a copy via PM please.
I dont remember seeing BMW anywhere. They came in two plastic bags, I'll see if I can find the packing slip.
-
1
-
-
Hey there Root,
If you have some to spare I could use a set please...;-)
yeah no worries, I should have plenty. I'll let you know when I get them and you can PM me your mailing address.
-
Swapping out the stock silver set screws for black ones would help with the finish product .
Small screws from McMaster Carr usually come in a box of like 50 or 100 so I'll send you a handful when I get them if you want. I need to wait until my paddles arrive so I can determine the thread size.
-
3
-
-
Just completed the install. It was easy enough and took around 10 min using the tiny set screws. I first started the screws before I put the paddles in place then had to tighten them each a little at a time. I went to each screw several times until they were evenly adjusted. If you try to tighten up one screw fully before the others the screw will just pass through the paddle and fall out the other side. The kit included 4 extra set screws. The paddles look and fit good and I hope they work as good as they look. I will road test later.
Looks good. I agree having them a little bigger will help when shifting during tight cornering. Normally with my hands at a comfortable wheel position, I can only reach the paddles with my pinky fingers. Its tough to get to them at all when the wheel is turned.
Just ordered mine from AliExpress and used a first-time buyer $4 off coupon so all-in I only spent $34.60 with free shipping.
I will probably get some black oxide coated set screws to make them less noticeable.
On eBay they are $56, but not sure if those are from the same mfg
-
1
-
-
They look nice, but what do they mean by "Flame-Out before installing"?!?
I assume they mean turn off the engine first, but I've only heard the term flame-out when a jet engine shuts down during flight. Technical writing from an incompetent translator is always good for a laugh.
-
2
-
-
Bought my 2016 Sport on 12/08/16, just hit 18k, I average a little over 11k per year.
-
Looks slick. I'm tempted to get one. All of the ebay listings say 2015-2017 but I've got a 2018....anybody know if that's a show stopper?
No difference, the "facelift" to the second generation Edge is for model year 2019, should fit the same for a 2018 model. 2015-2018 are the same as far as I know.
-
1
-
-
I've order the 3M protective tape the Ford has used. My 2011 escape had it on the rocker panels from the factory...still there today.
https://smile.amazon.com/gp/product/B01LYZJNWX/ref=oh_aui_detailpage_o00_s00?ie=UTF8&psc=1
Thats a good idea. You may want to get some PPF knifeless tape so you can do your cuts on the car without scratching the paint, or you can try cutting it ahead of time then matching it up
-
1
-
-
Yeah, at about the same time & event we had the same noise and found it after several of us violently shook the rear of the car from left to right.
And it was.....
Wait for it....
The exhaust pipe sashaying left & right usually when going over uneven bumps i.e. speed bumps at an angle.
The curved section of the tail pipes where they exit the muffler were clapping against my tow hitch framing.
Therefore, we used a body panel hammer (square head) to beat the inside of the tailpipe curvature slightly flatter than it normally is and BAM sound gone.
For those without a hitch...hopefully this provided some food for thought...;-)
I thought so! I'm certainly hoping its that simple of a problem for mine too and not something serious. It totally sounds like exhaust tubing clanging against something. Maybe I'll give my exhaust a few nudges with my foot in different directions to see if I can recreate the sound and verify this is the source.
Thanks!!
-
Hey all,
I looked for info here in the forum for this, but came up empty handed.
I know I'm a bit early on this, as the ST's are barely reaching dealerships, but does anyone know if roof rails and subsequently roof racks are an option on the ST? I've read some things that have said it's just not an option. Anyone know if this is True?
I've been pining after the ST for months and I'd hate to not go it's direction because of something like roof racks. Gotta have them for snowboarding, kayaking, etc... and not trying to pull a trailer for any of it.
Thanks guys!
I'm pretty sure you can option the Thule roof racks from the dealership as long as you do not opt for the pano-moon roof. The moonroof omits the necessary side rails needed for the roof rack. If you insist on having the moonroof, then you will need to piece together an aftermarket rack.
-
2
-
-
Hey guys,
Did this group buy ever go through? I'm in if these are still available
Thanks
Are we sure that ADDCO sold all of the units from the first run? If not, it might be worth checking with them
-
I picked up a annoying squeak after the bar was installed. I think it might help to have some type of light lubracation under the bushings to prevent this noise until things break in. Anyone else have this problem?
I have this odd noise coming from the rear end, its hard to describe, but it's not a squeak. It almost sounds like the exhaust is swaying and bumping into some other part of the car (like a hollow tapping noise). It happens when I drive over an uneven bump or go over a speed bump at an angle and I hear the bump/tapping noise once or twice then it stops when the suspension finishes damping out. I posted this here because I only noticed it recently and the last work I had done was the sway bar install. I had the rear wheels off last weekend and none of the rear suspension components seem to be loose or broken or anything. The car seems to be driving/handling fine too. Does anyone have any suggestions as to what this might be? Kind of driving me nuts now!


-
I suppose using pop rivets would make them not quite as easy to steal, so that's one advantage. As for paint rub, I thought about trying to add some kind of buffer between the mud flaps and the paint, like some thin double sided VHB tape, but thought it would be too difficult to apply during installation. You have to more or less shove them into place, then hold them there while applying the screws/rivets. If adding a double-sided adhesive to the edges of the flaps, you would also need to keep it from sticking on until you were done with all the fasteners. I saw that becoming too difficult to manage. Plus, I figure I can just use some polishing compound to buff out any surface scratches/marks if I ever decide to remove them permanently. Most likely they will remain on the car though.
-
1
-
-
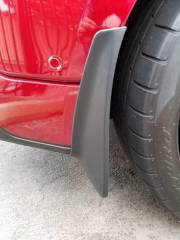
...some more details about my Chinese mud flaps installation. All of the mounting holes lined up with the original hole locations of the car for the front and back with one exception, the middle hole on the rear left flap was off by about 1/4", so I drilled a new hole in the flap at the proper location. I used the 3 fender liner screws to mount the rears. Here's an inside view of the rear left, if you look closely you can see the misaligned hole just below the middle screw:
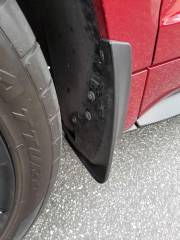
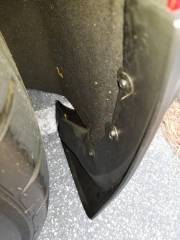 I may take the rears off and cut away some material from the lower inside area, it doesn't quite match the profile of the fender liner, plus the design has a "cupped" area that will just collect dirt/water. I will post some images of the material I cut away after I do it. The important thing is that the outer profile matches the body panels very well for both front and rear.
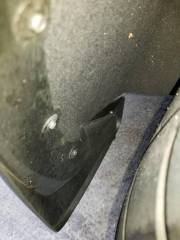
For the front, I started with the bottom hole first, remove the push rivet and reinstall thru the hole in the mud flap. The bottom OEM rivet was long enough to account for the added thickness of the flap, but for the 3 in the wheel well, I used slightly longer ones. I did these 3 wheel well rivets next. Last step is to fold the small tab at the top of the flap behind the edge of the fender and secure with one of the metal clips (you can see the clip in this pic if you zoom in a bit):
There are all kinds of options for plastic rivets on Amazon, I actually like the screw-type and may replace the push rivets with these. Just make sure you get 6mm or 1/4" diameter. I 'd recommend not using plastic pop rivets. I'm sure those would work too, but you have to drill them out to remove them since they are one-time use only. I would use the push or screw type so that you can remove them easily later. I may try these out, they appear to be long enough:
https://www.amazon.com/Dorman-961-050-961050-Nylon-Rivet/dp/B002ET131K
They also sell them at Autozone, Advance Auto Parts, etc.
Here's the purchase link from the eBay seller I bought the mud flaps from:
Couple more pics:


-
4
-
-
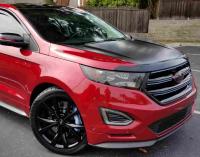
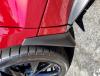
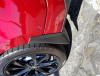
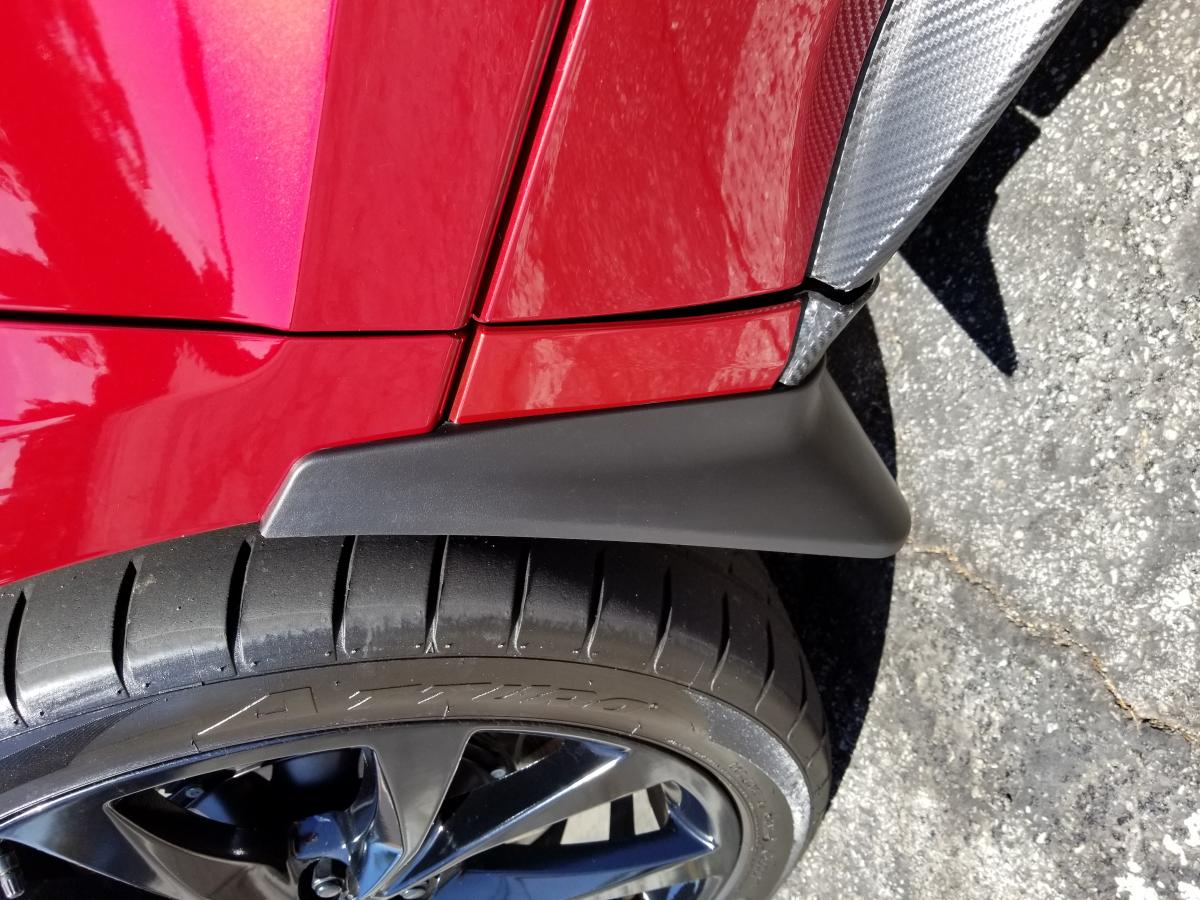
Installed my Chinese mud flaps today and I'm surprised to say that they fit very well! Much better than the OEM ones I had on the front before. I like that they are 3D molded and not just flat rally style flaps. I think they look great. Both front and rear match the body profile about as good as could be, no mismatch or gaps at all. I did have to drill one hole in the rear one because the middle hole location was off a bit, but only on one side which was weird. Also, the lower inner portion of the rears doesn't match quite right, but once installed you can't really notice. I'd recommend them though, especially since this is the best option I've been able to find. For the fronts I used the existing plastic push rivets, but they are the slightly longer ones that came with the OEM flaps, so it's probably a good idea to get some longer 1/4" diameter rivets to account for the thickness of the flaps. For the rears I used the small fender liner screws that are already there. I'm not sure if my flaps are different than NoDTMF's, but my install seems to have gone much smoother, took about an hour. I also did it without removing the wheels so that helped. I can take some more pictures if anyone wants to see, just let me know. I can also post a step by step how-to if anyone wants. (sorry my phone rotates the pics 90 degrees, will fix later)
PS, the eBay seller's name was frederic1313 and he kept me up to date with the shipment via email, took about 3 weeks I think.
-
1
-
-
I bought the same Chinese mudflaps. They took a few weeks to arrive, but the seller kept me informed on the progress of the order. I will be installing them this weekend, afterwards I will post a review with pics too. I also bought the OEM ford front mud flaps and have had them on since I bought the car.
-
3
-
-
few pics fresh out of the garage. Running 275/45 21's with 5mm spacers. No rubbing at all of full lock-to-lock turn (I wasn't sure that would be the case, but so far so good
 )
)Can I ask where you bought your wheel spacers and what the cost was? Xtra and I have an issue. The OEM spare donut wheel doesn't fit over our Rotora brake kit calipers, so I am currently driving without a spare...no bueno. I'm hoping I can simply space it away from the caliper a bit to create enough room. I am having difficulty finding spacers with the proper bore and bolt circle. Thanks!
-
3
-
-
read this thread for info on the H11 LED DRL bulbs
-
1
-
-
I picked up a annoying squeak after the bar was installed. I think it might help to have some type of light lubracation under the bushings to prevent this noise until things break in. Anyone else have this problem?
It looks like in the picture of your bar that there was some grease applied to your bushings. Did you figure out where it was coming from? I had them apply some grease to mine, no squeaking so far.
-
1
-

Do you need to remove the coolant reservoir to replace headlight bulb?
in Accessories & Modifications
Posted
Just remove the entire headlamp assembly then replace the bulb. I've had mine off many times, it only takes a few minutes as there are only 3 screws, one screw is plastic so be a bit careful with that one.