Sledwrecker
-
Posts
20 -
Joined
-
Last visited
-
Days Won
2
About Sledwrecker
Sledwrecker's Achievements
")
Newbie (1/14)
-

Air springs for 2018 edge
Sledwrecker replied to Sledwrecker's topic in Brakes, Chassis & Suspension
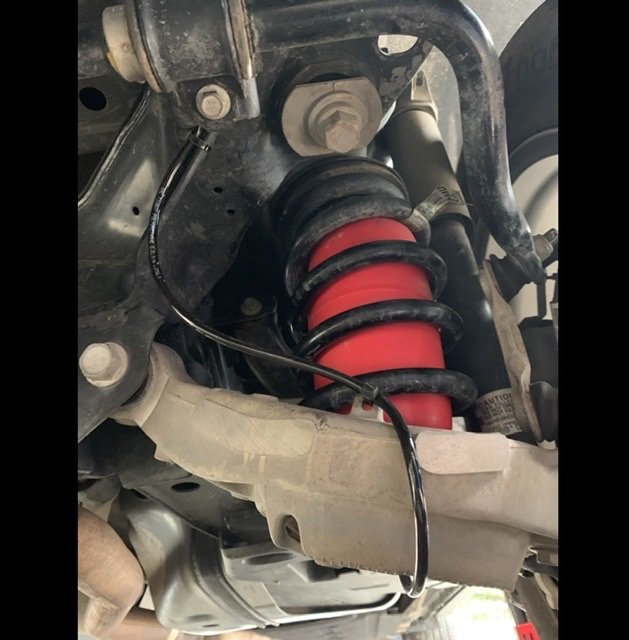
Got the air lift 60910 kit installed today on my 2018 edge. It took about two hours mostly because I went slow to be careful so this setup will last as long as possible. I routed the lines one to each side of the rear bumper so they are separate. I didn’t like the idea of using the plastic T and the muffler is in the way to make things clean. I also am use to doing both airbags separately as this is the existing setup on my pickup. I found it easier to push the airbags into the spring without a cap on the air nozzle. If i squished it and put the cap on like the instructions say I couldn’t flex it around to get it stuffed into the spring. I also heated up the ends of the air line with a hair dryer then sprayed the fittings with windex to make the air line easier to seat. I used one hockey puck spacer per side on the bottom. I did not use any spacers on top. As you can see the airbag nozzle faces down. I am not thrilled that the airlines are exposed under the control arm but I did a decent job of trying to keep it minimal. The manual says to keep atleast 5 psi in them I’m running at 7psi with no load and I like the ride a lot. It’s stiffened up the rear and the edge handles a little better. I pumped it up to 20psi and it lifted the back a good two inches. I have a hitch motorcycle carrier coming next week it will be interesting to see how it levels out. Air line routing out of the bottom of the control arm up to the sway bar mount on the vehicle frame. I left enough slack to allow for suspension travel. But sinched The zip ties tight so the lines can’t slide around. Air line going through the sway bar mount on the frame Fill nozzle mounted in bottom of rear bumper just in front of the aluminum trim. It’s not very noticeable when the car is on the ground and is easy to access for filling. One on each side passenger / driver.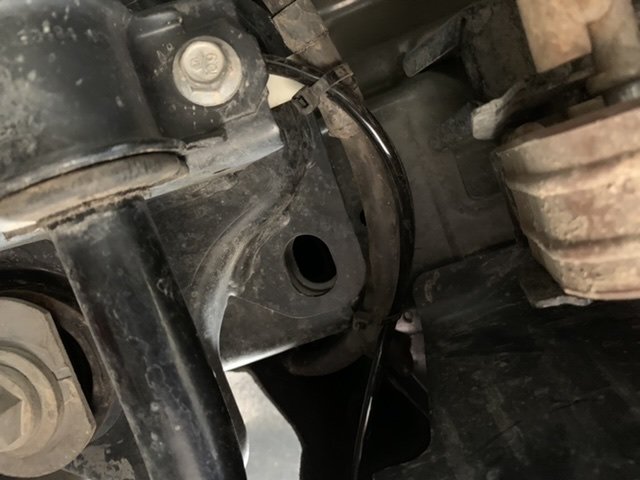

-
Air springs for 2018 edge
Sledwrecker replied to Sledwrecker's topic in Brakes, Chassis & Suspension
I got my 60910 kit today. Which hockey puck spacers did you go with the skinny or the thicker ones? I haven't started the install yet. Familiarizing myself with the instructions to try and tackle tomorrow. -
2nd Gen brake controller install
Sledwrecker replied to Sledwrecker's topic in Accessories & Modifications
etrailer wouldn't comment directly on exactly which colored wire to chose but he did instruct me to test the brake light switch with a light tester. I came up with purple / white stripe again. I don't leave the controller plugged in all the time, only when towing. Subsequently I tuck the disconnected harness up behind the dash near the hood release lever at the lower kick panel. I suppose it's possible a pin may have grounded against something metal under the dash while the vehicle was in motion. I've cleaned up the wiring and found a better place to position the harness. So far no reoccurring issues. -
Air springs for 2018 edge
Sledwrecker replied to Sledwrecker's topic in Brakes, Chassis & Suspension
Thanks! I just got an email response from them today. They said the same thing you did - no canned kit but can measure the springs for a "universal" kit. If you could find the part number(s) for the kit you used I'd like to match that up to what I come up with. How hard was your install? Any issues I should be aware of before diving in? -
Anyone know if there’s a company that makes air bags (helper kits) for the 2nd gen Edge? I tow a UTV and would like to level out the SUV. I’ve checked airlift and firestone but no love. Airlift did make a setup for the 1st gen.
-
2nd Gen brake controller install
Sledwrecker replied to Sledwrecker's topic in Accessories & Modifications
Yes, correct a 7-way with a Tekonsha P2 controller. I've already wired everything in I just need a confirmation on which brake sensor wire to tap into. I emailed them have a feeling they will tell me the purple / white.. lol -
2nd Gen brake controller install
Sledwrecker replied to Sledwrecker's topic in Accessories & Modifications
Thanks enigma, this is for a brake controller wired to a 7way for trailer brakes. -
I’ve installed a tekonsha P2 brake controller in my 2018 edge but I’ve ran into an issue. I followed instructions from etrailers write up on a 2016 and tapped into the cold brake wire which is a purple with white stripe. On the first drive the fuse for the brake lights blew. I didn’t know it until I stopped the car, put it in park and it wouldn’t shift back into gear. If the brake light fuse blows the shifter solenoid won’t activate. Anyway, I disconnected the red brake controller wire from the brake wire and haven’t had an issue since. Can someone help me confirm which wire the red brake controller wire should be connected to on the edge?? Red wire connects to cold side brake wire. https://www.etrailer.com/tv-install-tekonsha-prodigy-p3-brake-controller-2016-ford-edge-90195.aspx

-
Dealer PTU response.. never changed fluid?
Sledwrecker replied to SevenBizzos's topic in All Wheel Drive (AWD)
I did mine a couple days ago. I have a 2018 Titanium and it DID have a drain plug. It was a bit of a pain to get to so make sure the exhaust isn't hot as you will be working around it. It takes a 3/8 ratchet wrench to get the fill plug out and you can only do barely 1/8th turns so it takes a while to get until it will spin freely by hand. The drain plug was a 1/4" allen key (I used an allen wrench.) Some advise. Wrap the exhaust pipe area where the fluid will drain down with aluminum foil before you pull the plugs. Cover a large enough area that will keep the oil draining out from getting onto the pipes and flanges. This first time I just drained it down onto the pipes and even after extensive cleaning with brake cleaner it still took two days of commuting before the nasty smell of burning gear oil dissipated. All in all... was a pretty simple job with the right tools and a $8 pump from the local auto parts store. I used mobil-1 full synthetic 75w140 and today my Amsoil Severe Gear 75w140 showed up. Next oil change I will swap out the mobile 1 because it should only take about 15 minutes to service the PTU since I understand how to do it now. There's a very good video on the PTU fluid change requirement from a ford tech on youtube. He explains why NOT to listen to the dealers recommendation. https://www.youtube.com/watch?v=sS9JPaf1MDg -
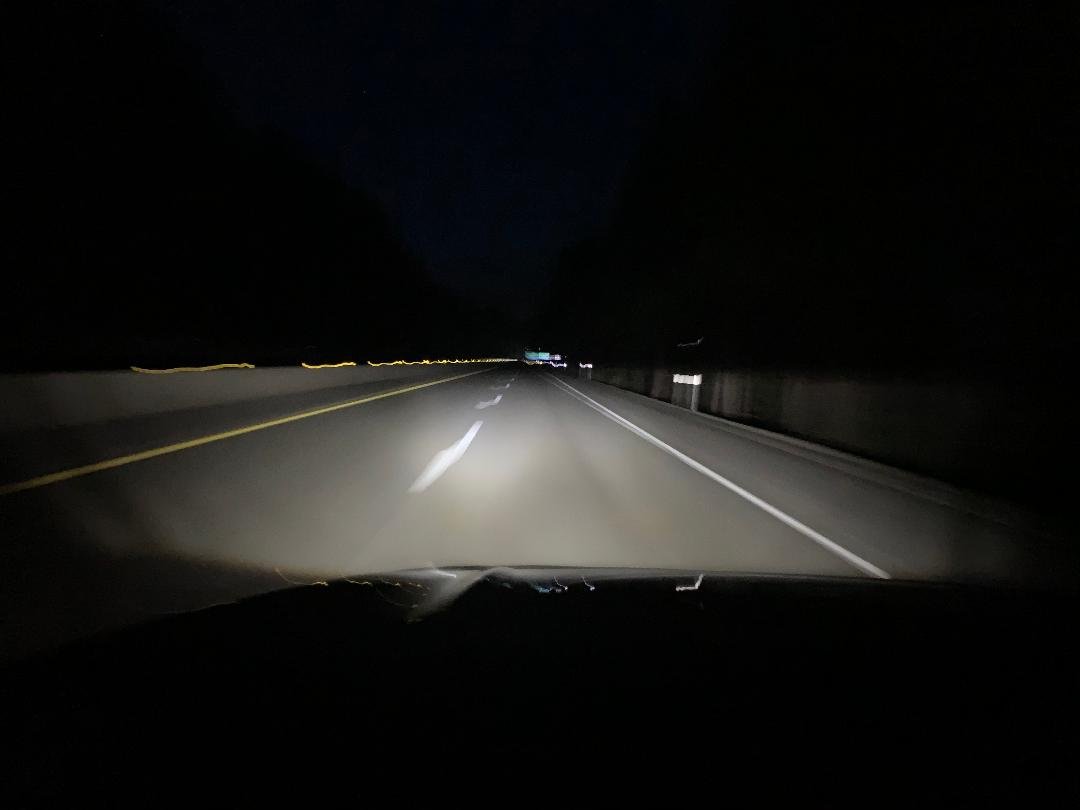
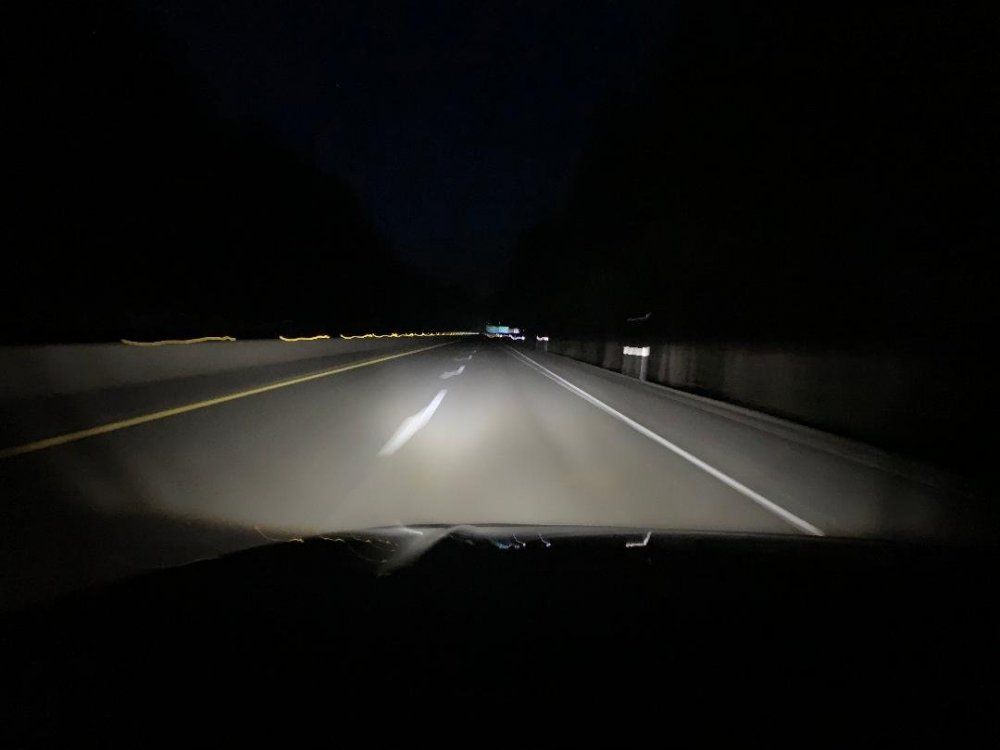
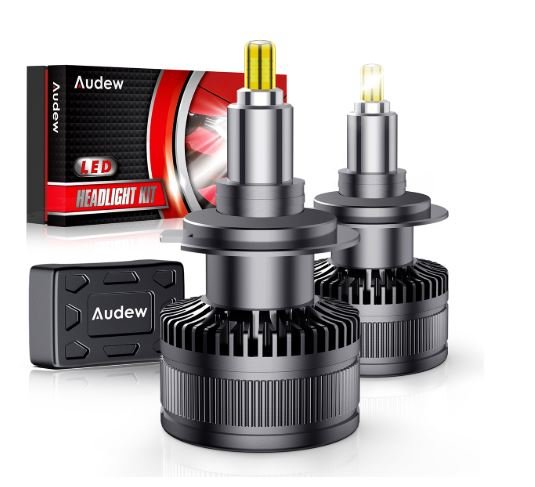
I recently bought a 2018 titanium with the halogen projectors and have been on a quest to find the best LED drop in kit to improve my nighttime driving experience. I live in the mountains and drive frequently at night. We have a lot of wildlife in our area so lighting and safety is crucial. I tried 4 different kits from amazon, even my tried and true Beamtech’s but because the edge has a halogen projector nothing - even the highest rated LEDs met the bar. After digging a ton on YouTube I stumbled across these new generation 360 degree LED bulbs. Specifically the Audew 360 H11. I was nearly going to pull the trigger on HR lightings coveted GTR ultra 2’s which retail for $199 but just couldn’t stomach the price tag knowing that I had already tried 4 other sets of similarly designed double sided LEDs. I got my Audew H11’s for. $43.99 on Amazon with two day shipping. I was also looking at the Light Moses brand but couldn’t find any real world YouTube videos of them in action. There are many videos of the Audew’s in projectors (check YouTube.) Hopefully this helps those struggling with a better lighting solution without shelling out big bucks for a factory HID upgrade. BTW, I ultimately decided against doing aftermarket HIDs as I still have them in my F350 and one of my snowmobiles. I have replaced ballasts twice in my truck and a compete harness once in my snowmobile which melted down 20 miles from the truck at dusk (that was a fun ride out..). So I wanted LEDs as I ran them the last 4 years in my previous car without any issues (did have one burn out at around three years.) Here are some photos.. blurry but you can see how well these work and there is a nice clean cutoff.
.thumb.jpg.5fffd4fc387e6f49d6943d3de4e4f7f4.jpg)
.thumb.jpg.b52244914aedeb0b97ad7d7d7f273dc5.jpg)
-
Hi Omar, no relay used but I’ll likely order one next. They are pretty inexpensive and should help protect the factory wiring during HID startup.
-
A quick final follow-up to this thread. I ended up using a factory ground location behind the drivers side rear cargo area inside quarter panel. It's in the same location the factory sony amp is grounded to. I did not use the exact same ground as the sony amp, there was a second hole already pre-drilled in the metal I sanded down and used a bolt and nut to ground to. When testing this location I got a resistance value of .003 which was almost as good as testing directly to the negative battery ground under the hood. It's actually very easy to get to this location. 1. Using a trim removal tool pop the two plastic rivets out of the trunk plastic scuff trim where the latch is on the bumper. 2. Gently pull out and up to remove the trim piece. 3. Next pull back the weather stripping running around the rear bumper and the drivers side up to the top of the panel. once the weather stripping is pulled back you will have a gap between the panel and the body. 4. Firmly grasp the panel and pull it straight and firm towards the inside of the car (straight away from the body.) It's held in with multiple clips only, no screws. I didn't bother pulling it off completely.. I pulled it away about 1 foot in the rear to give me enough room to work behind it. 5. Your ground locations are behind a small area of fireproof insulation material. 6. I removed the two plastic rivets holding the material in place to get clear access to the ground holes. You will clearly see where the factory grounds are at once you move the insulation. 7. Sand your ground spot well then reverse steps to close everything back up.
-
Sledwrecker changed their profile photo
-
I have a 2018 Edge Titanium with the 3.5L v6. The car has about 37k miles and is completely stock with the exception of a K&N drop in replacement air filter. While idling I can hear a hissing noise which sounds reminiscent of a vacuum leak however the vehicle is running / idling perfectly with zero performance or drivability issues. Is this normal for this motor to have this sound? I don't notice it as much with the hood closed but with it open it's very noticeable. I've done a thorough visual inspection and don't see any issues. I also haven't been able to isolate exactly where the noise is coming from but it seems to be on the side of the motor with the transmission (drivers side.)
-
Forgive me if this is buried in the forum somewhere.. I've been reading for a couple hours and haven't found any posts with this same issue on a 2nd gen Edge Titanium. Case: 2018 Ford Edge Titanium with stock halogen H11 / 9005 halogen projector housings. When installing Xentec 35w HID kit w/o harness (plug-n-play) HIDs shut off immediately when vehicle is running. Details: Rough install of a Amazon Xentec 35w plug-n-play HID kit (no hardness) or canbus / cancelers. When the vehicle is off but ignition is in the on position the HIDs work perfectly. When you start the car (engine running) they shut off. You can turn the headlight switch off then on again and the HIDs come on for about 1/2 a second then shut off again. I did spend about two hours last night using forscan to change numerous values outlined in the forscan forums for a factory HID headlight swap but this made no difference to my particular issue. Disabling the DLRs through the dash's on screen menu made no change in behavior. Disabling DLRs with forscan made no difference either. I'm thinking it could possibly be canbus and I need cancelers or maybe with this particular model edge requires an HID relay harness?
-
Definitely grounding to the seat brackets or bolts won’t work. Just did a DMM test and resistance is .27. For comparison resistance directly to a factory ground is .02. Any advice on a good ground would be appreciated. I’m reluctant to drill into the floor pan as it’s unclear what’s underneath. If there’s a factory ground behind one of the rear inner quarter panels please advise how to remove them safely without breaking anything.


.jpg.3444209dd0b848514caa875c78b74635.jpg)
.jpg.447fa3d9b45e909fc1ef06e85d01bdde.jpg)