threeputtpar
-
Posts
18 -
Joined
-
Last visited
About threeputtpar
threeputtpar's Achievements
")
Newbie (1/14)
-
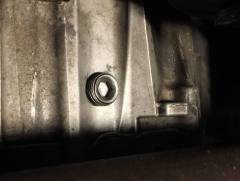
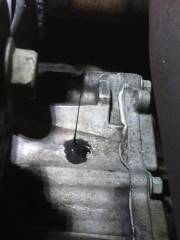
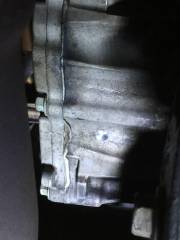
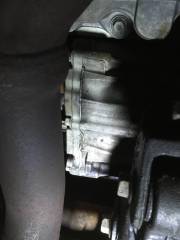
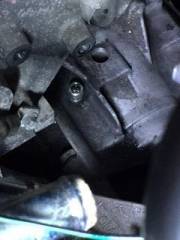
Decided yesterday to install a drain plug and make future fluid changes that much easier since I'll need to be flushing this thing for a while until it cleans up. Here's the list of tools and parts I needed/used: 3/8"-18 NPT hex head pipe plug from Grainger ($3) NPT tap and die set with 3/8"-18 from Harbor Freight ($12 with coupon) 5/16" drill bit for pilot hole and 9/16" bit for final hole Cordless drill 16mm socket with 3" extension and long handle ratchet 5/16" hex head bit and 6" extension Center punch and hammer New fluid and fluid pump Here's the start of the pilot hole: And were getting part way into the case: The pilot hole has broken through: I didn't get any pics of the final hole size drilled or the tapping of it as I was concentrated on not breaking off the tap in the case, so here's the final product: Filled it up with gear lube and will run it for a week and change fluid again. I even saved a sample of the disgusting old fluid as I'm curious in a UOA of it. It all went much smoother than I thought it would, because on the Taurus X the bottom of the PTU case is pretty low and drill bits were long enough to easily reach up between the exhaust and engine mount. I highly suggest using a hammer drill to do this, as I didn't on the pilot hole and it took way longer than the 9/16" hole did with the hammer action. Edit: I changed the 8mm hex bit to 5/16" because I stripped out the plug while trying to remove it the first time. Had to hammer in a Torx socket to get the darn thing out, then replaced with the same magnetic plug.
-
-
-
I can provide some clarification on the proper fill level. My research shows that early PTU designs (2007-early 2008) had a fill line cast into the housing on the side with the fill plug that was around a 1/2 inch below the fill hole. The second design eliminated that cast-in line and that's when Ford changed the fill spec to just at the bottom of the fill plug. It was their first attempt to Band-Aid their terrible design with a few more ounces of fluid. Clearly it didn't work like they hoped it would.
-
I did not need to add any fluid at that point because months before I had the fluid service done just after purchasing the vehicle, and that is when the leaking started. I now know that the family was selling the vehicle because they were likely hit with the estimate to replace the PTU and freaked and dumped the vehicle as soon as possible. Luckily, they didn't drive it enough that they did any permanent damage to the internals so I can save it with a good routine of fluid changes now.
-
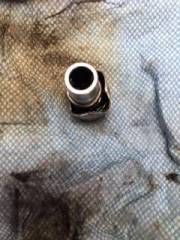
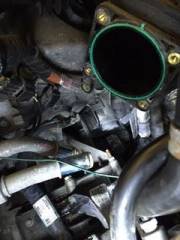
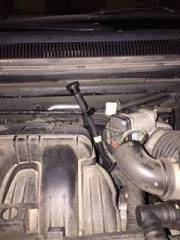
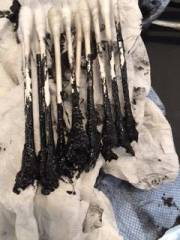
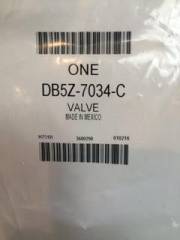
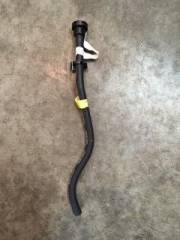
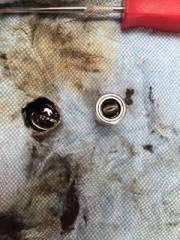
I've been having the same leaking issues from the PTU vent on my newly acquired 2008 Taurus X AWD, so I've been researching the issue and that lead me here. Seeing that the leaks come from the vent on top, I decided to dig in and find out how to solve the issue. I removed the intake pipe, throttle body, and because I have rear heat the two hoses coming off of the thermostat housing. This is where that got me: To liberate the vent valve from the PTU, I first tried to pry off the jiggle hat. After about an hour of no progress, Anger won out over patience and a slip lock pliers was implemented and both the hat and valve came out as a unit: It took a bit of prying to get the hat off of the valve, but here is what it looks like inside. Honestly I was expecting just an open tube in the fitting: I took the opportunity to try to clean out as much as I could from the top. Here is the first batch of 12 Qtips. There were two more batches: Then the valve went back in without its hat, as I had other plans on how and where it would vent: My idea was to retrofit the updated vent tube from the 2013+ Taurus models, and here it is in all its glory: I did need an extra foot of tubing and a fitting to put the two together. The ID of the vent tube is 3/8" and the OD of the vent on the PTU is 1/2". I couldn't find a proper reducer, so I heated the end of the 3/8" stub hose and gorillaed it on the vent. So far, it's not leaking from the vent or the tube that's pressed on. At this point I think I'll just start changing out as much of the fluid as I can for fresh stuff as often as my schedule allows and hope at some point it starts to clean up. The finished project: Hope this helps anyone who had the same questions I did about the vent valve that Google just couldn't answer.