Well after researching and a few phone calls I found the info I needed. I will post it here so in-case someone else is looking for it.
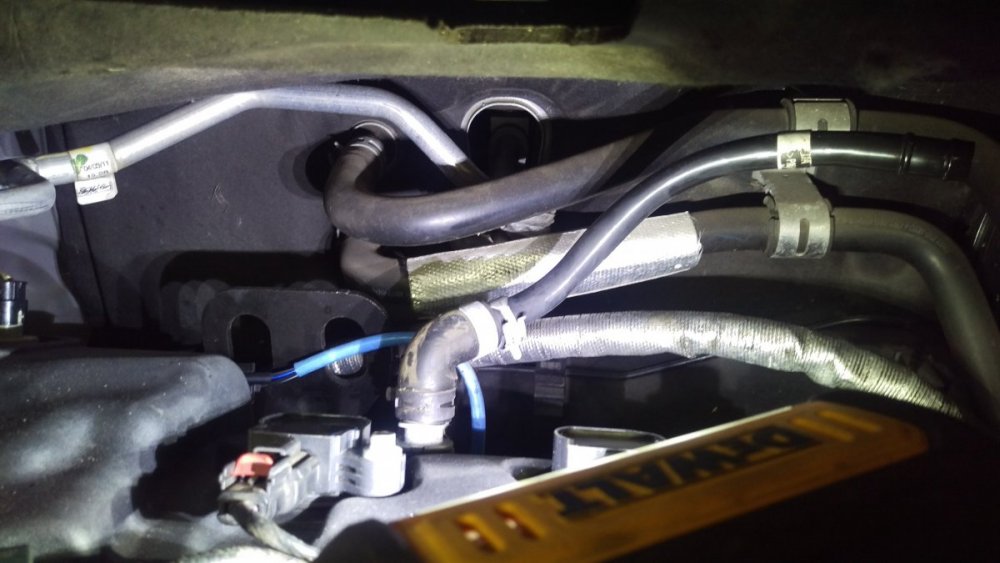
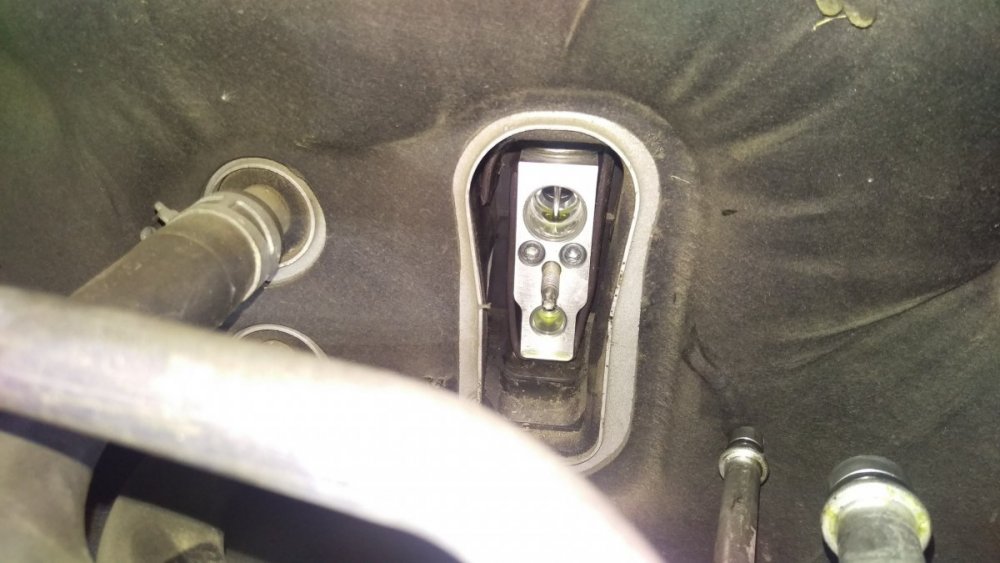
1. the A/C Expansion Valve located on the fire wall behind where the hoses run.Remove air intake system that you had to remove to get access , Once there you need to unbolt one of hose brackets and also the A/C line bracket that is mounted on the right side fender well.
This unit is in set into the firewall, 10 mm socket and a allen wrench are needed to remove. This is not easy to get out as you have wiggle it quite a bit to get loose. It is a tight fit with the a/c lines to put on the new O rings. Lube with a/c compressor oil.
Before you re assemble the air intake system that you had to remove , now is a good time to pull a vacuum on the A/C system, this will save you time if you have leak as you have access to this area.
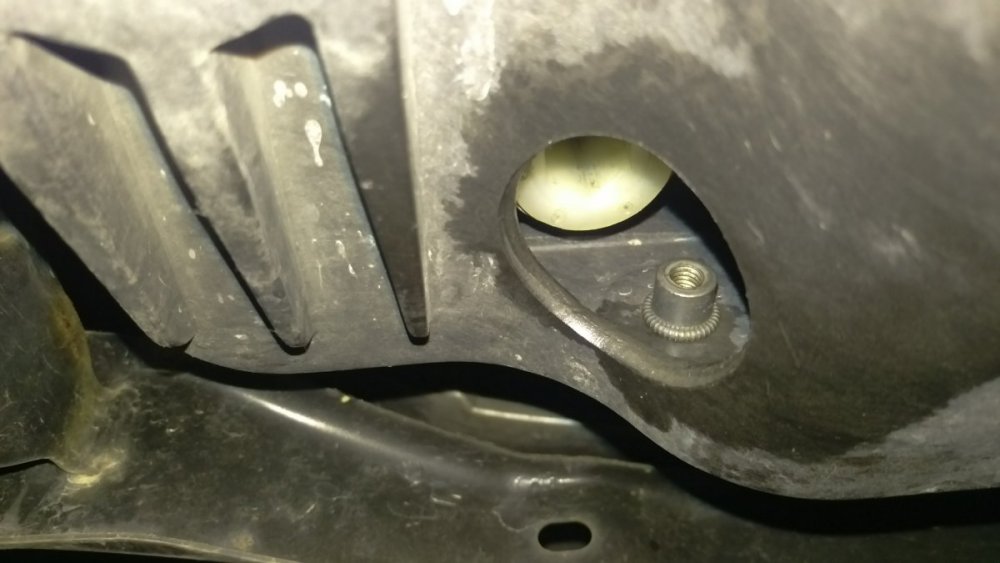
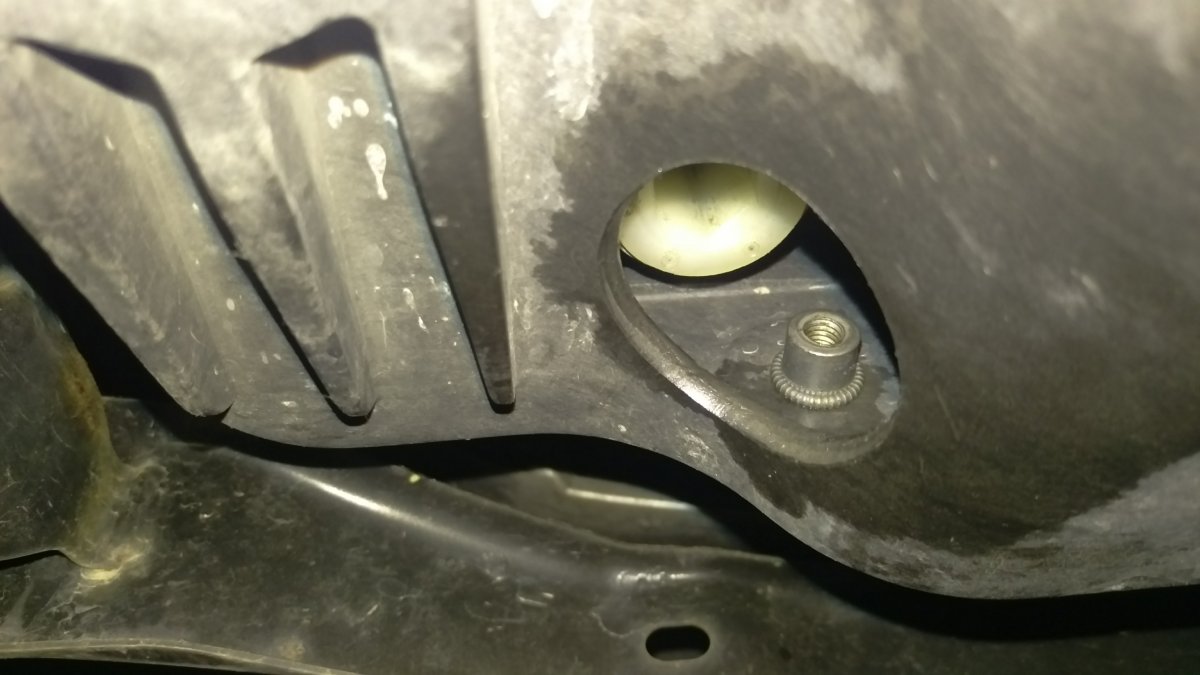
2. The A/C Accumulator Filter is located on the Condenser it self , raise the car and remove the air deflector , look up on the left front side where the radiator and condenser are , you will see a hole in the core support , then you can see a nylon white plug which is the A/C Receiver Drier and plug , big hex wrench is needed, use the new plug to size .
more details on - https://www.carid.com/2011-ford-edge-air-conditioning-heating-parts/?filter=1&sub-model[Liter][]=3.5Lyou need to remove to remove the filter bag , get a small hook tool and pull the bag out, be-careful not to taste test the a/c oil that will drip out.
3. When you go to recharge the a/c system you may not get the a/c compressor to kick on to take the proper charge , what we did was to pull the A/C clutch relay #68 and put 12 volts to it. Be sure to look up the relay number to find to 12v output pin. <-- this is important not to fry other parts like the PCM
Next we had a tough time in getting the system to take the proper amount of charge of 1.5 lbs . So start by evacuating the system , then add .3 to .5 lbs at a time till the fans kick on , then replace the relay and go about charging the a/c system like normal. When we found out was it did not like a full charge all at once but by adding a little bit at a time we were able to get the system up and running .
Now keep in mind you may have to go back and add a bit more charge after 24 hrs since the new Freon take longer for the gas to completely expand.


")