sirteman
-
Posts
29 -
Joined
-
Last visited
-
Days Won
1
About sirteman
sirteman's Achievements
")
Newbie (1/14)
-
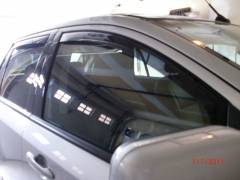
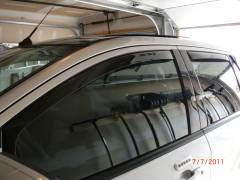
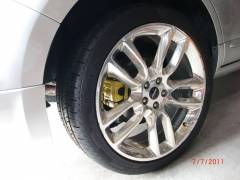
 They are WeatherTech which is made in Germany.
 -
 Hi Bates 949, The original bulb on the trunk is easy to replace. What I have done is to cut out a strip of aluminum tape and put it around the tapered ends of the LED light that I bought for this replacement. The available LED light out in the market has tapered ends, so in order to have it properly seated or installed on the terminals I have to use the aluminum tape to have a flat or level ends. The passenger dome lights used the same type of bulbs on the trunk light, so the same technique was used. Just be careful in pulling out the diffuser. The front dome or reading lights have the wedge type of bulbs, so the right size of LED lights should be used. The bulbs could be removed by pulling it out slowly with a rocking motion. Once again be careful in removing or pulling out the diffuser. This is all I could share and I hope this could be beneficial to you, specially if you want to have the bragging rights of having a cool Edge. Enjoy your mods and good luck!!! Sirteman
 -
with Upgrades
-
-
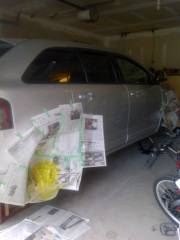
 Hi, I installed the "Hidden Hitch" Trailer Hitch Receiver - Custom Fit - Class III - 2" and also installed the Upgraded Circuit Protected Modulite with 4 Pole Harness and Hardwire Kit that includes a Tester. Try www.etrailer.com for the custom built hitch for your 2011 Sport. The hitch installation manual was easy to follow but doing it was a little bit tricky, specially the part where you have to lower the exhaust assembly since removing the hooks of the exhaust assembly from the three (3) rubber hangers was quite hard. Everything was perfectly fit and the outcome was really nice, love it as well.
 -
 Well, it was tough. First, I used a small screwdriver to push the locking stab on the slot of the puddle light in order to take it out from the side mirror. Just have to be careful on removing the wiring since it is so thin. Put a mark on both the wire and the plug on the puddle light housing. As per other posts that I have found in the internet, I used Acetone to soften the glue that holds the cover (round plastic). I was thinking that I just have slice through this cover by using a cutter (heavy-duty type) but it was not that way due to a small lip or edge that goes inside the black housing. You could see the details in one of the photos (puddle light components). So, you have to pry out that plastic cover once the glue has soften and after slicing around with the cutter. Just have to be careful so you won't cut or injure yourself. I put a LED bulb (with 6 LED's), just make sure that the length and diameter of the LED bulb is exactly the same so it will fit the holder. Wipe the bulb to get rid of fingerprints and dirt so that the LED bulb will last longer (no heat reflection from fingerprints). Used a toothpick to apply a small amount of Krazy glue on the cover and snapped it back on the housing. Test the light by temporarily connecting it to the wiring of the car, just reverse the wiring if LED bulb does not go on. There you go, push back the puddle light assembly to the side mirror and make sure the locking stab is latched on so it won't fall. With a little ingenuity I was able to replace the standard OEM bulb with a white LED bulb that looks nice at night. Good luck and for sure you will get your bragging rights, ha!
 -
ford remote start only runs 10 mins?
sirteman replied to 95f150's topic in Audio, Backup, Navigation & SYNC
Is the Remote Start User Guide available in the internet for download, please provide the link. Thanks in advance... -
Hi, Just curious on what type and make you got for the bulbs you used, it looks great on the photos you posted. Have you replaced your fog lights too and it would be nice to see them too. Great job..