
Lex Talionis
-
Posts
2,070 -
Joined
-
Last visited
-
Days Won
8
Content Type
Profiles
Forums
Gallery
Everything posted by Lex Talionis
-
MOON ROOF CONTROL LIGHTING
Lex Talionis replied to sanche's topic in Audio, Backup, Navigation & SYNC
no worries... if I can nail it down, I will do a better idea of explaining what is what and how it is done. with photos. for now, just talking out loud hoping someone who similarly understands this stuff can clarify some of the unknowns. once that is done, we will be cooking with fire. -
MOON ROOF CONTROL LIGHTING
Lex Talionis replied to sanche's topic in Audio, Backup, Navigation & SYNC
I want to better get a grip on what this "The only reason they're not lighted is that there's no wire running from the Accessory Delay feed running up the A-pillar to the switch assembly...a 3-foot piece of wire, and missing only on the Edge. The ground is already there." and this "That's a little steep for the two pins I'm going to remove from it and plug into the connector already in the car (so I can run the ground and Accessory Delay leads)," amount to? as these together make it sound so simple. If I could only understand 1) is the ground already done and in place, no need to worry about that since the board is already powered given it controls the map lights already, or is one of the pins for the ground and we still need to ground it, he is just saying it is there for us ready to use 2) where are the 2 pins and what pin is what? 3) why the mention of the pigtail if it simply is just 3 feet of wire we need? 4) what color wire is the "accessory delay feed" -
MOON ROOF CONTROL LIGHTING
Lex Talionis replied to sanche's topic in Audio, Backup, Navigation & SYNC
I am now on a mission to do this. I already took the unit apart to scope it out. I have tackled projects WAY bigger than this here on my Edge and made them happen... this should be totally doable. I just need a little more understanding. Sanche, I also read the part about "(pins 1 and 2 on the switch connector)" BUT I am not sure what or where that references on that board? Do you? Can you tell by looking at the image? And, IF you did know what/where those were on the board, does that mean one is power and 1 is ground and if we ground 1 and run power to other, we can fire it up? Now, If so, why the mention of that $55 pigtail? Does that, I wonder, imply that you can take the purchased pigtail, plug that into the bundle coming out of the headliner and plug that new pigtail into the unit and have it fire up quicker than running a new wire? The pigtail comment implies to me that that pig tail you could buy would bypass the current connection and supply the needed power to that motherboard to light those LEDs. In a way, that makes sense as that seems like something they could just pop in at the factory to make this system work rather than running wires as many of these parts are the same as in the Lincoln. Anyway... if we can hear from Jpark, it might explain more as I am a little confused by what the pig tail would offer or if, since we only tie into 2 pins, we can manually do this (clip or solder to a pin) and get this going. -
MOON ROOF CONTROL LIGHTING
Lex Talionis replied to sanche's topic in Audio, Backup, Navigation & SYNC
okay... I started some deep Goggle and found where this post came from. see it here at Bue Oval - it answers a few of my above questions. seems, as per that thread at least, he has not pulled it off (page 3, post #42)... yet also turns out, it was by Jpark, also a member here at our forums! I have a PM in to him to see if we can revive this topic and between us, get this done. if it is all there, and all we need to do is run a wire, I will do this today. BUT, in his last post on the topic, he mentions a $55 14-pin connector pigtail assembly WPT-287 needed to do this, but I 'might' be able to fashion one and work around that - since it seems you only need 2 pins - if I can get a better idea where to attach and what it does, etc. -
MOON ROOF CONTROL LIGHTING
Lex Talionis replied to sanche's topic in Audio, Backup, Navigation & SYNC
sanche.. PLEASE follow up on this here. I was correct it was never done here, but apparently you have another forum that has this info. this is great news. if you can get me the details: where the wire is placed, is it soldered or just crimped on to an open lead somewhere (I cannot tell), do you have to run a wire from your own power supply or is there a power wire there in a bundle nearby just not attached, where are the bulbs to supply light IF you get this hooked up? if you can get me more details, I will do this ASAP and give a write up about it. I am really actually surprised they would not hook this up and hold it back like it is some sort of 'upgrade' just for the Lincoln, -
For those who bought a Bumper Saver from ASL...
Lex Talionis replied to Andry's topic in 2008 Edge & MKX
someone needs to snap this thing up. :poke: I am telling you, it can easily be installed with little finesse and look perfect. mine looked a little off, but installed fine as I aid above. -
an email I put in to them last week said that they plan to have it available "in a few weeks".. so we will see. that one above I linked to by Green seems to no longer be listed. might have never existed, but at the time if the link, it did.
-
K&N Filter? Yes or No
Lex Talionis replied to dtappeiner's topic in Interior, A.C., Heat, Interior Trim
can you or anyone expand on what that is and why it is there? if you can easily 'pop' it out, is it just a restrictor? why would it be there and also be removable? that Green one I posted about elsewhere now seems to be... gone. the website no longer lists it. so not sure what that is about. there is also a thread here that has a post, with photos, to a website that shows one in development by Steeda. Well, I emailed them last week and they said 'a few weeks'.. so stay tuned. -
MOON ROOF CONTROL LIGHTING
Lex Talionis replied to sanche's topic in Audio, Backup, Navigation & SYNC
IIRC, it was never stated they were 'not hooked up'. in fact, I do not even recall seeing that. what I do recall is that some people are bummed it is not there - I have come, over time, to wish they were lit myself actually, but the last I read here some were considering trying to get the Lincoln part and install it into an Edge. never saw anyone actually do it. Now, if this is wrong, let me know as I would gladly wire them up and pass on the exact details on just how to do it. but I suspect the ability is not even there as I would be hard pressed to believe they would put them in, and not wire them up -
New Sync Update is availble
Lex Talionis replied to Lex Talionis's topic in Audio, Backup, Navigation & SYNC
this part has been hotly contested by dealers, Ford and others. rather then going in and saying it is still under warranty to get it done free, might be best to explain your connectivity issues that this addresses - that seems to have gotten a greater free response from dealers. -
if you use the search function here, you will see about 50 threads on this very topic already... more than you would ever care to read
-
New Sync Update is availble
Lex Talionis replied to Lex Talionis's topic in Audio, Backup, Navigation & SYNC
a few people over at SyncMyRide.com.. no one seems to report a lot of noticeable changes or diffs - a few say it helped some phone issues, some say still issues. it is the biggest thread there and pretty detailed FWIW. most pissed we need to pay for the enhancement as it seems to update a chip (there are 2) that only dealers can update and not us. I think that Aug 8 deal was bogus the more I have read about it and not really convinced it will ever be released for us to do ourselves. great huh? first true Sync 'update' for those of us with connectivity issues - and we cannot even self install it. -
For those who bought a Bumper Saver from ASL...
Lex Talionis replied to Andry's topic in 2008 Edge & MKX
I feel ya, but it seems there are few choices for these out there: this one (no longer made), the Ford one (most people say thin and over-priced) and another off eBay (no real reports). When I imply you have to adjust it, it is not a major effort or adjustment - there is some effort required to place these things no matter who's you get - and I would take this thicker model over that Ford one and something over nothing. Just look at the picture in my Gallery, does that not look about perfect when installed? -
For those who bought a Bumper Saver from ASL...
Lex Talionis replied to Andry's topic in 2008 Edge & MKX
sorry your bumber cover did not work ... IIRC, mine was not exactly perfect, but once you lay down the adhesion liquid and peel off the sticky back, if you lay one half down you can just massage the other half into the radius that works best. it is not precise, but this seemed to work perfect for me as I also recalled when I just laid it on for trail run, it was skewed, but when I tacked it down, I could get exact placement I wanted as it is rubbery and malleable. -
have you tried here at blue oval forums? your more likely to get a response there than here I have seen. I know I got mine there.
-
K&N Filter? Yes or No
Lex Talionis replied to dtappeiner's topic in Interior, A.C., Heat, Interior Trim
seems to be a lot of opinions on this topic no doubt, and I am sure you are about to get your fill of them so I will pass on the actual debate. That being said, I am a big fan and have/had them on past and current cars. I did not get one yet as I am waiting to see if someone - like Steeda or K&N or Air Raid - will release a cold air intake kit, which will naturally have their filter included. If that does not happen in the next fews months, I will be doing a K&N for sure. -
interesting... as a first post, it is compelling and the right place to have it. if someone else comes here for that issue, this should help them.
-
yes/no IF you do not use the yellow wire off the input box and attach a switch (or parking brake) to override the nav system you will only get it to be a backup camera off Video 2.. IF you do use the yellow wire and put in an override switch (or attach to parking break) then you can flip the switch and use whatever video source you attach to Video 1. now, on that note, according to the maker, the backup camera will ALWAYS have priority no matter what is going on. This is a step above most other systems (non of which are DIY at this point though). So, what this means is that even if you have hooked up a DVD player in Video 1, if you put the car in reverse it will always show the reverse backup camera and override whatever is happening on Video 1. So you do not have to flip the switch you put in to off or turn off the power to the DVD player (or whatever you have hooked up to Video 1) to use the reverse camera as it is the default primary input. this being said, this will not get you audio. this is a video system. so, to get audio you would use the external audio from the device, an FM transmitter, or splice into the stereo head unit an auxiliary input for sound. since having a backup camera was the goal, I am not too worried about even doing this.
-
ouch... well there you have it, that explains why the 2008 has that little entry door there. I wondered why. looks like that same part is used in 2007/2008, but in 2007 they used it for the button and 2008 they closed it off with a plate when they added the actual lower grab handle with the button. well.. maybe there is room left or right of it? if not, a license plate frame camera would be ideal.
-
hey hey.... first, I could just not fit my camera wire through and the reason why - I did not explain above - is the end of my camera wire is a thick bundle that has the RCA jack, another stereo 3mm jack, and a red power wire. That all emanates from a pretty thick bundle and trying to fish it through that ridged rubber sleeve was just a no go as it was just to thick if a bundle and sticking to the tacky rubber. I tried, but decided given the time spent thus far just not worth the effort so went around. I assume not all cameras will be like this I am sure, mine was and it was just to thick a mass and taking to much massaging effort past each ridge in that sleeve. I said it and moved on. as for the color wire to get power for the input box, I am pretty sure I explained above that I tied the blue and red together from the box and then tied those 2 to the red power wire that came at the end of that camera wire bundle - power viola to the box. Since the camera was already powered back at the rear reverse light, that red power wire that came off my camera end supplied the boxes power. That worked slick and allowed me to not have to search out the power up front for the reverse lamp since I did it back at the lamp. BTW.... what camera did you get? Report back your experience. I found wiring up that box is much tougher than running the camera. be careful with all that sensitive 9 wire bundle with white tip connector and thin thin ribbon cable & the snap connectors and 4/4 and 5/5 pin connectors and tight tolerances... it can get trying at times
-
thanks... yeah, it was trying to not make the scrolling soooo long versus making readable paragraphs. I went for the former. if not, it could be about 5 more scrolls down long - but I feel yeah. I bet most will just look at the photos anyway
-
Thanks... I plan to wire up Video 1 today (the yellow wire) so I can run a DVD player or something. The Port is there, so might as well wire it up and I plan to put an RCA jack & a flat toggle switch in the center arm rest console as there is a very deep storage spot in there and a power outlet, so it makes sense. The retail price for the nav unit is $325 and the camera was like $110-115 if you Google for best deal. Call Sam to order. It was just released a week ago. The unit is there, all they do to make it plug and play is the special harness (wire bundle, ribbon cable, cable to tie harness to box), but the box they show and list is the same. When you tell them what car yo have, they know that kit is needed. The photo above shows what you will get.
-
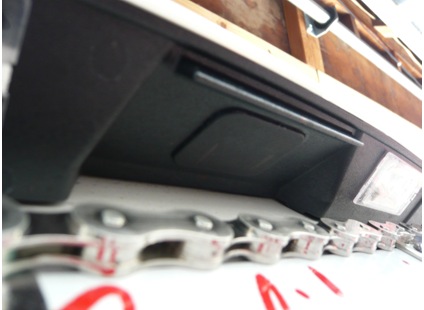
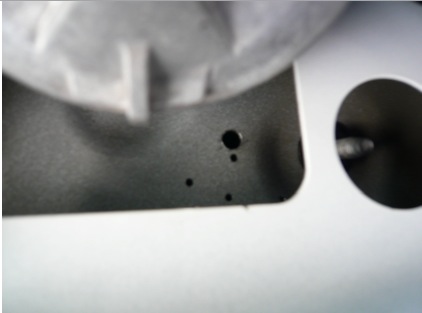
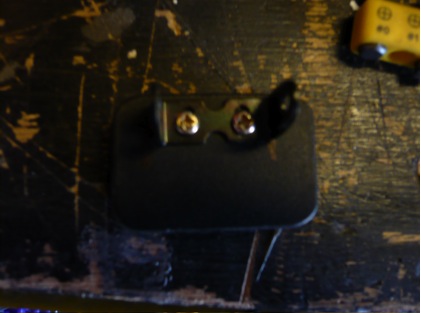
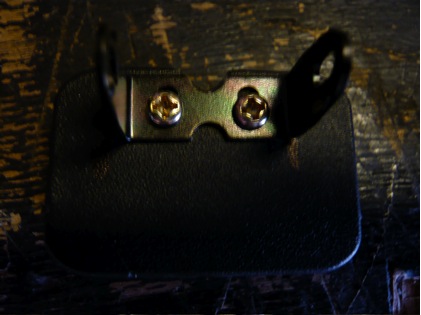
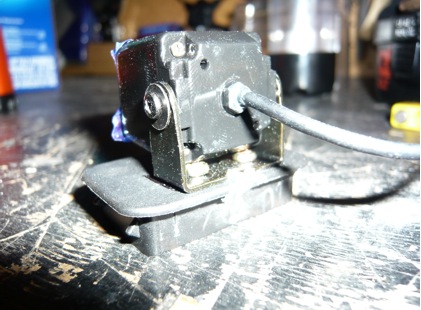
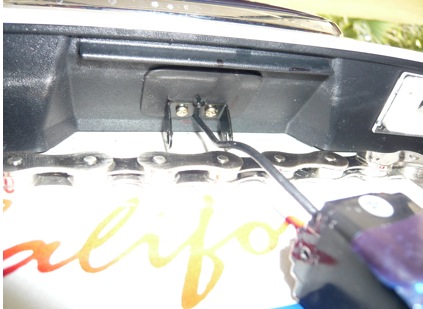
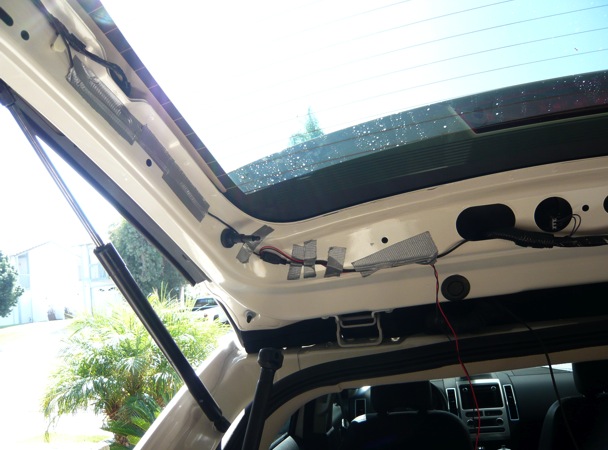
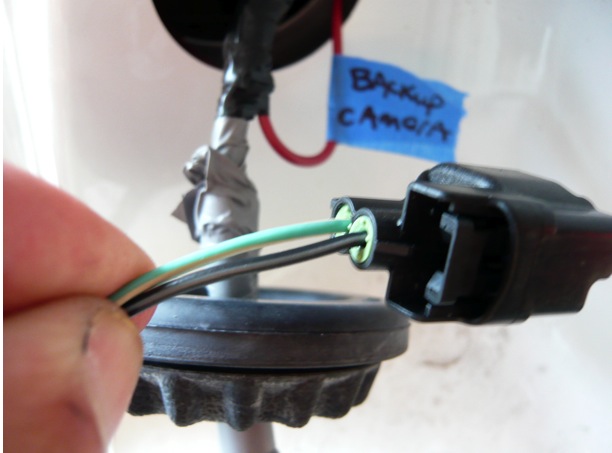
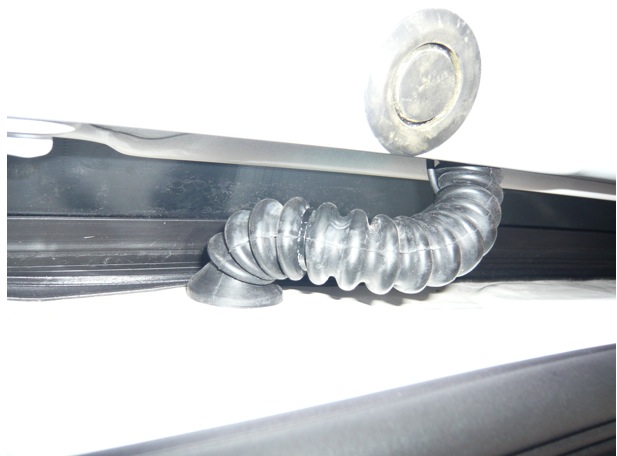
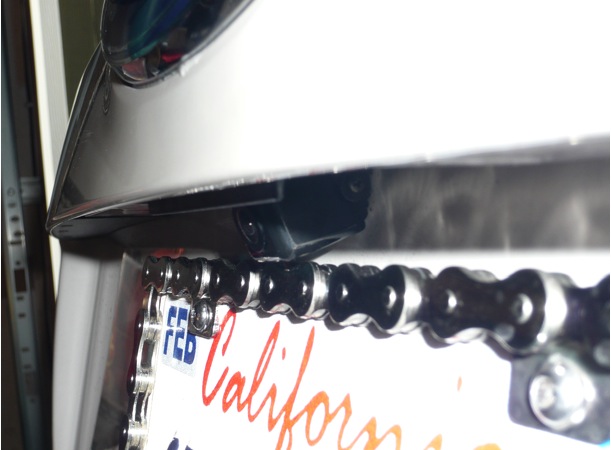
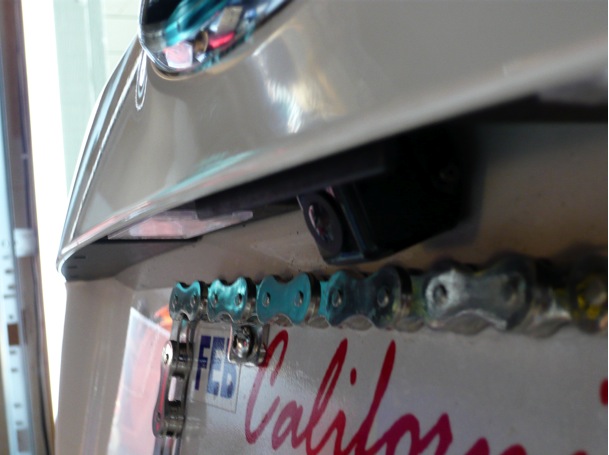
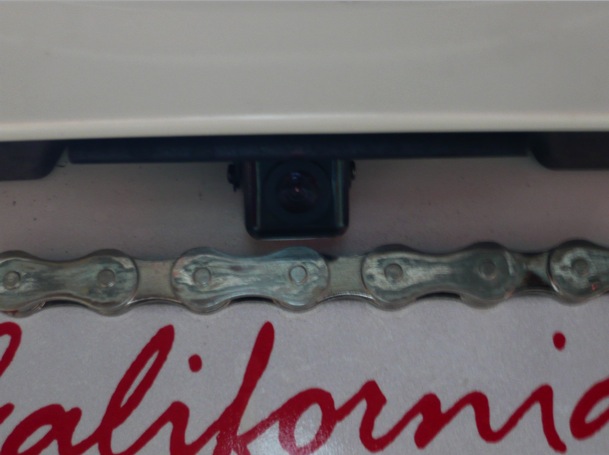
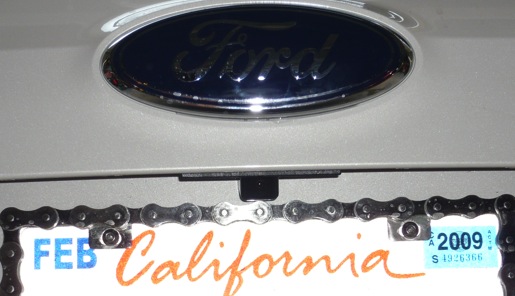
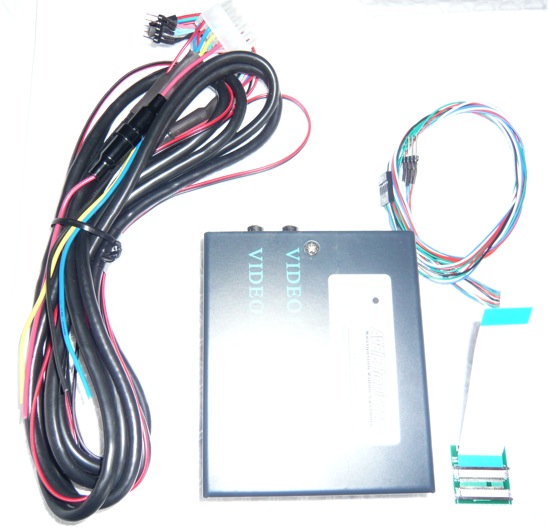
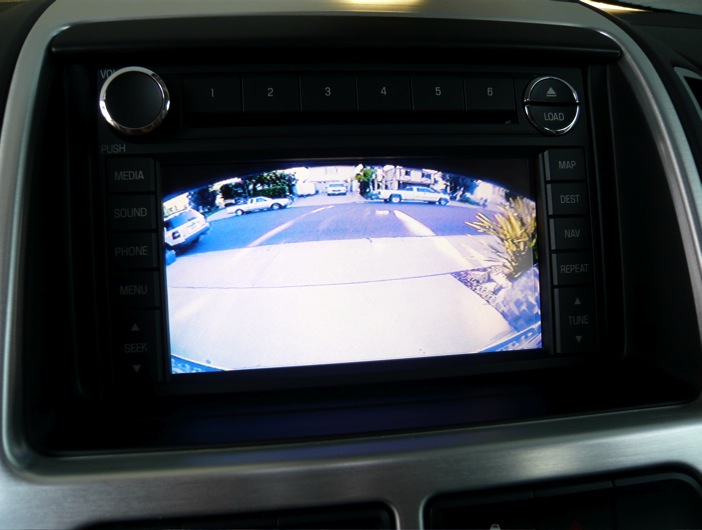
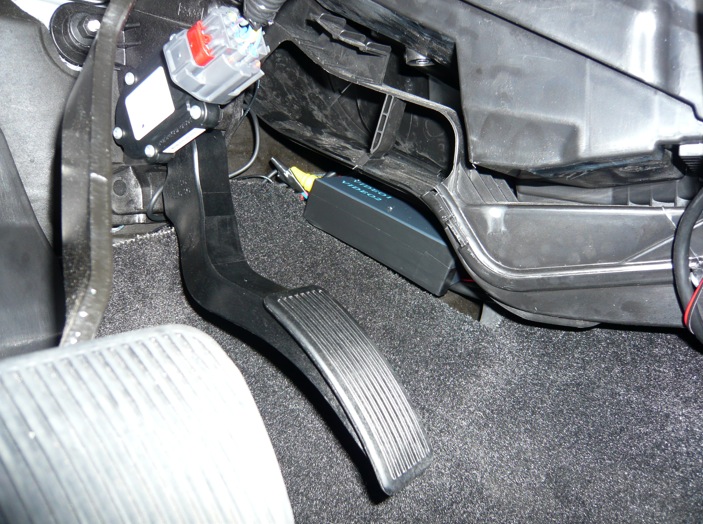
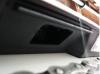
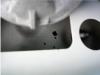
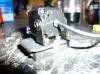
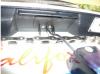
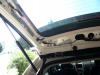
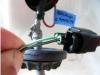
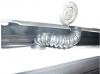
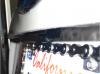
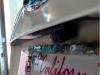
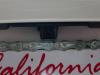
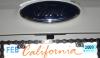
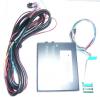
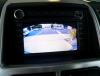
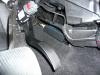
(add disclaimers, risks and caveats here about what damage you could do or warranties you could void or laws you could break by messing around like this) Direct to FordEdgeForum - another first install - the new plug-n-play (yep, you can now do it yourself) rear view Back up Camera to the factory Navigation System offered by AV Electronic (click here). Thanks to Sam, the owner, my plug and play unit was one of the very first sent out a week ago Friday on their official release day and by the time I had it working by this past Friday, only 1 other person - a dealer - had the new release "plug and play" unit working before me. So, for your enjoyment, here it is. Install details, products details, tips, info on the first and only know true DIY plug and play option to add a backup camera to or factory nav systems. I think, even with the camera, you will agree this setup looks as factory as you could get and the camera is almost not even noticeable. Enjoy! Products: 1. I used the "Budget Version" of the Navigation Video/Camera (Dual input) Interface as I only planned to run the backup camera and maybe a DVD player 2. I used the Power Acoustik CCD-4XS Rear View Color Camera. I did MASSIVE research on a camera that met my requirements (1) tiny - this thing is only about 1x.75x.75 (2) CCD best quality versus junky CMOS (3) adjustable pivot point. I defy someone to find a rear view camera any better, smaller, quality than this. I think you will agree when you see the final results. The only other option to consider is a license plate frame camera (which I have one to sell (click here) as I found a license plate frame I just had to have so could not use the camera). Camera Install: The camera is the bomb. Period. Anyone wanting to do this, just save your time and effort and buy this camera as it worked perfect and meets every goal (but night vision - which I did not care about given where I planned to place it which was right between the rear license plate lights which are bright LED in my case) you would want in a camera. Install was not so bad, but takes a lot of time. I would say to do it right, 3 maybe 4 hours at most just for the camera. You want to understand wiring and talking molding and such apart before installing a rear view camera. You have to remove the inside of the rear gate (easy, 4 screws). I had decided long ago to put a camera under the emblem in the little recessed alcove. It just so happens, there is a little "plug" there that I was able to pop out, attach the camera to, and plug back in with a few modifications. Like it was taylor made just for this mod. It even angles down towards ground so makes perfect angle. I then had to drill 1 hole in the inside of the gate to pull through the cable that run power, ground to camera and run to the front of the car to attach to the RCA video input. I ended up using silicon around the hole when I had it all setup to (1) keep the cables from getting cut or sliced over time with jostling and (2) make it weather proof - though I doubt that is even an issue given how it is installed with camera lower than cable and under the alcove. I had to run all of the cables and I ended up taking black (ground) and drilled a second tiny hole in the boot and attached the ground to that after sanding away and exposing the metal under pant for a solid ground. I then ran the camera power to the drivers side backup lamp (top most lamp) as you have easy access to that light. The color of the wire you tie into to get power to the camera only when the car goes into rear is: green/white in the bundle that goes to the rear light. Both of these wires I pulled through the rubber wire bundle protection sleeve that allows wires to run from hatch to car body. As for the actual thicker camera RCA wire, that was to think so I ran it behind that sleeve and zip tied it. It is clean, you cannot even see it really. This leaves the camera wire in the head liner. I then ran this camera wire over to the drivers side molding, along the rear window and down the pillar behind the passenger on drivers side and into the floor, along the floor molding - popping up molding to run clean hidden wire where needed and then right up to the kick plate at the fuse box. it is clean, you cannot see a single wire. There is PLENTY of camera wire to do this. Pictures show all of this. can you believe this perfect placement port. like it was made for this. hole for camera harness wire to be pulled through a few shots of attaching camera to that popped off port door. taped up wire from camera along gate and into open holes into wire bundles sleeve. power wires goes off to light, ground hooked right to gate and the plastic molding hides it all. notice the red power wire from the camera, it ties into that green/white wire and will only et power when car is in reverse. here is the sleeve bundle, power and ground run through this into car, but notice very close the actual thicker camera wire runs along it's backside as it cannot easily be pulled through the sleeve. a few shots of the mounted camera. pretty flush, hidden, barely noticeable... AV Electronic Video Input Box Install: This system works awesome and exactly as claimed. Also, not like you have a lot of options as they are first to market with a plug and play DIY kit. I know, I called all other places. Sam, the owner of the company, is super helpful and very nice to deal with. We had to talk a few times during the 2nd part of install, the video converter box, as it was the first time install for anyone other than 1 other dealer and there were some small bugs to work out and he was a champ about helping me. Even stayed late into night - he is 3 hour time diff - to work out some plaguing kinks. Now I will say this now, this is NOT an install for the meek and unskilled. It takes patience, a very steady hand, small screw drivers, a light touch and diligence as you are working in VERY small tight spots with very small and tight tolerances. If I were rating the install of video input to the nav unit, I would rate it a difficulty of 7-8 out of 10 for electronics and wiring and such. it is tough. I think most might end up having a shop or dealer do this, but for those of us that can and do like to wire and mess with electronics, it is doable. Just set aside 2-4 hours to do this as tying the input box to the nav unit is the tough part, hooking up the camera to the box and powering the box is a cake walk. So, with this product, you get 3-4 pages of instructors so I will not go through all of that here. I will gladly help with specific quesitons if you come up aganst a wall and want help, but the directions are pretty good. I will have some tips here, but I will not recount the step by step they provide. But, the highpoints are... the install is 2 parts, the box and the ribbon cable to the nav unit. It is nice as there are several connection points so you can tie it all together in segments and check and recheck connections if things do not go well rather than pulling it all out. So, to do this, you must remove the center console (it pops off super duper easy and the entire center piece comes off easy). This will expose a huge alcove in the dash and the DVD nac unit. Remove battery cable to neg to turn power off to car!!! you remove the DVD nav unit with 4 simple bolts, undo 5 cables in the rear of nav unit and remove it. Then, the tough part. You must essentially weasel a small bundle of wires into an existing hole in the side of the nav unit (which is actually the nav, cd, radio, stereo, all in one). Fish that out through the front of the nav unit after you remove the screen and disconnect the ribbon cable. The point is, you will remove the ribbon cable, jump there new ribbon cable into that, reconnect the older ribbon to their new one, tie that bundle of wires into the new ribbon cable that has a mother board on that, SOFLTY squeeze all of this back into a tiny opening the original factory ribbon cable came out of.... and out it all back together. Simple? Not really so much. So, as I say, their directions step you through all of this but here are 3 CRUCIAL tips I would add that: TIP ONE for step 7... this bundle of wirs that has the white connector that attaches to the mother board is not a snug connecting fit and when you go to step 7 and try to push it all back into the ribbon slot, if comes apart as it is a VERY tight tolerance with the added bulk of the wire bundle, tiny motherboard, and ribbon cable. So, what I did was make sure that connector lined up perfect - that is crucial as that connector is ultra precise and imperative it is straight, even and lines up. And the tip is I added some quick dry silicon glue to hold the connection together. Electrical tape might work, but I just decided to use glue to be safe. All other connections you have to make have press fit holders and such, but that one. so that is what I found made it firm 100%. TIP TWO for step 7... when you are pressing all of this stuff back into the slot the single ribbon cable came out of before, you look in and see what looks like a piece of paper. It is not. what it is is the ribbon cable that powers up and runs the DVD nav unit! So, the tip is be very slow and careful. do not push hard and maybe angle the whole bundle to the right slightly and work around that. I know as I disconnected that cable and had to take apart the entire factory unit to reconnect it. You do NOT want to make that error. Once you get past that and button it all up and follow the rest of the directions, you move on to part 2 and that is firing up the actual video box that this whole new wire bundle attaches to. Here is where I will give TIP 3.. on the last page of directions Step 2 you tie that new bundle of wires into the main wire that goes to the input box. This is a 2 connectors:f 4 to 4 pin and 5 to 5 pin males/female connectors. the tip is be very careful and crucial with this connection also. I did not do it precise enough and that will lead to discoloration of the nav system when you turn it on as those 4/4 and 5/5 provide the color video. So, be sure to make those nice and clean, electrical tape them together to be safe and zip tie or tape them to the vent pipes you will see in the center console cavity. Other than tie, connect he main connector to the input box and then to power the input box you run the black to a ground (I did an exposed bolt), you run red and blue together to the red power wire that sticks out of the camera RCA wire to power the box when you shift into reverse, attach the camera RCA wire to "video 2" port, and then leave the yellow as that will be used for those that want to run a DVD player or other video item I do not yet, but will this week. Since the nav unit ribbon cable bundle comes down through the open cavity in the dash and pops-out at the floor by the drivers feet (at least, that is how I did it) I then hid all of this under floor carpet and put the small nav box in a little spot that it fits perfect in right behind the center console dash at your feet (gas pedal to be more precise). Pictures show some of this. here is the small box with 2 ports, the ribbon cable + tiny wire bundle (right) and the main harness that ties the ribbon cable into the box (left) see the box hidden to the right of the gas pedal behind the dash? I put a few strips of black electrical tape just to blend it in as the box is blue. and this is what you get... how cool
-
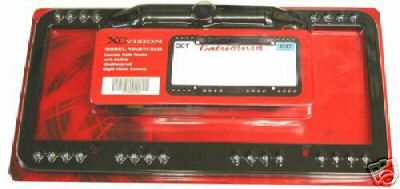
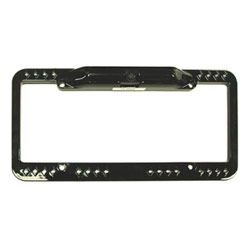
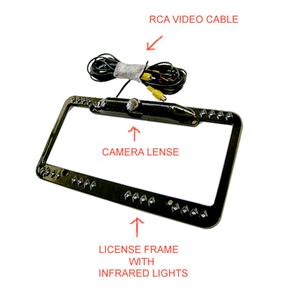
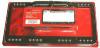
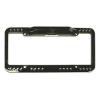
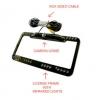
Did you see there is now a DIY kit to tie a backup camera into the Ford Edge factory nav unit? Well, if you get that, you need this! Read all about that RIGHT HERE Got kids or pets? See what (or who) is behind you!! Or help you backup and get your boat, RV, trailer attached to your hitch or help with parking or making sure you do not hit the car behind you. I have a brand new, never opened, never used, black license plate frame rear view camera with NIGHT VISION ability! Yep, works great at night as well. This is NOT the cheap CMOS camera that mounts to your existing license plate frame and that cannot display the rear view in low light or at night, this is the high end CCD model that IS the license plate frame and the camera is built into it. This one is also the kind that has the night vision ability so in your dark driveway or street at night you can see just like during the day. Awesome piece. These sell for as much as $170-190 retail. IF you investigate rear view cameras as much as I have, you will see that this camera has all the key aspects that make it about as good as you can buy for any camera or a license plate camera. This is the camera only plus all wiring and all installation instructions in still sealed package. All you need is the AV Electronic DIY backup nav video input box and this camera and away you go..... Built Into sleek black Licence Plate frame Super high Resolution camera Color camera Sensor: 1/3" sharp CCD Compact Zinc Alloy Die Cast Body Waterproof Housing Night vision - 24 LEDs!! Easy To Install Wide Angle up to 150 degrees!! Adjustable up and down camera angle Securable hex nuts/bolt plenty of cable to reach the front of your car SAVE MONEY..Asking just $120 + paypal & ship. PM if any questions or an offer to consider. SOLD
-
Autolock and Autounlock malfunction
Lex Talionis replied to pbmitch's topic in Audio, Backup, Navigation & SYNC
read here post #12.. maybe it will help?