2016 Edge Titanium AWD
-
Posts
45 -
Joined
-
Last visited
-
Days Won
3
About 2016 Edge Titanium AWD
2016 Edge Titanium AWD's Achievements
")
Newbie (1/14)
-
 Rare
Rare
-
 Rare
Rare
-
 Rare
Rare
-
 Rare
Rare
-
 Rare
Rare
Recent Badges
-
Parasitic draw - help needed
2016 Edge Titanium AWD replied to Diagnostic Dad's topic in 2011 Edge & MKX
One final note while many of the folks on the forum wait for a solution that works to be posted. After installing the new replacement battery, my wife took the vehicle shopping the next morning. I had turned the AC off the night before and reminded her that it would likely still be off when she started the vehicle. It was off, but she insisted that before she turned it on the re-circulate light was on even though the AC was off. Of course it automatically turns on the re-circulate when the AC comes on to help cool the cabin down. Went out later and tried to duplicate the scenario where the AC is off but the re-circulate comes on anyway. I wasn't able to duplicate it but something completely unrelated happened while I was doing my checks. The engine check light came on, and so I shut the engine off, and tried to see if it was an intermittent fault be restarting the vehicle several times. No dice. Figuring that the most likely sensor to trigger the ECL was EVAP, I shut the engine off, took a rag with some mineral spirits and wiped the inside of the 'fast fill' cap where the inner flap touches the inside of the filler neck. Let it dry for 5 minutes, re-started the vehicle and the ECL was now out. OK, I'll take that as a win! Which all leads me to wonder if every root cause of parasitic draw may be different based on what module is misbehaving. In one case it may be the RF module, or perhaps the HVAC module or even both at once (I believe there is even a trailer towing module) which further leads me to believe based on how many modules make up the complete vehicle, any combination of them could cause parasitic draw individually or in combination. Need to get back to basics I think. My '78 Tbird only has a fuse panel with 8 or 10 fuses, and pressing the trunk release when the AC compressor kicks in will blow the fuse because they are both on the same circuit. Go figure! Cheers, Everyone -
Parasitic draw - help needed
2016 Edge Titanium AWD replied to Diagnostic Dad's topic in 2011 Edge & MKX
Opening the vehicle to release the hood latch partially woke the vehicle up, and first measurement of standby voltage was 12.38 volts. However, as the vehicle went back to sleep, the standby voltage rose to about 12.45 volts and climbing. Hood is open now, so I'll check again in about a half hour. Update: 12.56 volts standby Cracked the rear windows open and put the sun shade on the windshield; - a tad warm here in Niagara Falls Ontario today - 31C with the Humidex: 38C 🥵 -
Parasitic draw - help needed
2016 Edge Titanium AWD replied to Diagnostic Dad's topic in 2011 Edge & MKX
Good morning All, Add our 2016 Edge Titanium to the group of vehicles experiencing parasitic draw when the vehicle should be asleep. To put context around this, I now believe this has been a hidden 'ghost' issue since we bought the vehicle in June 2019 at 44,000 Kms. Whatever killed the battery actually brought it well below 11 volts over a 4 hour period sitting in the driveway two days ago. The windows were part way down to allow heat dissipation in the cabin, there were no lights on or doors / hatch open and one would think that the vehicle should be asleep. We were going to go out for an early dinner, and the message on the Sync screen said it had shutdown all unnecessary modules to preserve battery power. The vehicle would not start and putting a Fluke voltmeter across the battery terminals gave a measurement of 3.56 volts. I mean really? 3.56 volts? I attempted to put my electronic battery charger on the battery set to 2 amps, but it kept kicking off because the draw on the battery from whatever was drawing power was much greater than the charger could handle at 2 amps. Didn't try boosting with another vehicle. I noticed that there was this clicking sound coming from the AC compressor clutch when the electronic charger was first activated, and the symptom would cycle on and off with the compressor clutch clicking on and off every 15 seconds. NOTE: This is the second CarQuest DieHard battery the vehicle has had since we bought the vehicle used in 2019. CarQuest was closed so we bought a new Kirkland battery at Costco and installed that in the vehicle so I could at least get the windows up and lock the vehicle. Meanwhile the DieHard battery, immediately taken from the vehicle, slowly recovered to 12.6 volts over night without any help, so I don't think the battery was the root cause. I checked the standby voltage of the new Kirkland battery at 12.27 volts fresh off the shelf, which is a normal reading (with a build date of 11/24 BTW) and proceeded to install it. You can install the battery positive first and then attach the negative cable, but it is easier to connect the negative first, slide the battery back into place and then attach the positive cable. Well, I wasn't particularly expecting a significant spark when I attached the positive cable to the battery, but there it was. And the compressor clutch clicked on the moment the battery was reattached. OK, now the charging system has a reliable power source and the engine will start and run. I haven't done the battery reset function yet, but I read somewhere that just sitting for 8 hours the battery monitor will reset to the new battery. I may be misinformed. I think there are at least 4 different recommended procedures on YouTube to reset the battery monitor. So then I went into diagnostic mode trying to figure out what was drawing the power (still had no idea how much of a drain it was), but perhaps my 30 year old $300 Fluke meter can help me do that. I've noticed that remote entry may be misbehaving from time to time, for example the vehicle self locks on me at the gas station while I pump gas. In this scenario, the only way to unlock the driver's door (normally by touching the handle) is to open the rear passenger door first. Rolling my eyes! Refocusing on the parasitic draw issue, I noticed that if I leave the AC button on when the vehicle is shut down and parked, there is 'something' drawing power because the voltage will drop from 12.6 volts standby to as low as 12.11 volts over an 8 hour period. However, if I turn the AC off before I shut the vehicle down, standby voltage stays around 12.6 volts. And Oddly, I have two batteries I can monitor as my 'benchmark' for standby voltage, - the recently replaced DieHard that sits at 12.6 volts on the garage floor and the heavy duty 10 year old 12 volt battery in my 1978 Tbird that also registers 12.6 volts while disconnected. I could now pull the fuse on the AC compressor clutch (now that I know where it is), to see if that reduces the parasitic draw, because obviously there is something drawing power when the vehicle should be asleep. BTW, the vehicle has been sitting locked up since 8:30 last night and as of this posting it is 13 hours in sleep / standby. The AC was shut off last night before shutting the vehicle down and locking it, so I'll see what standby voltage is now and report back. I was going to replace the AC clutch relay thinking that possibly it was sticking on when the vehicle was parked but now, after reading through the original poster's story, I think this is more of a symptom than a root cause. Summary: Vehicle Mileage: 101,750 Kms or about 63,240 miles I think that whatever killed the original factory battery 3.5 years into its life may well have been the result of some 'ghost' parasitic draw from some module in the vehicle. This 'ghost' also killed the first DieHard battery two years after it was installed (and it probably didn't need replacement), and then this parasitic draw attempted to kill a second DieHard making me believe this is not a faulty battery issue at all. It would be great if a simple software update would fix this, but I am doubtful. Thoughts anyone? -
What brings this topic to mind is a recent video that surfaced on YouTube regarding a completely different engine family; - the 1.0 liter EcoBoost relative to engine coolant leaks. A search of the Ford Edge Forum today yielded a post for TSB 22-2229 for the engine in our 2016 Edge - 2.0 EcoBoost. Originally when I heard about the coolant leak issue, I believed that our vehicle was exempt, but apparently according to the TSB it is included. Coupled with the potential for the flexplate between the torque converter and the engine to crack and fail, (a potential failure that Ford has extended the warranty to 10 years from delivery date), it sounds like our Edge might be a ticking time bomb. We love the Edge and take care of it with regular maintenance and up keep. While we bought it three years new in June 2019, the interior and exterior look like the day we took delivery at 44,000 Kms. We've owned it for almost 5 years and it currently has about 88,000 Kms. Ya, I know, it hasn't really been anywhere! I'm sitting here trying to decide what, if anything we might do next, as we hadn't planned to buy a new / newer vehicle at this time. I know the two mechanics at the shop where we take the Edge could easily complete the long block coolant repair if it needed doing, and probably cheaper than our selling dealer. I think we will just ride it out and see where this journey takes us. ?♂️ Anyone have thoughts on what they might do given these two ever-present issues that haven't surfaced yet?
-
I had a similar rattle shortly after installing winter tires this year, and thought it was something inside the cabin rattling. Turned out to be the upper shock mounts on the rear shocks - more specifically the bushings in the mounts were badly worn. Ours has about 88,000 Kms on it. It sounded like a seat belt or seat was loose when it first happened, and got progressively worse. The mounts can be replaced separately, but at 50,000+ miles it was probably time for new shocks anyway. Our shop replaced both side mounts and shocks (with a 'kit' of parts) in under an hour and the noise was gone.
-
In April 2022 I broke down (couldn't live with the large crack in the reflector lens) and ordered a new light reflector panel from Tasca Ford online while dealing with some really nice people there. I could have bought it from a Ford dealer in Hamilton, ON but the price with shipping was higher than Tasca even with the currency exchange. Arrived in one piece with no external damage to the box it was shipped in, thankfully. Installed it at the end of June last year when the weather cleared up a bit and it got cool enough to work outside. (We'd had a bit of a heat wave and some rain showers too). My first thought was to seal the edges with Permatex Ultra before installing it, but my faith in a newly manufactured part not leaking got the better of me and so it got installed without any extra sealing. Well, a month later my faith in manufacturing was shattered when this new part leaked moisture predominently on the left side of the reflector. Over the winter it fogged and cleared and by spring it was swimming in water. With non-stop rain and then the cold weather setting in it wasn't the right time to pull it back off and seal it, so I left it until this week. By the time I got to pulling it back off (can probably make flat rate now!) the left rear taillight had begun to take on water too. The taillights are easy to fix, and I went around the edges with Permatex and re-installed it within an hour letting the Permatex cure over night. I'm happy to report that the left taillight, and the reflector panel are both bone dry now. Waiting for the right taillight to show signs of moisture, but right now if it ain't broken I'm not gonna touch it! Cheers!
-
Well the glass shop cleared the old glass from the hatch and taped some heavy duty clear plastic (like that used to wrap boats for winter storage) over the opening and directly to the body of the vehicle. That meant the tailgate could not be opened. Also, unfortunately they managed to partially close the hatch so that the warning light was on. Trying to push the tailgate closed was futile, it would not go on latch perhaps because something was jammed between the hatch and the body of the vehicle. I actually didn't think it was possible to close the hatch and not completely latch it. Anyway, we were waiting for the glass to come in from the warehouse the next morning. What did this do for the battery?? Read on ... Apparently the BCM would not go to sleep even though the four doors were closed and locked, waiting for someone to close the hatch. At first I couldn't get the exterior lights on the mirrors or the cabin lights to go out, but eventually they timed out after 10 minutes. But the BCM was still active. Had parked the vehicle in the driveway thinking it was locked down and secure the afternoon after going to the glass shop to file the claim and arrange for them to do some prep and re-wrap the hatch so the vehicle could be driven. The vehicle sat for about 21 hours and when I came out to start it the battery was flat (actually 12.02 volts). Not even enough power to open the door using the factory code. So now I'm about to take two 'trips' with the vehicle I've never done before, the first being "how do you get into the vehicle when the battery is dead?", and second "how to you use the key in the FOB to unlock the door?". Well, the owner's manual is a feat of stupidity, or maybe I'm just dense, because the verbiage and the pictures of how to remove the cap over the lock cylinder were not clear (considering that this is a manufacturer that used to provide some really good engineering drawings in their shop manuals in the 1960's) and given that the key had never been used in 6+ years, the cap was difficult to 'slide' off once the tip of the key was inserted underneath the cap. OK, now the door is unlocked, and my FOB is in three pieces including the special key, plus the cap that slides back over the lock cylinder but didn't click when replaced. I'm starting to shake my head in disbelief. When I decided to boost the vehicle with my multi-range charger, it was now 1:30 in the afternoon and I'm already a half hour late for my glass appointment. As soon as I connected the battery charger (first at 12 volts / 2 amps) the vehicle thought I trying to steal it (with a dead battery?!) and the horn went off and wouldn't cease. Unlocking the doors, or silencing with the FOB did nothing, BUT trying to start the vehicle in the presence of the FOB actually did silence the horn! What the vehicle had done to this point with the horn must be an engineer's inside joke I guess. Imagine trying to do this at 2AM in a residential area?? So, after reaching 12.7 volts on 'nuclear' (10 amps) for 20 minutes, the vehicle finally started and continued to complain that the hatch was partly open (yes, I know this!). Now, after two days, several starts and not much travel the standby voltage was 12.4 volts, (the battery is a 2 year old DieHard from CarQuest BTW) so I've put the charger back on nuclear for an hour or so and will switch to 2 amps for a couple of more hours. And it's now raining outside, so I must make sure I'm well grounded before I grab the AC cord to disconnect the charger and my eyes light up! (humor!). Not overly impressed with what happened but that is life in the slow lane I guess.
-
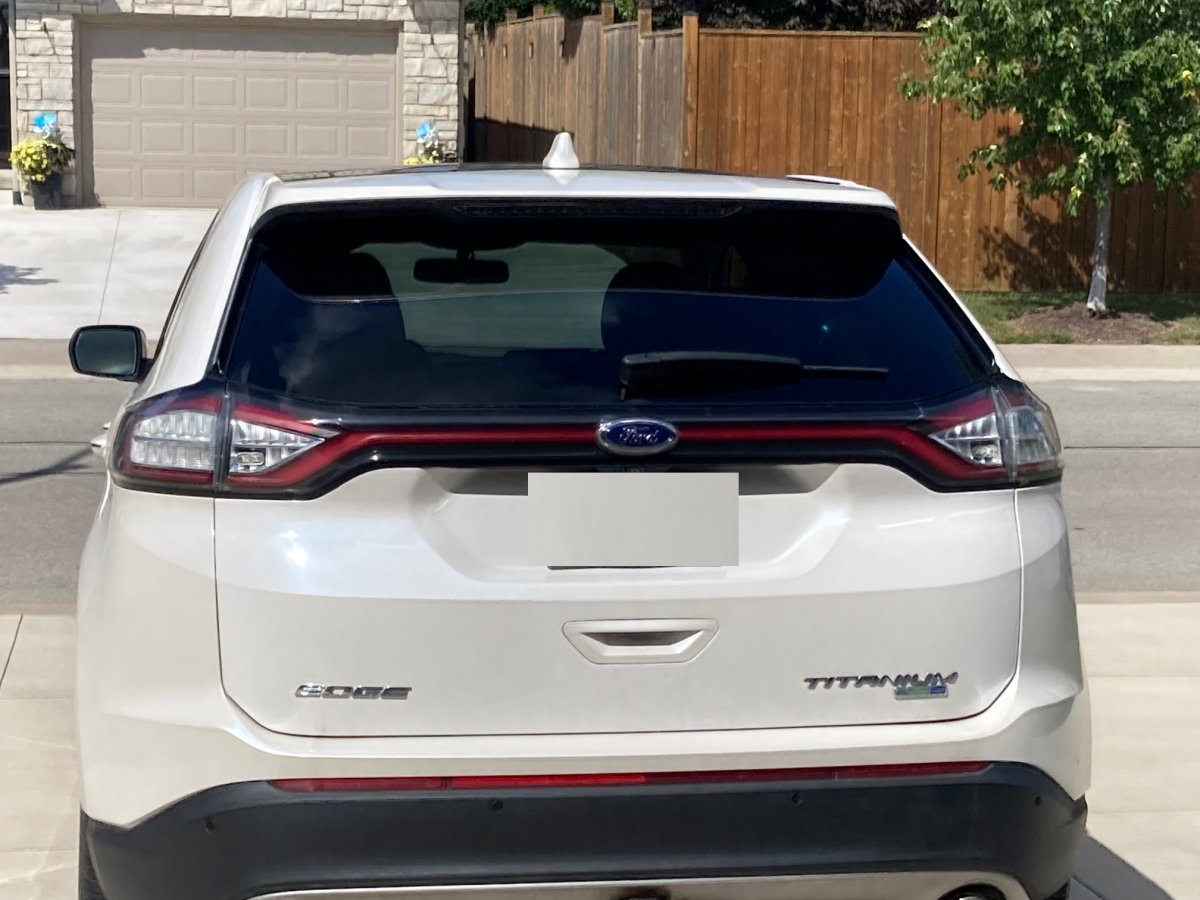
2016 Edge AWD - Titanium On my way to the mall this morning when I turned the corner and the back hatch glass exploded. Seemed to explode from the wiper motor location outward. Edge is completely original, low mileage and I don't think it ever had any work done on the hatch. Glass went opaque and started to fall in. Oddly, pieces of glass fell apart around the bottom outer edges. Was 32 F; - not severe weather. Rear defrost wasn't on or needed, so I'm not sure what caused the glass to break. Only experienced this once before with a rear window when a hot spot in the rear defroster caused the back window in my '78 Dodge to explode. On to Speedy AutoGlass tomorrow. If this is a known issue, posted and covered elsewhere in the forum I couldn't find it. The more I tried to zero in on the glass, the greater the number of search result pages were. Uuugh!
-
Was looking at the Owner's Manual for information on Time / Mileage intervals for certain maintenance to be performed, and concluded some time ago that we could line the Service Ops up, but would have to make our own interval schedule due to very low mileage driven. We bought the Edge used from a Ford Dealer with 48,400 Kms in June 2019 - with an in service date: August 2016. Vehicle was a special order as a Lease unit and it looked like a snow bird vehicle that had never been driven in Ontario's Salt / Rust Belt. We've taken really good care of it, cleaning the leather interior and applying leather conditioner, deep cleaning the carpets, vacuuming regularly, had it Krown Rust Proofed each year, and winter stored the alloy wheels fitting steel wheels and Continental snow tires. Between the two sets of rubber, we may never have to buy a new set of tires during its ownership, except that the All Season tires that came with it will need to be replaced this year due to age. I've changed oil and filter every 4 or 5 months or 3,000 miles since we bought it. The Edge has 72,600 Kms on it now, has had the coolant flushed and I'm considering taking it to the dealer for a transmission flush and fill, even though it hasn't reached the mileage interval listed for this service. In fact, a lot of the service intervals are so far out based on mileage that many of them would likely never be performed before we ever considered selling it, IF we followed the manual. But I think we are entering a 'severe service' mode since the vehicle doesn't go very far due to COVID and our driving habits as seniors. I was wondering if anyone else has created a revised maintenance schedule for low mileage vehicles like ours. Thoughts?
-
Final Chapter: After several down pours it became obvious that there was still a 'leak' somewhere in the outer lens plastic. Having bonded the new and old crack(s) with CA, I thought I was home free, but I wasn't. Sealing with CA sounds like it will work, but the CA forms crystals and therefore is somewhat porous. So, I bought a spray can of Rustoleum / Tremclad clear gloss acrylic and sprayed a small amount into the cap. Using an artist's brush I worked the acrylic into the cracks and applied 2 coats in succession. The acrylic is still curing 72 hours later, but the amount of moisture in the lens is now at an 'acceptable' level with mist forming on the inside after a heavy rain. I'll eventually sand the acrylic with 320 / 1000 / 2000 / 3000 and then apply polishing compound the way you would buff and clear headlights. Having originally drilled four holes in the ends of the lens to allow the moisture to escape, I temporarily plugged the two bottom ones and left the two top ones open. The top holes are angled downward so it is unlikely that they will admit a significant amount of water. I'm going to call this job done for now. Unless I see any further water appear, the repair is good enough for a 6 year old ( new in June 2016) vehicle. Adds some character I guess. Definitely does not warrant an $1,800 repair. Thanks to those on this forum who shared info and ideas when I needed advice. Robert?
-
And the complete answer is, there are no cracks behind the emblem. The lens is a continuous mold with a cavity for the emblem to sit in. There are two tabs at right angles to each other with push clips on them that hold the emblem in place and make it impossible to put the emblem back on upside down. They used two sided butyl rubber re-enforced tape stuck to the bottom and perimeter of the emblem that makes it really hard to remove the emblem without a plastic pry bar. (And while I used the fishing line approach to break the bond, it still held on too well). Use anything else and you mess up the lens and the emblem. I had a pry bar left over from the days when CPU's had to be pried out of the motherboard, but once I got the emblem to unseat I had to reach behind and cut the bond with a sharp knife before I could remove the emblem. The emblem is worth $65 CDN if you break it or mess it up, so take your time and wiggle it off. I don't have any two-sided tape so will re-attach the emblem with a combination of Permatex Ultra Black on the underside of the emblem to seal it against moisture and a bead of Butyl Rubber Tape around the perimeter of the emblem where it contacts the lens cavity. Will never come out!
-
Answering my own question, yes it can be ... going in to have a looksee ... ?
-
And this is the result of sealing the unit ... a small amount of moisture after two huge down pours last night and this morning. Seems centered around the 'Ford' medallion. Does anyone know if the medallion can be removed externally? I still have the 'vent holes' open in each corner to vent mist too, but the holes are drilled on an upward angle so water is less likely to find it's way in, and there isn't a ton of water in the lens either. Medallion has me wondering ...

-
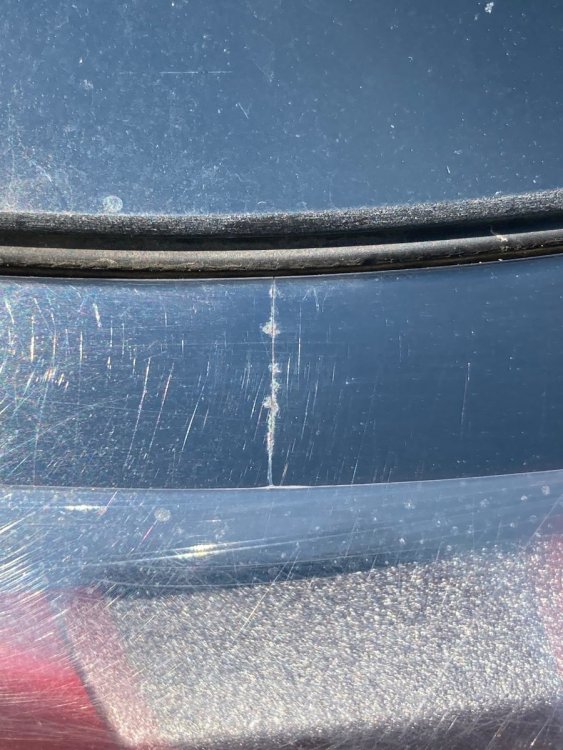
Let me be 'clear' and explain that there are two different things going on when these light bars fail and admit water. The design is two piece construction, rigidly bonded together. If the black base cracks, the crack telegraphs through to the clear lens. There is no 'give' between the black base and the lens, so if there is stress between the two, or the body of the vehicle; - something gives. In the 'olden' days we would have used butyl rubber tape (similar to what they used to set stationary window glass in the body) to join these two pieces together, but some wise acre engineer decided that cementing two pieces of dissimilar plastic together was 'the better idea'. The entire assembly is subjected to heat and cold, and the UV rays make the plastic in the lens brittle over time. Disturbing the assembly by removing it introduces even more stress. The Chrysler Journey has the same issue. This light bar appears to have been removed previously before I disassembled the hatch to remove it. In this photo you can see the original hairline crack in the right hand side of the clear lens (follow the arc of the wiper blade). If you look very closely (or take the photo into Irfanview and blow it up), the right hand side of the 'finished' photo shows that the crack has grown to about three inches; - and that happened as the assembly lay cooling on my garage floor. Between the 'Ford' medallion and this first crack mentioned, two more appeared on the top edge while I was sealing the unit and I was not rough with it; - it laid on a moving blanket the entire time I worked on it. This was my experience; - your mileage may vary however.

-
Hi, This is one of those, 'If my wife had told me 4 months ago' I could have fixed it stories. After fixing the Tail Lamp Assembly on the hatch of our '16 Ford Edge this weekend I discovered that the 'hands free assist' to open the hatch no longer worked. I knew it had nothing to do with the work I had just performed and with my wife standing there I said, 'Gee that's odd, the hands free assist isn't working'. My wife said, 'Ya, it hasn't been working for me for months so I switched to the release in the outer handle'. ? Perplexed, I hunted around under the rear bumper, but was unable to find the 'sensor' that caused the hatch to open when your foot waved in and out under the rear bumper. Wouldn't work on either side of the rear bumper. Then I noticed this small rectangular connector box next to the hitch receiver and I pulled the cap off. Green crustys and puss greeted me. Got some CLR and cleansed the area followed by some electronics parts cleaner to flush and dry it out. Once satisfied that the trailer 4-wire plug was cleaned up, I put some silicone grease (NOT DIALECTRIC GREASE) on the 3 female pins and the one male pin and replaced the cap. Waved my foot under the bumper and the hatch happily opened. Success, but why?? Does having a trailer wired to the Edge disable the hands free feature, or was there simply a short through that copper oxide goo that prevented the sensor from opening the hatch? Can somebody please explain the 'Connection'??