mpsrent
-
Posts
12 -
Joined
-
Last visited
-
Days Won
1
About mpsrent
mpsrent's Achievements
")
Newbie (1/14)
-
 Rare
Rare
-
 Rare
Rare
-
 Rare
Rare
Recent Badges
-
Based information from a Google search, I fixed my switch by spraying a generous amount of electrical contact cleaner in the door latch. I had two bad switches which were fixed instantly. Six months later, still working. No need to replace the switches.
-
Hello all, I'm replacing the rear hub and bearing on my 2011 AWD 3.5 Edge due to a broken stud and I'd appreciate any guidance regarding the axle nut torque. What I've been able to locate so far is 258 ft lbs, however I would appreciate confirmation that this is correct from anyone with a service manual. Thanks for the help.
-
"11 Edge AWD rear rotor replacement help request
mpsrent replied to mpsrent's topic in Brakes, Chassis & Suspension
From what I can observe without taking off the caliper, the pistons appear to be the screw style that you retract into the housing using the pin tool. As I don't have an urgent need to change my pads, once I locate my caliper piston tool I'll pull the caliper off for a look. -
"11 Edge AWD rear rotor replacement help request
mpsrent replied to mpsrent's topic in Brakes, Chassis & Suspension
I've determined that the part I described as a sensor is actually a brake caliper vibration damper. The lower caliper bolt has a double stud, one to go into the caliper bracket and the second to go into the damper. Thus I believe it is safe to remove the lower bolt/damper as one unit. This leaves me with my question regarding the parking brake. Is it internal to the rotor or tied to the caliper piston? Thanks -
2011 Ford Edge SEL AWD 3.5L I apologize in advance if there is a quick "how to" guide to replace rear brake pads and rotors on a 2011 AWD however after much searching I'm unable to find anything. As this is a unique caliper setup I'd appreciate any words of wisdom or links from anyone with experience. While the top caliper bolt is normal, the lower caliper bolt has some sort of a sensor attached to the end of the caliper pin bolt. I didn't want to attempt to remove the bolt until I was certain I was doing the correct thing. How do you remove this bolt? Once you remove the caliper, is the 2011 setup with an internal brake shoe within the rotor or is this a screw in piston? Any assistance or link to a manual would be appreciated. Thanks in advance.
-
2011 2nd run had modified (read - smaller) mirrors.
-
Okay, so now that we have the emotion removed from this thread, you appear to have a real issue with one specific dealer. There is no sense in blaming every Ford dealer. I suggest you have 3 options: 1. Write a calm letter to the dealer principal. 2. Try another dealer. 3. Write a calm letter to Ford. In each case, focus on detailing your concern with the vehicle. P.S. I don't mind Brits. My wife is one.
-
2011 Edge trailer hitch & wiring installation tips
mpsrent replied to mpsrent's topic in Cargo, Hauling, Roof Racks & Towing
Thanks! I haul an enclosed snowmobile trailer. It is about 12' long and 8' high. In total the trailer and snowmobiles have a combined weight of 1,600 lbs. Weight isn't really a concern, its the frontal area of the trailer lid which in this case is acceptable. I only use the trailer a few times a year and my old '04 GMC Envoy handled it quite well. -
My dealer told me that there is a part shortage issue pertaining to AWD vehicles and some form of electronic module. The parts source is in Japan and was affected by the tsunamis. Apparentlly dealers have a much higher percentage for FWD Edges in stock than normal.
-
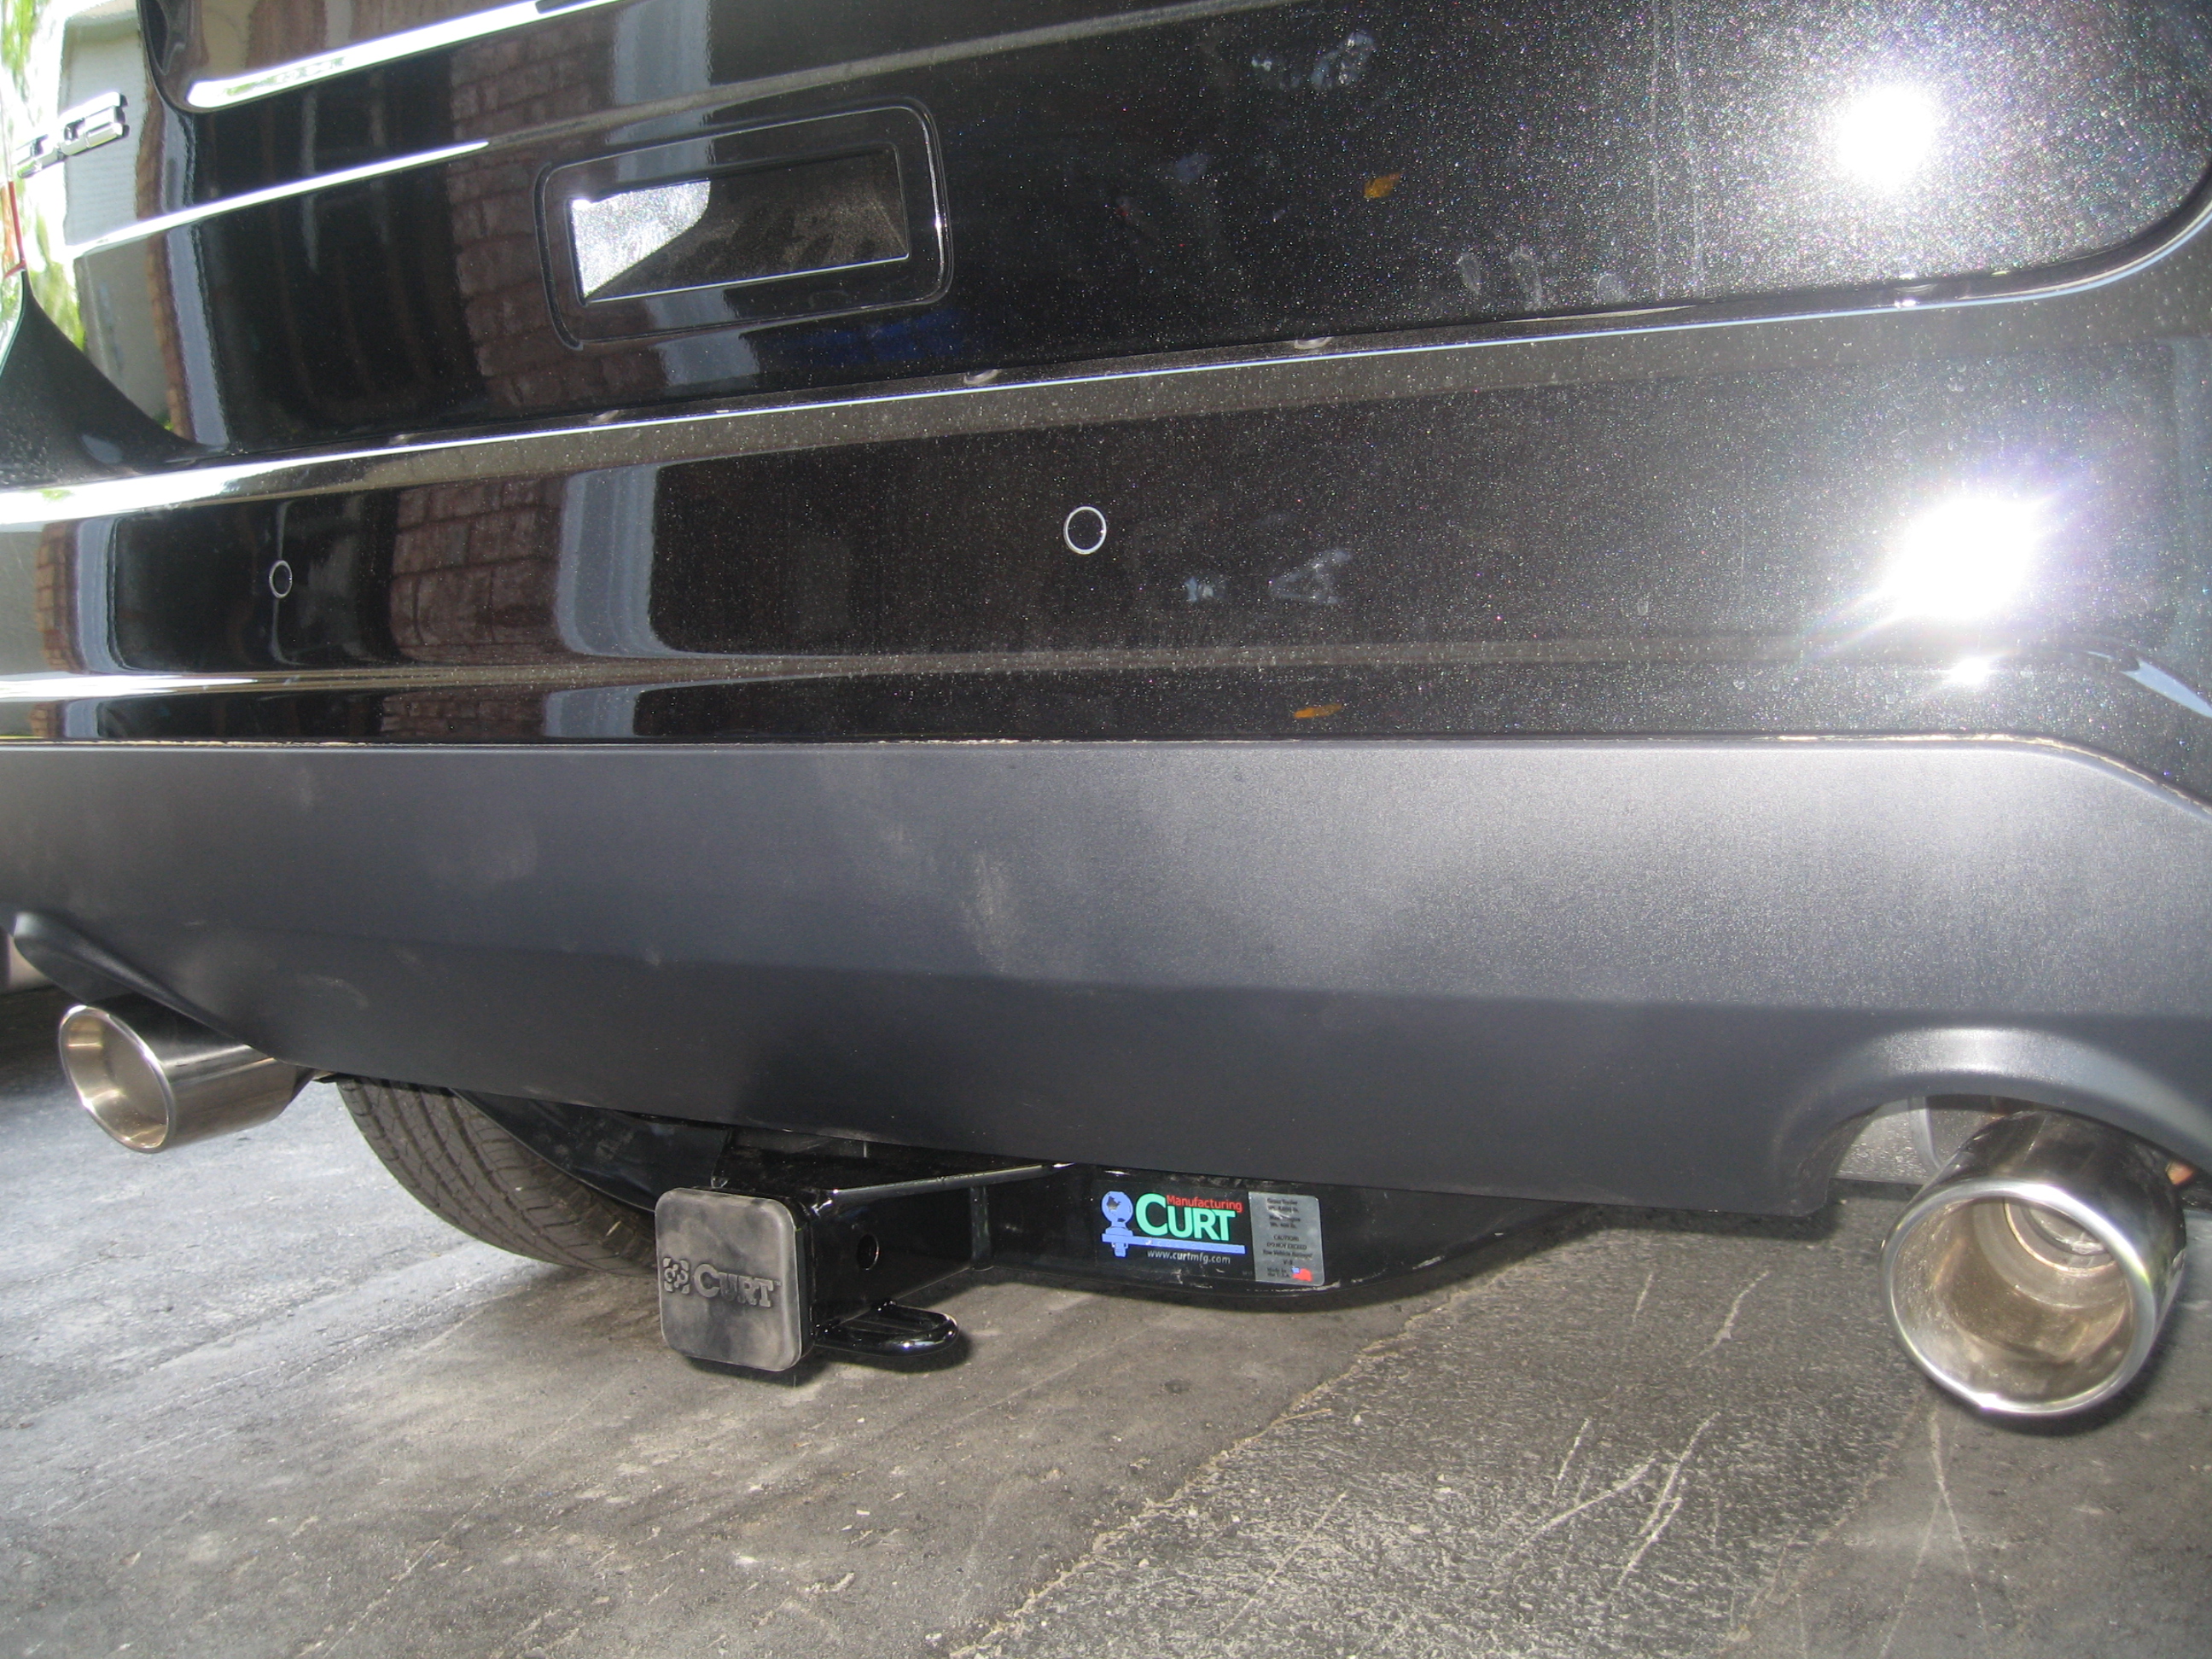
Hello All, I just installed a new after market trailer hitch and wiring on my 2011 Edge SEL AWD and I thought I would share some tips that may be helpful to someone else. I choose the Curt Class III 2" receviever hitch from hitchdepotusa #13067 and the wiring kit #56120. Hitch Deport has competitive pricing with no charge for delivery in the USA and Canada. Service was excellent, less than 24 hours and I live in Canada. I'mm not sure how they did it so fast. All parts appear to be of very good quality. The instructions that came with the hitch are quite good but a few steps could be expanded on. Hitch Tips 1. Using mechanics wire (or similar) I created a loop of wire about 2" lower than the front rubber exhaust hanger to support the exhaust while I installed the hitch. The metal exhaust bracket actually fits quite tight into the rubber hanger so spray a little silicone or something similar on the end of the metal post to help you as your force the metal post out of the rubber hangers. 2. To fish the bolt and backing support plates, first run you fish wire from the hole you wish to install the bolt/plate. Fish the wire with the coiled section first into the hole and fish the wire to the rear of the vehicle until you feel it exit the frame rail. The opening at the end of the rail is rather small so you may need to move your fingers around to locate the coiled section of the fish wire. 3. The opening at the end of the frame rail (really a uni body rail, not frame) is small with one side larger than the other. Use the large side to install the bolt/plate. 4. Place the support plate over the coiled section of the fish wire and then thread the bolt into the coil. 5. Push the support plate in the larger side of the frame rail and pull it into position by pulling on the end of the fish wire. The bolt will follow and with a little bit of wiggling it will fall through the hole. 6. Once you have the 4 bolts in place, install the hitch for use as a template for the last two bolts which need their bolt holes drilled. 7. The instructions call for the 17/32 drill bit, but the more common 1/2 bit works well. The hole must be large enough for the bolts to fall through. 8. Tighten everything up and you are done, it's that easy! Wiring Tips 1. Follow the instructions to remove the tailights and spare tire cover and trays. When you remove the two taillight bolts you need to wiggle the light housing for the two clips to release. Don't force or pry the housing, just wiggle it being careful not to touch the paint. It will come out even if it feels you are getting nowhere. 2. Using side cutters or shears cut the rubber wiring boot the you removed so the the wire harness can be installed through the boot. The gap closes up once you reinstall the boot into the metal housing. Though you don't need it, I put a small amount of silicone over the crack (a bit anal about leaks). 3. Using the two way tape, I mounted the module on a flat surface inside the left rear quarter panel and screwed the ground screw (after drilling a small pilot hole) on the same panel. 4. Using the fish wire from the hitch kit, I fished the green right tailight wire through the rear channel. I cut the boot on the right side as I did on the left. 5. While the instructions suggest that you run the power wire under the vehicle, I drive in a snowy winter environment so I prefer that wiring stay dry and protected. I ran the wire up the left side of the vehicle under the side panels and sills being careful to ensure that the wire was not subject to any pinch points. It was a fast and easy install. 6. Using an old metal coat hanger, I punched a small hole for my wire through the main power boot in the firewall and ran the wire to the battery. I silicone sealed my connectors and wrapped them in electrical tape (again, a bit anal). Aftermarket hitch installed! As long as you follow the instructions and have the tools in place, it's a relatively fast job, especially if you follow a few of these tips. A photo of the completed project is attached. Few other tips: * I purchased a crome mount bar and ball as I have found that over time the powder coat paint wears off and rusts. Chrome is a little more money to buy but something to consider. I got the 2" drop 3/4" rise mount and installed the ball with the 3/4 rise side to maintain a flat mount with my trailer. *All Edges have a tranny cooler. The factory option gives you a larger cooler and larger cooling fins. As I only trailer in winter months (snowmobiles) and my entire load wieghs only 1,600lbs, I don't have any concerns. Good luck and I hope these tips are useful to someone. Now if anyone has any suggestions about trailer mirrors, I'd appreciate it. The MY2011 Job2 mirrors are a bit small and aero shapped for my old extension mirrors to fit.
-
Hello All, After months of lurking on this site and consideration and test drives of a number of different vehicles, last night I took delivery of a new 2011 Edge SEL AWD. While I started by looking at a relatively base SEL model, in the end I choose a well loaded version with sunroof, sat/nav, leather, MY Touch, chrome wheels etc. Quite a change from my trusty 2004 GMC Envoy that was somewhat dated but certainly served us well. I can tell you that it is a pleasure having to get use to a smoother ride. :D Thank you to all Edge Forum posters as your wealth of information helped me with my decision. I hope that in time I will be able to assist others. Paul - mpsrent
- 1 reply
-
- 1
-

-
Where is the Edge built? What Plant/State?
mpsrent replied to drober30's topic in Buying, Leasing & Ordering
Oakville, Ontario Canada