
Lex Talionis
-
Posts
2,070 -
Joined
-
Last visited
-
Days Won
8
Content Type
Profiles
Forums
Gallery
Everything posted by Lex Talionis
-
very cool.. I would have assumed you would have just done like a 9424412 or something, but you changed it up totally. interesting. any reason why you just did not cut out what you had and put back right where you had it? did you learn/were told something about why doing it as you did it would be better than the rear muffler with dual exhaust out? how about that sound? you made no mention of the actual sound difference you noticed? I am very curious about this: louder, perfect, obnoxious, no chnage did it still just cost you $350 in the end? FYI, cooler engine temps are not always ideal. For example, in a Chevy 350 I have in my truck, they are spec'd and are known to perform ideally when the temp is around 190-200, going below that hinders actual performance. The dyno results show some interesting numbers for you. I wonder if the transmission has to adjust for this new reaching of RPMs faster than before in its shifting points?
-
HIDs rock and all LEDs also rock and I agree 100% - very much worth their money and time to install. especially all the LEDs on the inside of the car.
-
in a 2008 at least, that is already a LED system. so no need.
-
Sweet! thats what I am talking about. please do, it would help to have both. :hyper: BTW, why did you pick that model versus some of their others?
-
so what part # when I said tips, my 2008 has nice tips - I know some years/models do not, so I assume if they put back the exhaust outlets, and they have tips on them, they put them back. Sounds like that is what they do and if you had tips, they put them back on as they just reuse your 2 exhaust out pipes. report back about the sound. I would be very curious how you personally think it compares to the actual sound clip they reference?
-
what part # from that link did you get? I assume something from 3rd column, but which part #? That is a lot less than the Gibson setup, so I assume it is muffler only - also looking at the link it shows only mufflers. so, it is just the muffler, no tubing and they will cut out your muffler, weld to your existing in pipe, and weld back your 2 exhaust out pipes (with tips) back on to the new muffler?
-
Looking for X-Plan Rules / Guidelines
Lex Talionis replied to cmoses's topic in Buying, Leasing & Ordering
just relative to this portion of your question.. at the time I used my X Plan I also qualified for, and used, 3 different cash rebates: Presidents Day, Ford Cash Back, Conquest Cash I did pay cash for my car so did not get into the financing... so my point is more that you can combine rebates and X Plan I was not under the impression that financing had anything to do with being able to use rebates AND X Plan at same time, but that financing plays more of a roll in WHAT rebates you can get (i.e., cash back or good APR but not both). BTW, this page http://www.fordvehicles.com/incentives/offers/ is pretty good about showing what Ford rebates/offers are happening now in your area and the caveats and requirements for each - also remember that your local dealer may have other rebates happening that are not listed there (Conquest Cash or a holiday sale) so ask about those as well. -
so wait.. your saying you got the map lights changed and they come on when the door opens, but they do not come on when you push the button? If so, I wonder if these stems from your install. You did WAY more to install these than I did. I never removed the frosted trim piece, just pulled it down slow and easy. I never removed the aluminum pieces around the bulb. Not even sure why that was needed or why you did that? but it might be because of your extras steps that your push buttons may not trigger the map lights - if I follow your issue. I suspect that when you took all that down and put it back, the push buttons - clear plastic lens - is simply not triggering and hitting the on/off switch up where it use to. So, the bulbs still get power and so they come on when the doors open, but cannot be triggered when you push the buttons as the buttons are not lining up as they did and trigging the switch. Might have jostled more around when you took all of that off, or not lined it back up perfect. As I said, I never took any of that stuff off. Yes, they are a PITA I agree.
-
Looking for X-Plan Rules / Guidelines
Lex Talionis replied to cmoses's topic in Buying, Leasing & Ordering
www.blueovalforums.com is by far the best place to get the answers to this question. It gets minimal play here, but is a key topic there. As I recall it, it was not really spelled out in any 1 place all together packaged as one FAQ like one may want it, it was more spread out across reading many posts/threads on the topic that you get the sense and details of X Plan usage. I got all the answers I needed by just browsing the www.blueovalforums.com posts on X Plans and kind of gleaned what was key to know. -
it has only been up a few days since your request.. I think mine took several days to have someone finally provide. You might try to be more proactive and find someone offering to give them. IIRC, as it has been a bit since I did the X Plan from Blue Oval, I also remember reading posts of people saying they have them and just PM them to arrange. Did you try that option and see if someone is offering if you contact them?
-
Gibson Cat-Back Exhaust
Lex Talionis replied to 818EDGE's topic in Interior, A.C., Heat, Interior Trim
I see only a listing for 2007 at this time (G27619630) but no 2008. I suspect that will change at some point. Any real world notice of HP changes right off the bat? Were you able to keep and use your tips? Listen to the stock FX 35 sound clip on this website does yours sound like that? -
great.. break yours and then when you regret it, I can sell you mine
-
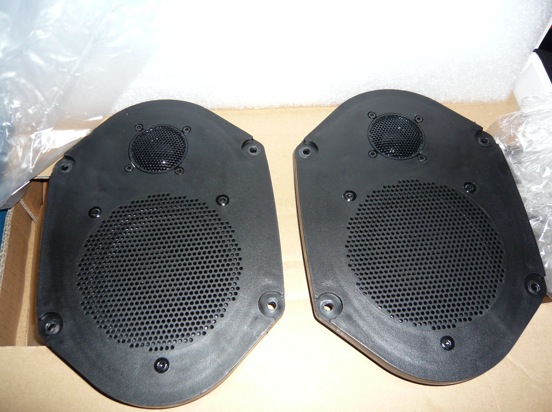
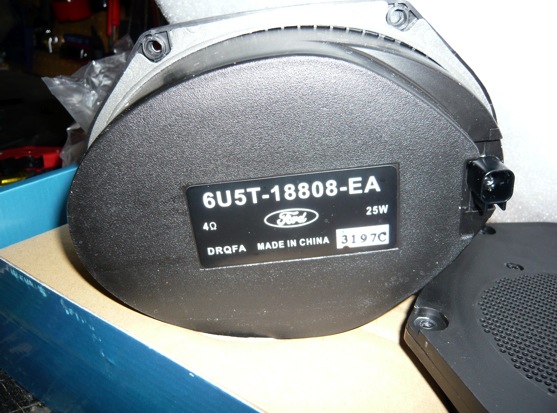
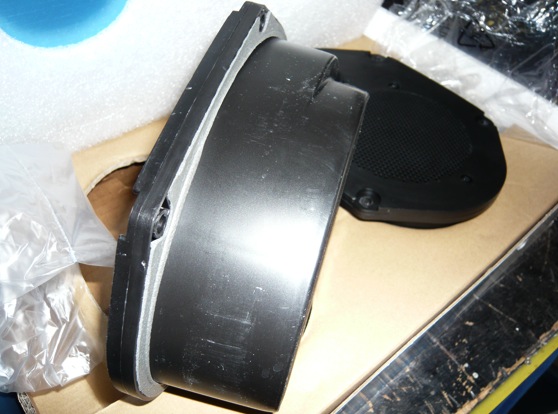
UPDATE: SOLD SOLD SOLD Looking to unload my barely used OEM Ford speakers from the Audiophile sound system. I had them a few weeks before upgrading to new higher end speakers. I know selling them is a long shot, but I figured maybe someone might blow a set or want the OEM so I would just post up and leave the post and maybe over time.. someone will find use for them :unsure: anyway... PM me an offer if they are ever of interest to you - maybe we can work something out. they are just sitting around sealed up in a box right now and I hate having unused stuff sitting around. I called Ford to get a value idea on these and they said since they came out of the Audiophile sound system they are better speakers, upgrades, than those from the NOT Audiophile sound system.
-
I need to chime in here... For as much as I love my white sand tri coat Edge, I have to admit that as I spend more time with it and cleaning it and seeing every surface of it as I clean it in various light conditions, it really has one of the lowest quality paint jobs I have seen or had on a car. I can point out dozens of small and slight imperfections: bumps, what looks like dust/dirt particles under paint, thin paint in areas (like under edge of wheel wells), contamination, rough bumpy spots (like around the headlights), and then some just imperfections I can't name that look like tiny tiny splatters of another paint color. I would consider the paint and quality of paint job my biggest actual gripe about this car. oh yeah... and I paid extra for this color/paint job to boot <_<
-
LED Puddle Lamps! Home Made!
Lex Talionis replied to Lex Talionis's topic in Interior, A.C., Heat, Interior Trim
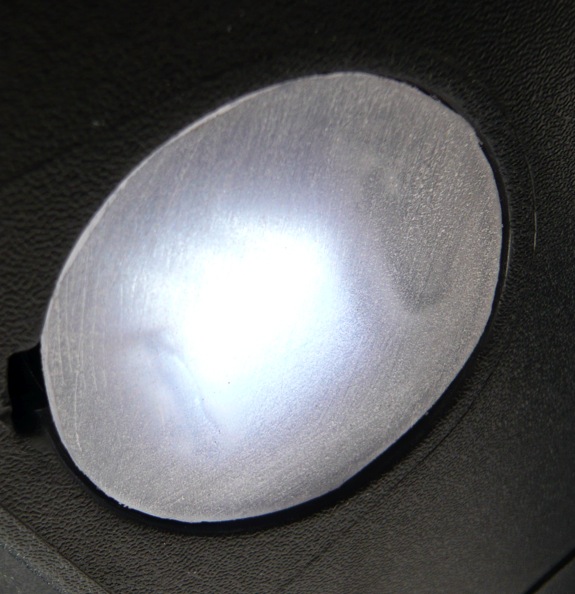
it 'might' have been, but I did not check. There was no way I would have left it, even if it was a tad brighter, as I would not want to be able to look into the reflector and see the bulb, wires, etc. If I were a betting man, I think the extra 'possible' brightness would have been negligible. But hey, the were cheap to make so I could make some clear ones also. I can tell you, they are pretty bright. They still do the job just fine. I only tested last night outside my home, but they still seem perfect bright and you can see the ground just as with the dingy incandescents. When I went out to test last night, I tested like it would be real world. I stood back and unlocked the car as I was walking up and I did not 'feel' in my gut any less brightness. I felt no discernible differences that was like "wow, that does not work or is less light or does not do the job", other than it looks really kick ass. A better test will be to go to a totally dark pitch black area and see what they are like with no ambient light from house lights or street lights. I suspect the result will still be perfect as we know the LEDs put out a cleaner, brighter and more light all things being equal. Also, I need to drive it around and see just how stable they are - do they shift, come loose, etc. they could fail at that stage.. not sure yet. the interesting thing about these LEDs is that since they are 1 sided, LEDs on only 1 side, nothing on back side, no real need for a metal reflector behind them as no light from back there to bounce down. I do wonder if that plays a role in brightness as I wonder when using an incandescent that puts light out all directions, the metal reflector behind the bulb shots stray light back down in addition to the light already aiming down? not sure. but again, the resulting look an feel is as important to me as the actual light output, and since I 'feel" no difference, the goal was achieved. I suppose if it looked cool but put out like no light, light that did not even hit the ground, I might call it a failure and go back. -
Home Made LED Puddle Lamps - viola.. proof of working concep
Lex Talionis posted a gallery image in Member Photo Albums

From the album: Lex's SoCal Limited: white sand tri coat + black guts
-
Home Made LED Puddle Lamps - over view of parts/idea
Lex Talionis posted a gallery image in Member Photo Albums

From the album: Lex's SoCal Limited: white sand tri coat + black guts
-
Home Made LED Puddle Lamps - making of positioning bracket
Lex Talionis posted a gallery image in Member Photo Albums

From the album: Lex's SoCal Limited: white sand tri coat + black guts
-
Home Made LED Puddle Lamps - test fit mock up
Lex Talionis posted a gallery image in Member Photo Albums

From the album: Lex's SoCal Limited: white sand tri coat + black guts
-
Home Made LED Puddle Lamps - mock-up of idea
Lex Talionis posted a gallery image in Member Photo Albums

From the album: Lex's SoCal Limited: white sand tri coat + black guts
-
Home Made LED Puddle Lamps - making the reflector 2
Lex Talionis posted a gallery image in Member Photo Albums

From the album: Lex's SoCal Limited: white sand tri coat + black guts
-
Home Made LED Puddle Lamps - making the reflector 1
Lex Talionis posted a gallery image in Member Photo Albums

From the album: Lex's SoCal Limited: white sand tri coat + black guts
-
no part numbers to give, they do not work that way. I gave photos, specifications, and exact product names above from the ebay dealer - not sure what more I could possibly add or do to make it any easier than I did. and as for the puddle lamps.. no, they are sealed units and cannot have their bulbs changed.... BUT I am about to blow your minds with what I DID do.... which I am willing to bet, for a fact, is a 1 of a kind mod never done on an Edge and I bet no one else has it and you will be the first to see it here
-
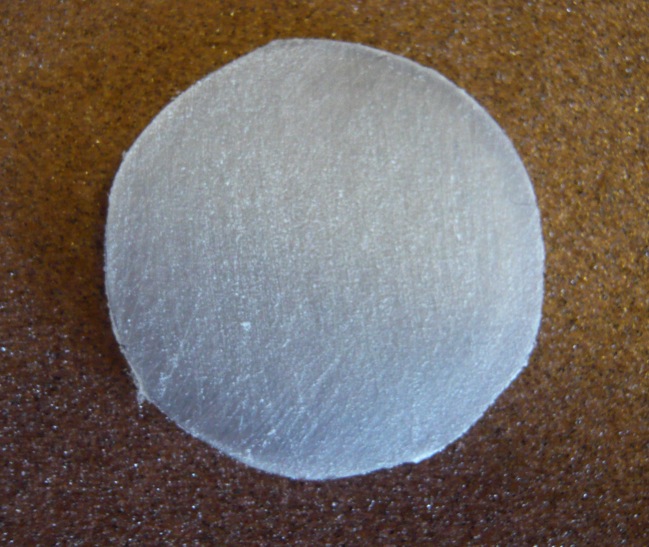
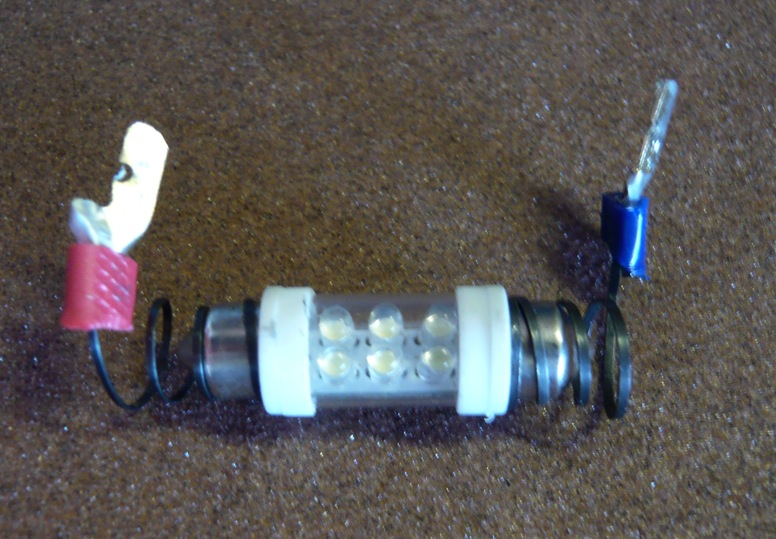
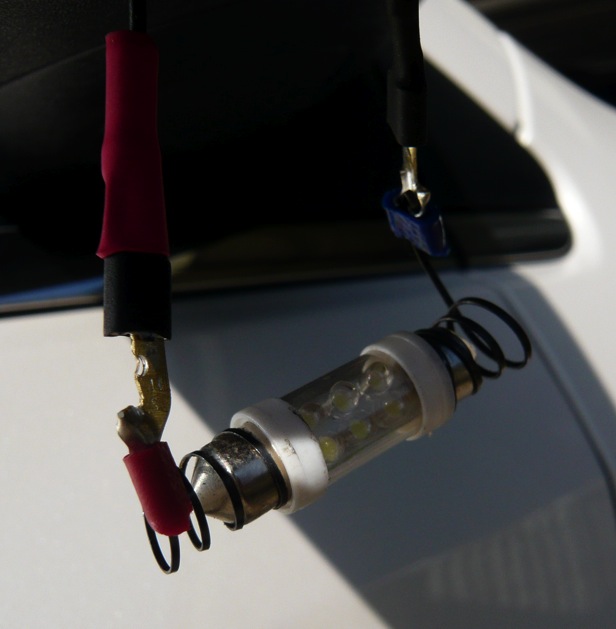
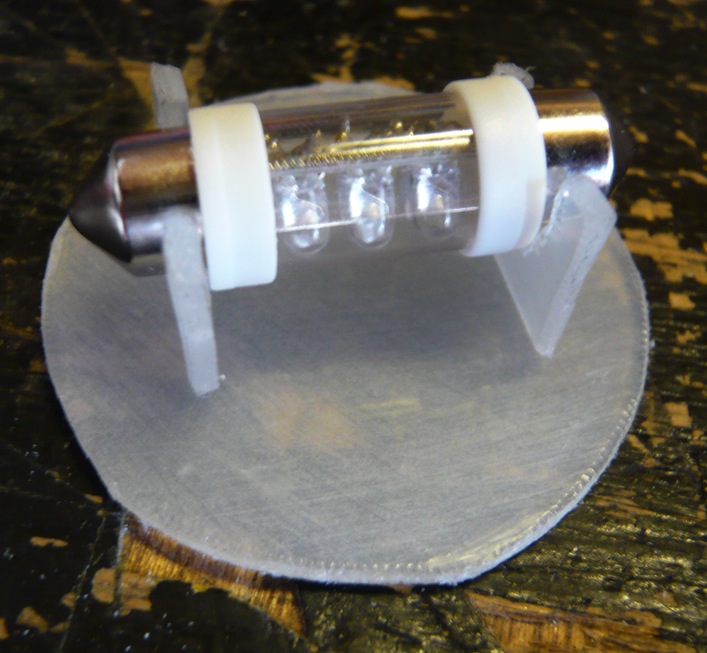
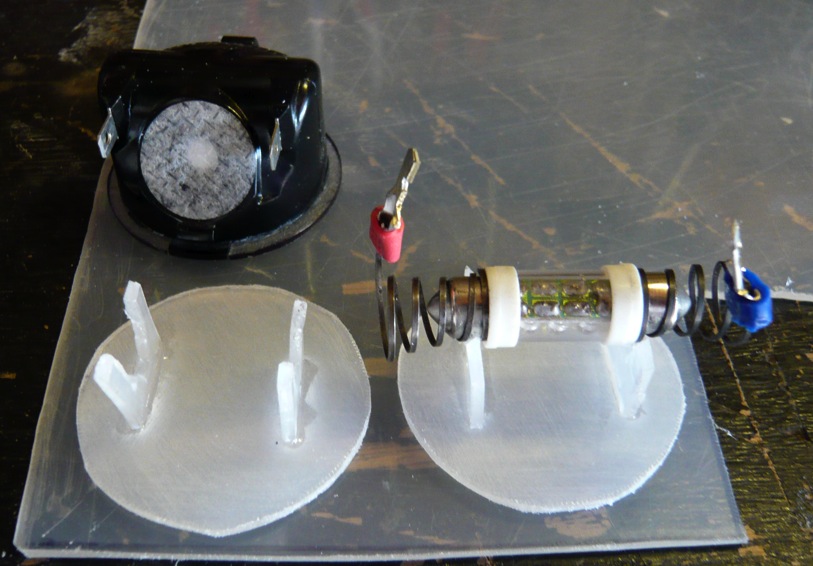
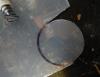
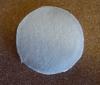
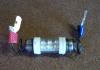
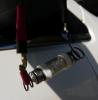
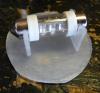
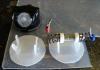
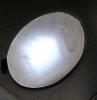
(add disclaimers, risks and caveats here about what damage you could do or warranties you could void by modifying your puddle lamps) What you are about to see, I am willing to bet has NEVER been done before on an Edge. Some of you may think it a total hack job, and well, it kind of is. But it works, is simple, and I did it all with household items I had in my garage (except for the LED bulbs of course) and it 100% worked and kicks ass. Yep, I made my very own, 100% from scratch, puddle lamps WITH LED bulbs. I made them on the fly - literally - as the ideas came to me on how to pull it off.. and this is what I ended up with. I did this because (1) I could not stand the fact every other bulb I did was a nice clean super white LED (see other LED thread), except for the dingy yellow puddle lamps and those could not have their bulbs changed as they are a sealed unit and (2) I was not willing to pay $50-60 for just 1 Ford sealed puddle lamp to try to rip it apart and test my theory and (3) I wanted to see if I could do it. So, I did it. The pictures tell the story.. The pseudo reflectors are pieces of clear heavy plastic cut from a clear 30 gallon storage bin (yep, right from Target). I then sanded it down so you could not see thru it anymore and not see into the bulb/mirror. You will see in the photos the cutting of the clear reflectors and then them sanded over and no longer see thru. The springs that hold the bulbs are from the quick release skewers off a bike wheel. Yep, PERFECT idea as they expand and contract and hold the bulb snug, can be easily opened and the bulb changed, and as critical as anything they conduct electricity. The male ends that plug into the existing electrical female plugs I had in my electrical kit from working on my other truck. I just modified them (cut and grind down) to fit the exact size on the female Ford harness plugs that hang free when the factory bulb is removed. I made sure to use red and blue so I could distinguish power and ground once I determined that from the Ford harness as LED bulbs have + and - poles and so that matters. I even marked the Ford harness - you will see a photo - with red shrink wrap to forever note the power wire of the 2 hanging harness wires. And, the little bracket/stand that attaches to the bulb to keep the bulb from moving around in the mirror and kept in 1 place is made of the same left over plastic as I made the reflectors from, then simply super glued to the home made reflector. Finally, it all simply press fits into place (as I left the reflectors a little to big) and is held by pressure BUT I ended up putting black RTV silicon seal all around the lip of the reflector to better hold them in for sure, it blends in with the black plastic, and keep the elements out - like water. Viola!!! enjoy!! they look so aweome with all the other complimentary internal LED lights, license plate LEDs and the HID lights I did. :hyper: creating the reflector reflector done quick mock-up of idea to hold the bulb and tie into the factory harness quick test fit of the mock-up to see if it would fit/work/establish which was power (red) and ground (blue) wires start of making the holding bracket to keep bulb placed correctly over reflector and in the mirror over view of all the pieces and the actual Ford closed unit the final installed working product - Proof of concept!
-
as for my post above #27, I followed through on that exact order and they turned out AWESOME I now have clean LED lights in all internal spots in my car: 2 front maps, 3 rear dome/map, 1 rear cargo.. when they light up at night it is killer looking. nice clean bright white bulbs make the car feel 100% different and so much more classy feeling. no joke. it is dramatic, to me, to go from dingy yellow to super bright white. wow... looks fantastic. and even looks cool from the outside as you walk up. here are some tips. As I said above, getting the exact correct bulbs was a no go, so it was a matter of measuring and getting closest you could. I had to do some minor tweaks and improvise here and there, but nothing major. In the end, I had all the bulbs in in about 15 minutes.. it is during install that I determined these tips. TIP 1: removing the front 2 map bulbs in a really. cant pry down the white plastic trim piece fare enough to comfortably get your fingers in there to even get a grab on those slippery bulbs. that took me the most time and in the end I used a pair of forceps to get up into there and grab those bulbs. the whole time there seems a risk to breaking that piece, but I got lucky. go slow. TIP 2: as I said above, LED bulbs seems to have a + and - pole, so if you put them in and they do not come on, turn them around. TIP 3: on the rear cargo bulb and map/dome...from the place I ordered all my bulbs, I had to pick and choose the correct length of bulb as seen above. 1 thing I failed to take into account is that the festoon bulbs they sell taper to a point on each end, versus our festoon bulbs that are flat on each end. so, when I measured, I measured correct and all is well, until I got the bulbs and realized that because of the taper, they do not totally 100% fit perfect because the surface area lost by the taper would actually touch and have more contact if they were not tapered ends. in the end, you just have to center them such that 1 side of the internal bulb clamp makes a solid grip on the bulb end while the other side will just barely come into contact with the clamp completing the circuit and viola.. point is, a 39mm would have fit better, but in super white 6-led they had no 39mm, just 36. TIP 4: on the rear cargo bulb and map/dome...you will need to use your fingers to squeeze the bulb holding clamps a bit tighter to hold firm. I believe stock are 11mm in diameter and what I got was 10mm, so just squeeze the clamps to hold them firm.