Ecoboosted
-
Posts
10 -
Joined
-
Last visited
About Ecoboosted
Ecoboosted's Achievements
")
Newbie (1/14)
-
 Rare
Rare
-
 Rare
Rare
-
 Rare
Rare
-
 Rare
Rare
-
 Rare
Rare
Recent Badges
-
Forscan to enable tow lights
Ecoboosted replied to mr_jason's topic in Cargo, Hauling, Roof Racks & Towing
Just installed the factory hitch, wiring, and module on my 2022 Titanium. All the part numbers are still the same. I had power to the brown/red wire already, so it was plug and play. I'm not concerned about trailer sway so I'm not going to activate it. I bought the wiring manual before I got started (I also have one for my 2015 titanium) and I can confirm that the wire runs down the passenger side, through the firewall, and directly to the under hood fuse panel from 2015-2022. On the post about the wire behind the OBD connector- that may be MKX specific so beware. -
2015-2018 Ford Edge 2019 conversion
Ecoboosted replied to colinc755's topic in Accessories & Modifications
Any progress on this one? I have a 2015 that just got rear ended and I would love to know if I can refresh the front and rear while it's being repaired. -
2015+ Brake booster replacement- SSM 45857
Ecoboosted posted a topic in Brakes, Chassis & Suspension
I finally got around to replacing my booster regarding SSM 45857- touchy or over sensitive brakes. I was in a hurry so I didn't take any pictures, but I couldn't find anything on the internet to help so I figured I would document what I remember: Disconnect battery (+) terminal, 10mm Remove airbox cover and air filter, 7mm clamp on the intake hose, electrical connector at the front. Remove air box, 7mm bolts at radiator support, the box is held in on the bottom by rubber grommets so it "pops" out Loosen battery hold down (8mm) slide battery forward and disconnect (-) cable, 10mm Remove battery Remove battery tray, 8mm bolt towards the firewall in the center, and another towards the front on the driver's fender side of the box. The other 8mm bolts that look the same are there for the battery hold down and do not need to be removed. This is where a picture would really help, but if you leave the hold down bracket attached you can remove all of the bolts and not lose the bracket. Remove the battery tray support, 13mm- one nut and one bolt Pull out the vacuum line from the booster, remove all electrical connections (one at the master cylinder and one on the bottom of the booster.) Inside at the brake pedal remove the pin that holds the booster arm to the brake arm, use needle nose pliers to pinch the plastic retainer and at the same time pry the pin out. I used a metal trim removal tool (forked end) to pry with. The upper left nut holding the booster on is the most challenging to get to so I removed it first. I used 2 swivel joints and a deep 13mm with a 6" extension to turn it out. The other booster nuts are right in front of you. You can fully remove the nuts at this time Back in the engine bay: break the 2 brake lines loose at the ABS block to the right of the master cylinder- these require a 15mm crows foot. 8 bucks for a whole set at Harbor Freight. Be ready to lose some fluid, I had rags all around it to keep it clean, then immediately put a ziplock bag over both lines and zipped it tight. Remove the booster and master cylinder as 1 unit. Try to keep the open brake lines at the highest point to minimize fluid loss. With the booster/ master cylinder out, remove the master cylinder (it still has the 2 lines attached to it that hooked up to the ABS block), 13mm Remove the sensor at the bottom (it won't come out with the lines still there, so you have to remove and install it with the master cylinder removed from the booster.) It's tight, it just prys out. Install the sensor onto the new booster. Replace the o-ring on the master cylinder. Attach the master cylinder to the new booster. Replace the gasket for the firewall. Slide the new unit into the engine bay, line up all the bolts and slide it into the firewall- don't push it all the way in yet. There might be enough range of motion in the pedal that you can line it up with the booster all the way in, I just did it this way to make sure I didn't have to pull it back out or misalign the booster arm. At the brake pedal, make sure that the booster arm lines up with the brake arm. I rested a ratchet on the brake pedal to hold it down with the booster arm in the correct place, then slid the booster all the way into the firewall. Insert the pin to the brake arm I started the nuts inside, but did not tighten them at all so that the booster could still move around In the engine bay, get both the brake lines started into the ABS block. Be careful not to cross thread them. There are flexible sections in the lines, but it was still good to be able to move the booster around to get the lines to start easily. Tighten the brake lines Tighten the booster bolts inside Have someone pump the brakes and bleed the lines at the ABS block- only bleed the lines that were removed. Replace the vacuum line at the booster, it's tight. Replace electrical connectors. Replace battery tray support, battery tray, air box and hook up battery. Run ABS brake bleed service routine Bleed all lines. Enjoy! The booster comes with the o-ring and new nuts for the master cylinder, and the firewall gasket. I may have forgotten a small thing or two (like where some wiring is attached to the battery tray and air box that have to be pryed out) but I think this covers all the main stuff. MC-10081005-7690.pdf -
Mine is a 2015, I think the 2018 was the OP So I finally got around to replacing the booster today- I don't normally react this way but.... This is literally like a new car- it actually has pedal travel and stops like you would expect it to. What really gets me is that there's a bulletin on this, I took it to the dealer and told them I wanted them to change it, they said everything is normal and said not to change it even after I was clear that I was ok paying them to do it. So I ended up saving a few bucks on labor and I'm stoked that there was such a significant improvement. Now I'm ready to order a tuner from Livernois and keep this thing a while. If you've got short pedal travel and touchy brakes, don't hesitate on the booster update.
-
Ok so I went ahead and ordered the replacement booster. I went by the part number in the bulletin, and that is the part number on the box. When I opened it, the part number on the booster is the same as what is currently in the vehicle. Obviously they are compatible, but do I need the part with the actual part number referenced in the bulletin to get the improvement?
-
Yeah I got it, I didn't tell it I had HS + MS on the initial connection so it wasn't looking for it and aborted the reset when I tried the first time. It "seems" better, but I won't know for sure until it's cold and rainy- that's when it's the worst.
-
I tried running this with forscan this afternoon but I got an error that the module reset could not be completed- what am I doing wrong?
-
I know this one is old but it's what I came up with on the search. I took my 2016 Titanium in today with the exact complaint listed in the bulletin and said I wanted the braking diagnosed (after giving them the bulletin.) It's out of warranty so we both know I'm paying for it- and I'm fine with that if it fixes the problem. They said everything was in spec and it drive's like it should. I know it should not brake like this- my wife hates driving it because they are so sensitive. Has anybody had this same issue and the booster did not fix it? I don't mind changing it myself but I can't find much on the bleeding procedure upstream of the ABS, that's the only reason I went to the dealer.
-
2015 Ford Edge Sync 3 Upgrade
Ecoboosted replied to bofus's topic in Audio, Backup, Navigation & SYNC
After I flashed the apim a couple times playing with visual settings I couldn't get any GPS signal and the cluster compass was glitching, then I found this: SSM 45917 - 2016-2017 Ford/Lincoln - SYNC 3 – Inaccurate Global Positioning System (GPS) Tracking Or GPS Vehicle Icon Spinning Or Spinning Compass - Engineering Investigating Some 2016-2017 vehicles equipped with SYNC 3 may experience the following concerns; the GPS not tracking the vehicle position correctly, the vehicle location arrow icon spinning in circles on the navigation screen or a spinning compass on non-navigation vehicles. Perform the following procedure to resolve. Enter BezelDiagnostics per Work Shop Manual (WSM) Section 415-00. Select Testing Settings from the menu. Scroll down and press Clear DR calib. Perform a drive test for approximately 10 minutes, include at least four right turns and four left turns with a vehicle speed of at least 25 MPH. Confirm that GPS position for Navigation or the Compass for non-navigation vehicles is functioning properly. Engineering is aware of this concern. if you already have test settings activated on your screen it's super easy, as soon as I hit clear DR I had a good location in nav and the cluster compass was good. -
2015 Ford Edge Sync 3 Upgrade
Ecoboosted replied to bofus's topic in Audio, Backup, Navigation & SYNC
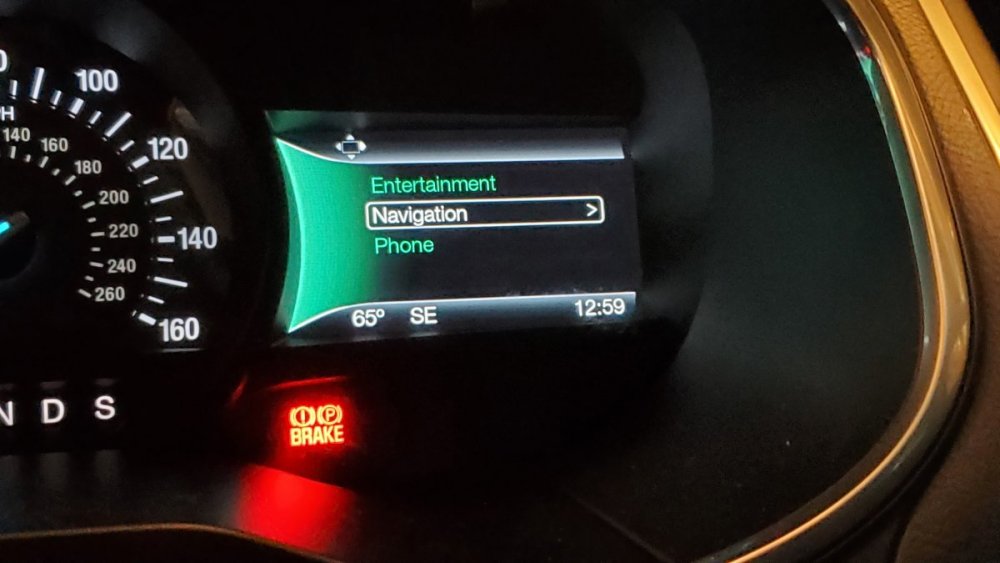
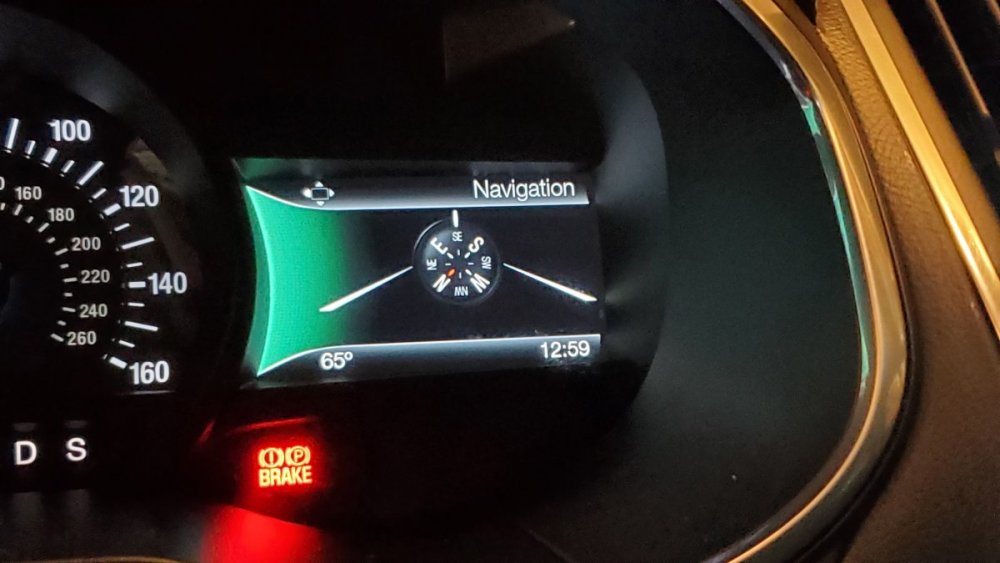
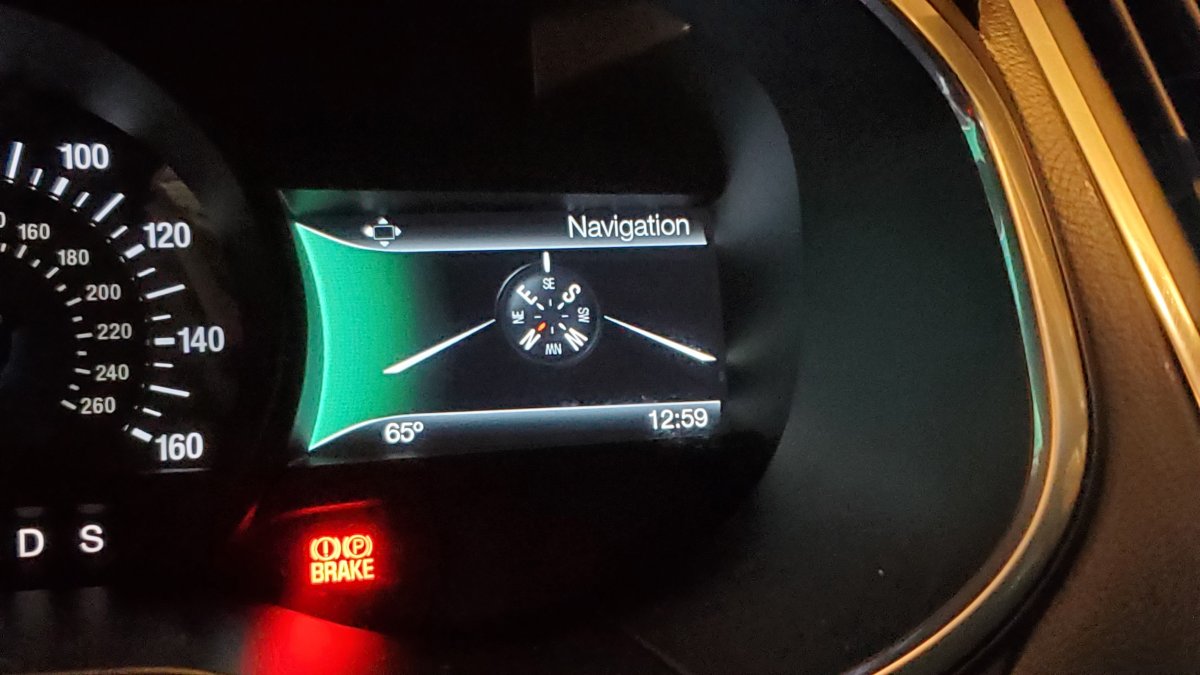
I just upgraded my 2015 titanium this morning, the right screen shows entertainment, navigation and phone. No climate, but to be honest I just bought the car and I don't premember if it was on there with sync 2. One thing to note: I've seen some comments that the compass on the right screen will be glitchy because of the 2 GPS antennas. Back in the 90's when they first started putting compasses in Fords the calibration procedure was to drive in a big circle in an open field or parking lot (according to the manual.) So I did a loop in a cul-de-sac and boom- no more glitching compass on the dash. I'm just glad I didn't pull the cluster first. The posted speed limit still comes up in the nav window. I got my screen and APIM from an MKX- those are way cheaper than anything else I could find and have the right screen. I went ahead and paid Dan for the programming file to save time and a headache- total for everything programmed including the OBD cable was $355.