Lifeisabeach
-
Posts
58 -
Joined
-
Last visited
About Lifeisabeach
Recent Profile Visitors
1,873 profile views
Lifeisabeach's Achievements
")
Newbie (1/14)
-
 Rare
Rare
-
 Rare
Rare
-
 Rare
Rare
-
 Rare
Rare
-
 Rare
Rare
Recent Badges
-
Considering a 2022 Edge Titanium.... thoughts?
Lifeisabeach replied to Lifeisabeach's topic in 2019-Current Edge & Nautilius
Thanks for the tip. I did some more reading about Sync 4 and bugginess and wow! It sounds like a real mess, but a couple articles go over issues generally with all the generations of Sync. I only used mine briefly before putting in the Pioneer and had no real issues that I recall. Same for the 2017 Edge... I wasn't the primary driver, but in 3 years, I don't know of any problems. That would have been Sync 3. There were a lot of good suggestions in the articles to be aware of, not the least of which is being fully updated as you mention. It sounds like use case has an impact, like more problematic if you use the built-in navigation as it overwhelms the system memory and resources (using CarPlay instead should mitigate that). They also caution to avoid blaming Sync when it could be the phone or even the cable. One article also made a point... pretty much all, if not all, of the comparable systems in other makes have similar problems. Ford just sells more so they are more visible for it. In any case, doing a thorough test of the Sync system in advance will be a must-do. It may even be best for me to buy used from a Ford dealer still to ensure software is fully updated or issues that may be hardware-related are resolved as a condition. -
What's up all? I currently have a 2010 Ford Edge Sport that I bought used in 2015 that has been super reliable and have been very pleased with, but I'm getting to a point where I want to look at something newer. I'm familiar with the 2017 model via my now-Ex and liked the handling and seating quite a bit, so on that basis, I feel good about sticking with the Edge line. I'm looking at some 2022 models on the market, but I wanted to see if there are any "gotchas" I should be aware of. From reading around, the reliability ratings aren't quite what I would have liked to see, but not deal breakers. One concern I saw was issues using Apple CarPlay and failure to connect. This is something that will be important for me. There were no issues with it that I recall with my Ex's Edge, although it's been a few years. My own Edge has a Pioneer head unit with CarPlay, so I have experience in that regard. Anything else, positive or negative, that are worth mentioning, I'd appreciate hearing about.
-
Update: all is well. Temps have dropped back down the past week and it definitely was a "perception" problem. I do think it blows slightly less warm than the old one, but I think that's easily chalked up to being a change from an aftermarket brand to a Motorcraft. I honestly can't get over how much quieter the Motorcraft one is compared to the previous aftermarket one that was in, even before it went bad on me. Lesson learned: stick with Motorcraft.
- 1 reply
-
- 1
-

-
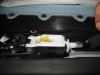
Hey guys, I had to replace the blower fan motor yesterday in my 2010 Ford Edge. The old one had been making a nasty noise for a few days so I did the swap out myself and it went very well. I hear it spinning and ramping up as I turn the fan speed up on the console. It sounds a whole lot better and I'm confident otherwise that it's seated properly. Today I was out driving and I feel like it's not blowing out air quite as warm or as fast at top speed as the old fan, but the weather is pretty mild today compared to the past few days and even this morning, so I'm not sure if my perception is skewed. Additionally, the fan that came out was an aftermarket one that I picked up from CarQuest about 7 years ago and installed myself, but this time I went with a Motorcraft. So... I'm not sure if the difference I perceive is due to the product change. I can say that the one I removed has always made a very slight rasping noise (brushes inside motor?), as did the one that it replaced 7 years ago, so I had blown it off at the time. The new one does not make that slight rasping noise, which is what I would have expected. So... question is if I should be looking at something else in the chain here? I know there's a blower motor resistor in particular that I might need to look at, but I don't know if that would be responsible for what I'm perceiving. Any thoughts/advice? As a side note, I had also been experiencing a high pitched whistling-like noise for the past few months that wasn't resolved by replacing the blower fan. That particular noise turned out to be from the felt seal on the cabin air filter cover that was falling apart and had gaps in it. I scraped that all off; added some foam stripping that I had on hand, and problem solved!
-
Right-turn blinker sped up; left-turn is normal
Lifeisabeach replied to Lifeisabeach's topic in 2010 Edge & MKX
Yeah, this was news to me, but I like it now that I know about it. As it turns out, the rear right bulb was blown, and since it doubles as the brake light, that was a ticket waiting to happen! Easy fix at the auto parts store, did it in the parking lot after buying the bulbs (replaced both sides while I was at it). I keep a driver and socket/bit set in the back for just such an emergency. -
Right-turn blinker sped up; left-turn is normal
Lifeisabeach replied to Lifeisabeach's topic in 2010 Edge & MKX
Thanks. As soon as I posted that, I did a web search and found that was the likely culprit. I’m usually better at doing my research than this. ? -
Hey guys, something odd happened here. I have a 2010 Ford Edge Sport. At some point yesterday, the right turn signal suddenly started blinking at double-speed, while the left turn signal blinks at the normal speed. This persists despite having turned the car off and on several times between yesterday and today. Any idea what could be causing this and how to fix?
-
I wasn't aware of the ANC feature myself, but all I did in my wife's 2017 Edge was replace the dash and rear door speakers. I'm doing a little digging around and found a discussion on another forum where someone had the problem and eventually found the microphone that is part of the ANC system. Unplugging it effectively disabled ANC. https://www.ecoboostmustang.org/forum/mustang-ecoboost-audio-electronics-lighting/6874-how-do-i-disable-active-noise-control.html
-
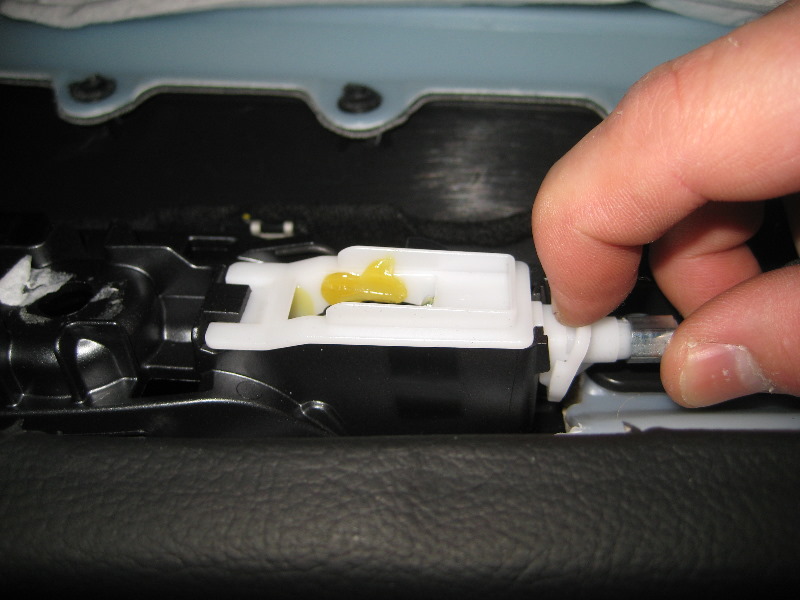
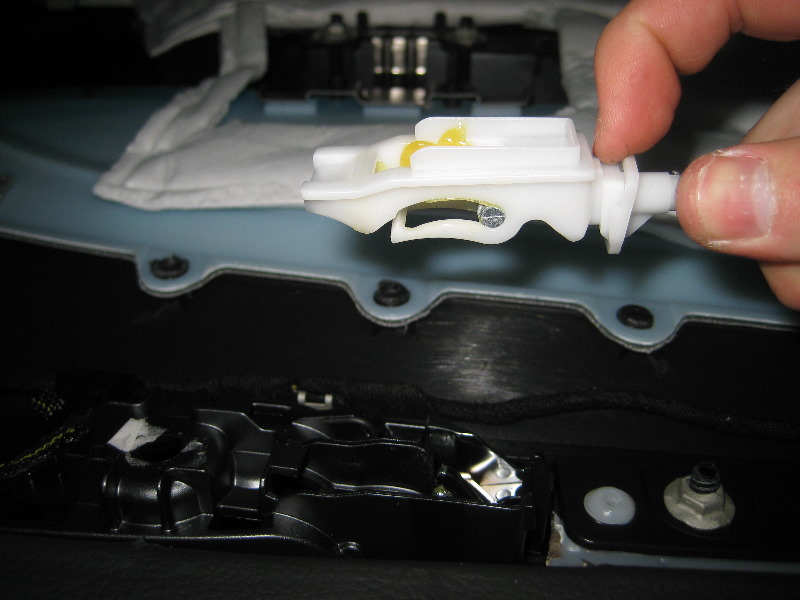
Howdy all. I have a 2010 Ford Edge Sport with the series 100 remote start kit that was already installed when I purchased the vehicle used a couple years ago. The remote start function recently started failing to start the car, just as cold weather hits and I need it. Grrrrrr. What I'm seeing is that it "tries" to start (I hear a brief whirring-like noise), then it pops off a pair of horn honks and stops trying. The failure was persistent for a few mornings. I found the series 100 guide and it appears that the double-beep on failure indicates that the hood is open, but it's not. So one afternoon, I walked to the car to try to troubleshoot and the remote start worked all of a sudden. Of course since then it's stopped working when I need it to. At the moment, it seems this may be a problem caused by low temperatures since it was in the 50s when it did work the one time, but in 30s when it failed. The car otherwise starts fine by key. The battery was recently tested and is fine (replaced a few months ago and re-tested a month ago). Soooo... any thoughts on what the problem may be and what to look for? EDIT: half hour after posting this, i tried the remote start and it worked perfectly.... temp in the 50s. So still looking to be a temperature-sensitive problem EDIT 2: Ok, it's in the 60s this morning and it wouldn't start, so not a temperature-sensitive problem, it would seem.
-
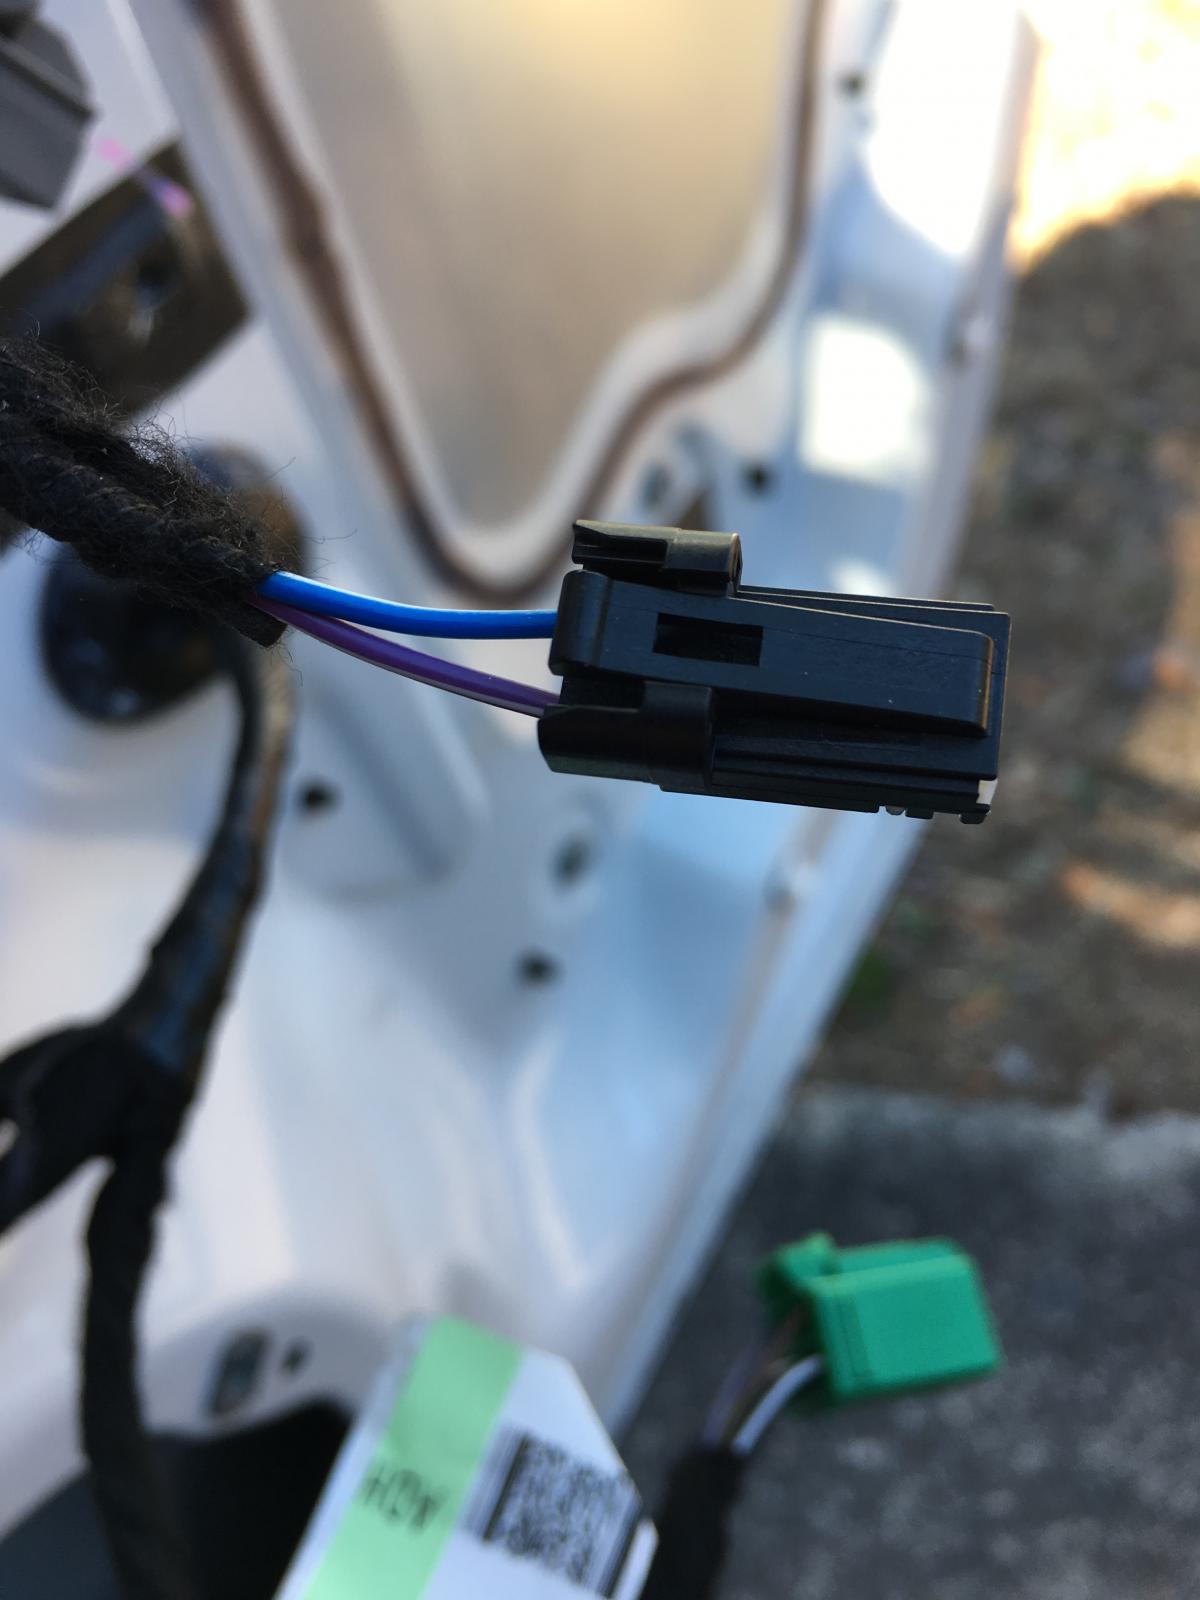
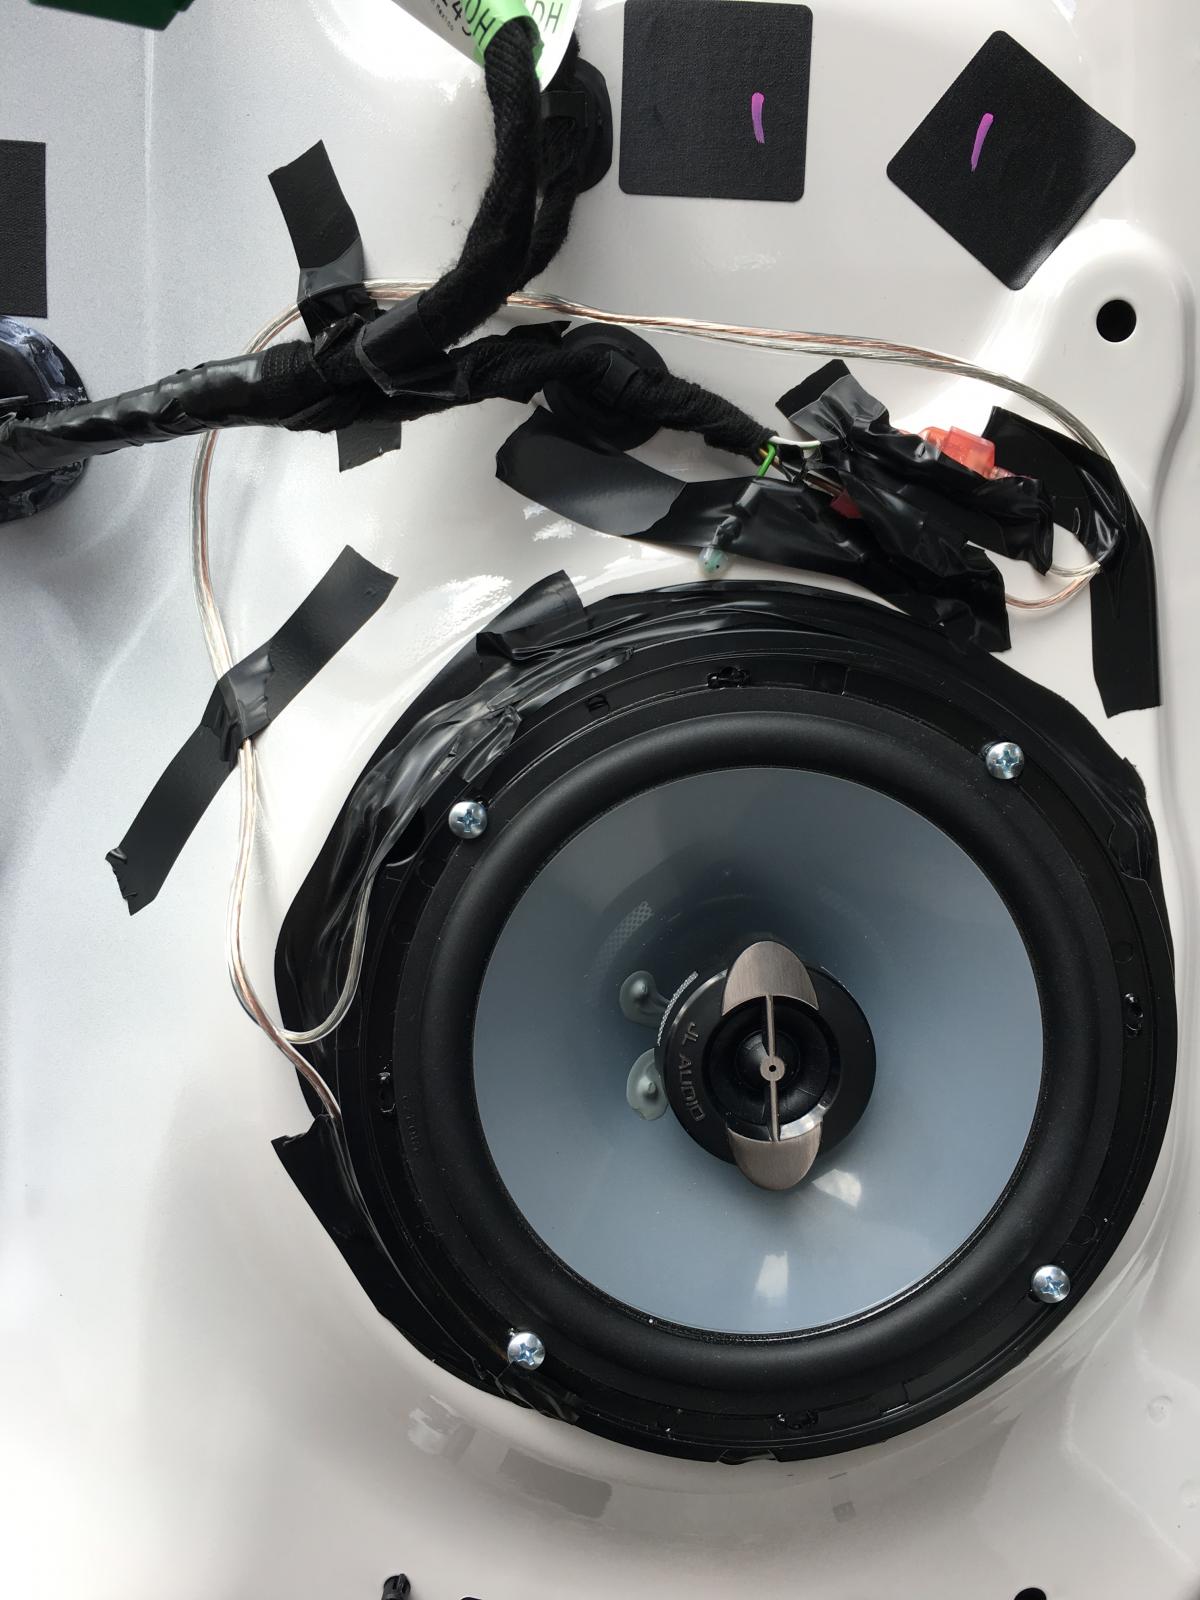
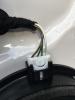
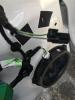
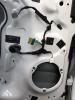
Alrighty, I just completed the job. First, some pics of the connectors demonstrating the cable colors for the right rear door. According to the diagram referenced in my original post, the positive lead is brown/white and the negative is brown/blue. I wasn't satisfied with the way I mounted the speaker in the left rear door. I relied on electrical tape to seal up the edges, but was concerned that it would come off in time. I had also wanted to use a gasket of some sort to insulate the speaker assembly from the door frame, but couldn't find what I wanted when I did the left rear door. I wound up ordering this from Amazon: JVCC SCF-01 Single Coated PVC Foam Tape: 1/8 in. thick x 1/4 in. x 75 ft. (Black) I used this to make a seal between the speaker and the adapter, then between the adapter and the door frame. This worked out great. The width was just right and not too thick. Anything thicker would have risked causing a problem with the speaker sticking out too much. I used DynaTape to secure all the wires in place, as well as seal up a couple holes that were exposed (the factory speaker had a pair of plugs that sat in those holes). Final job here: I opened up the left rear door to redo the mounting using the PVC foam tape, and my concerns about the electrical tape not holding were well founded. It was mostly coming off already. *whoops*. I re-did it all as I did with the right rear door and everything is looking much better and secure now. My final impressions aren't much different than from when I did just the left rear side. I think the bass is a bit cleaner, "tighter", and maybe slightly cleaner vocals. Overall an improvement, though not as drastic a change as I saw with the dash speaker.
-
I did not replace the fronts and am disinclined to right now. We had the same need to adjust the fade control when replacing the dash speaker. I wonder if a different speaker choice in the dash would have made that less necessary. I'm not seeing any volume changes yet in the one rear, but I'll have a better idea once the other is replaced.
-
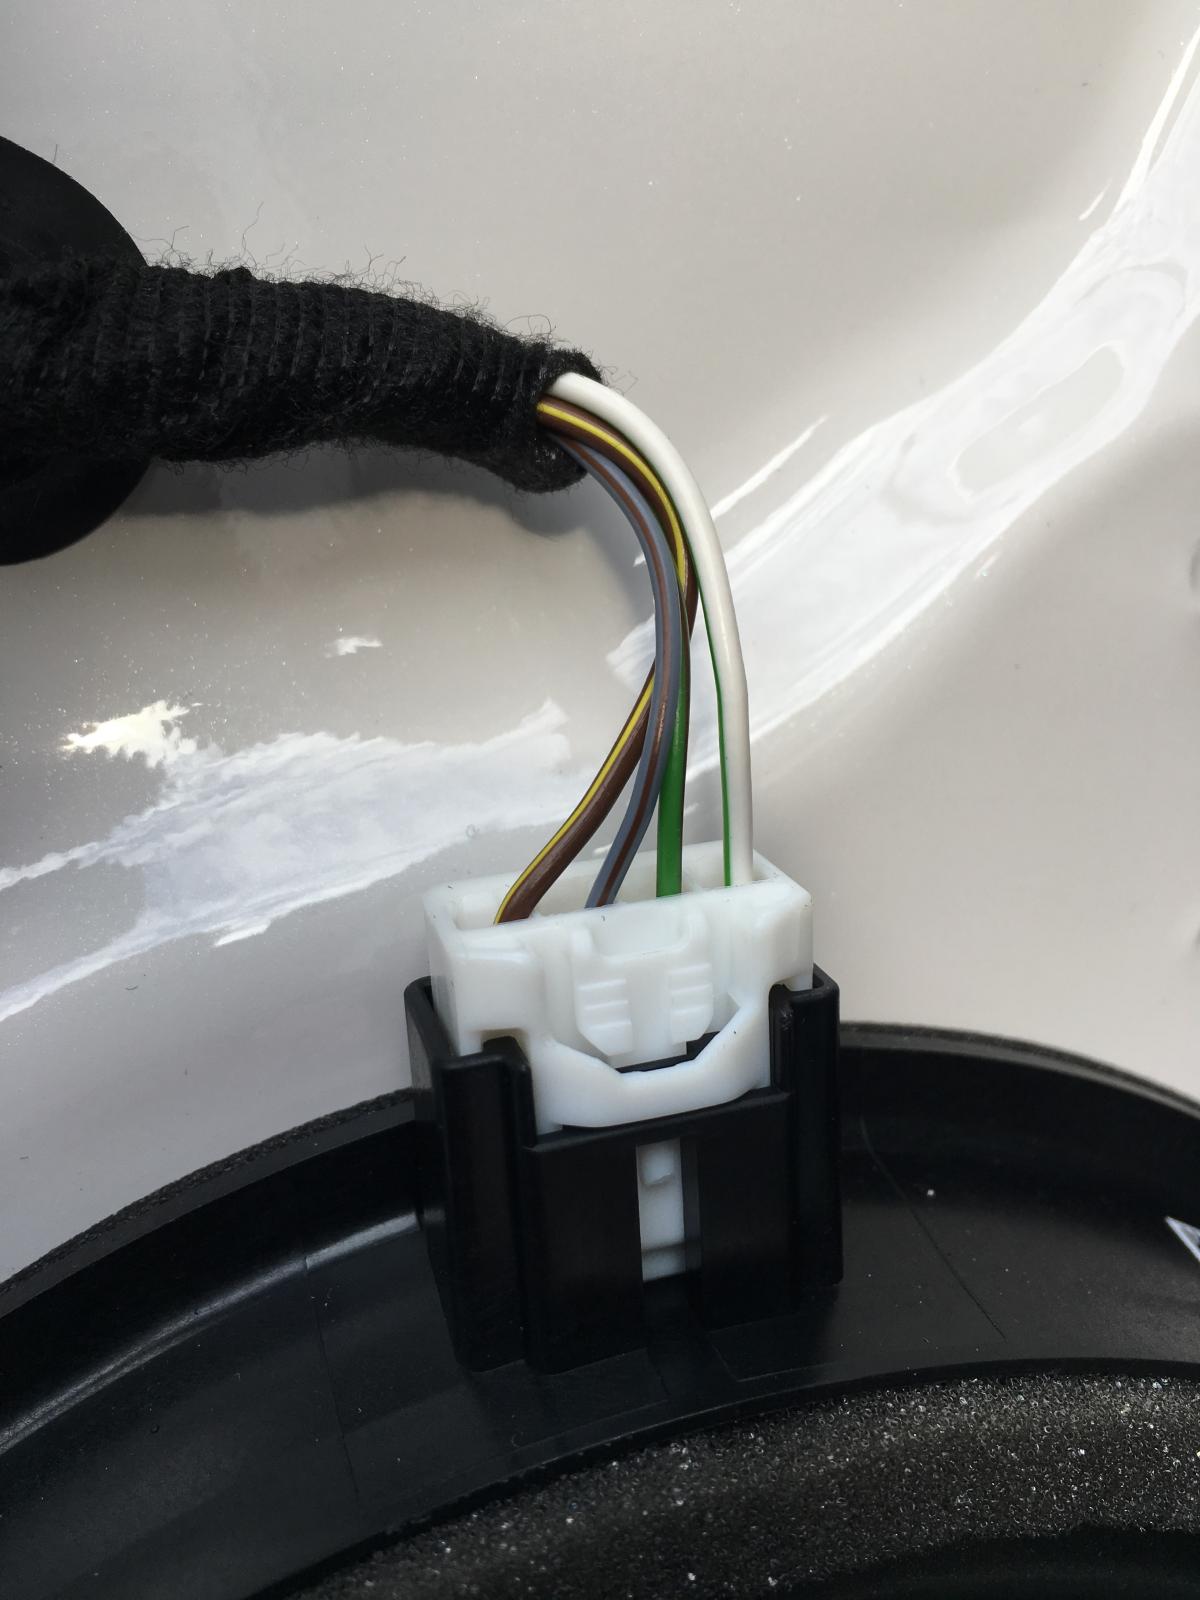
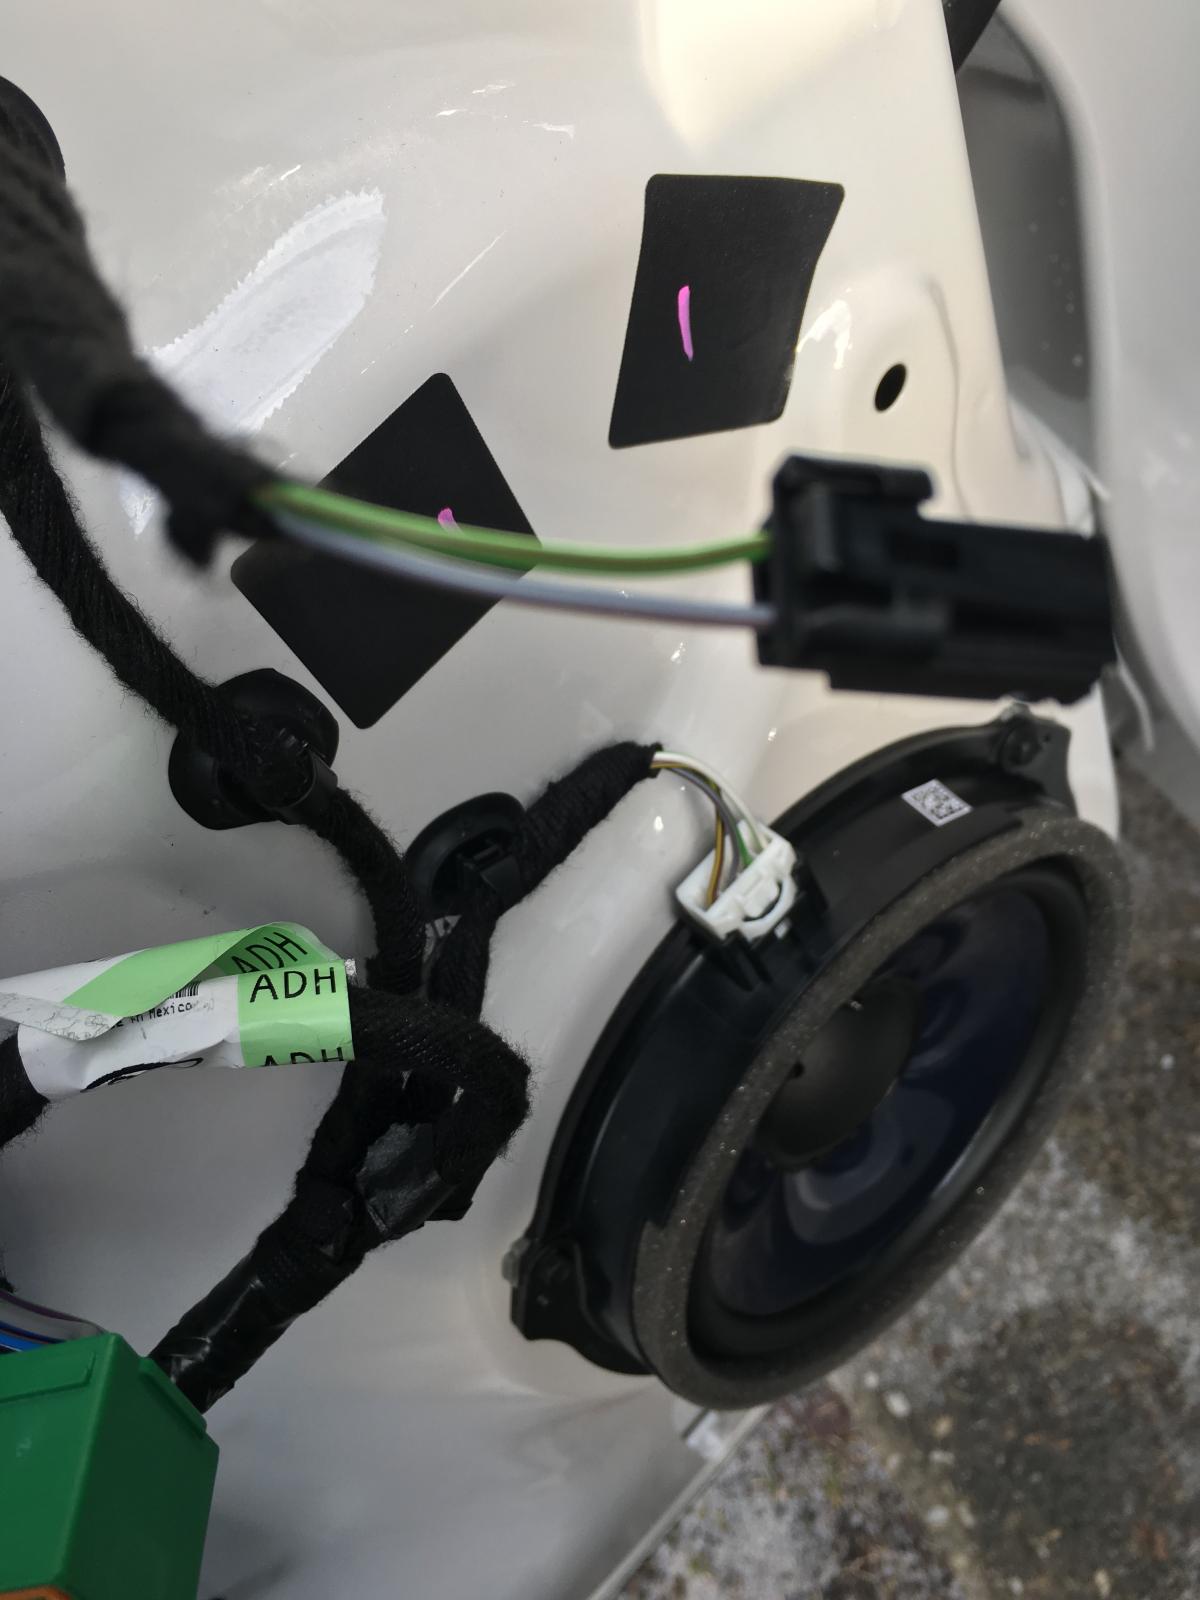
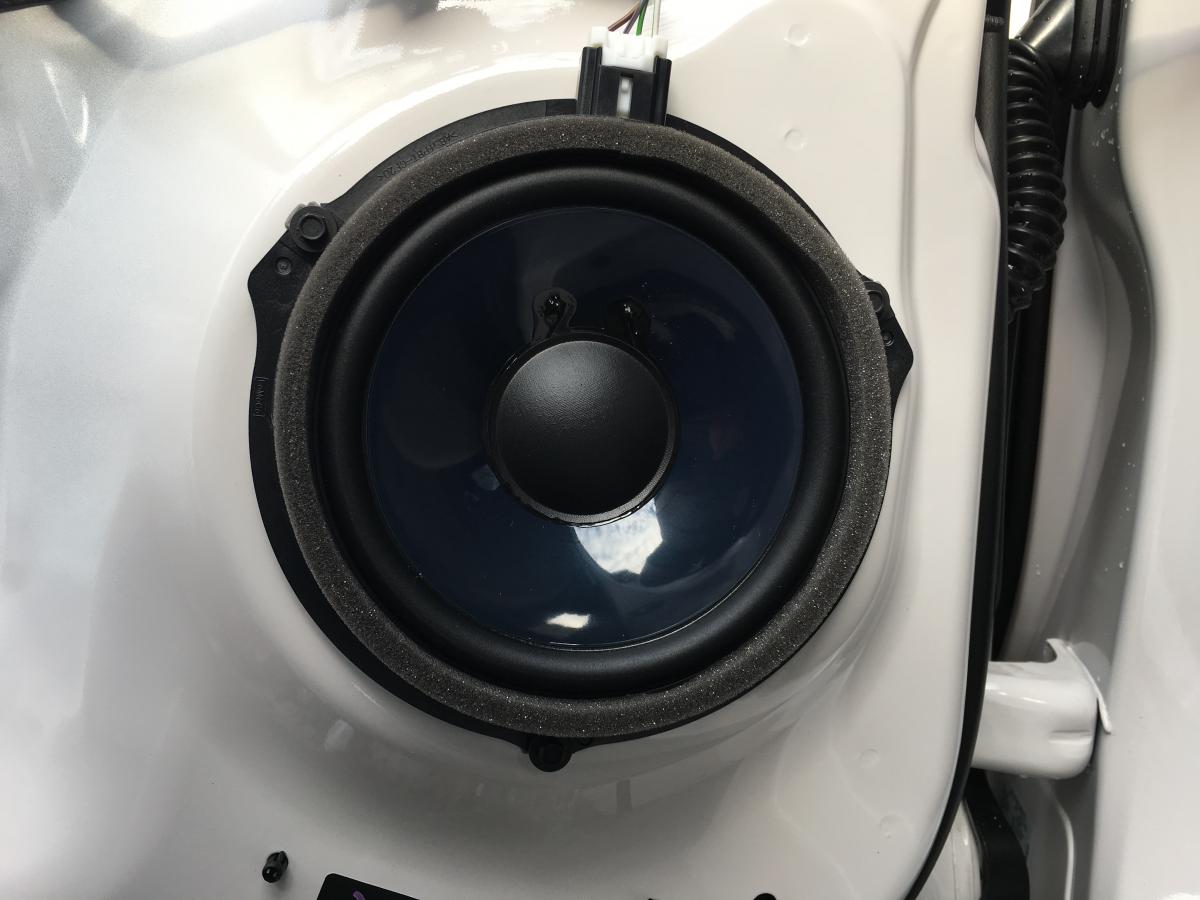
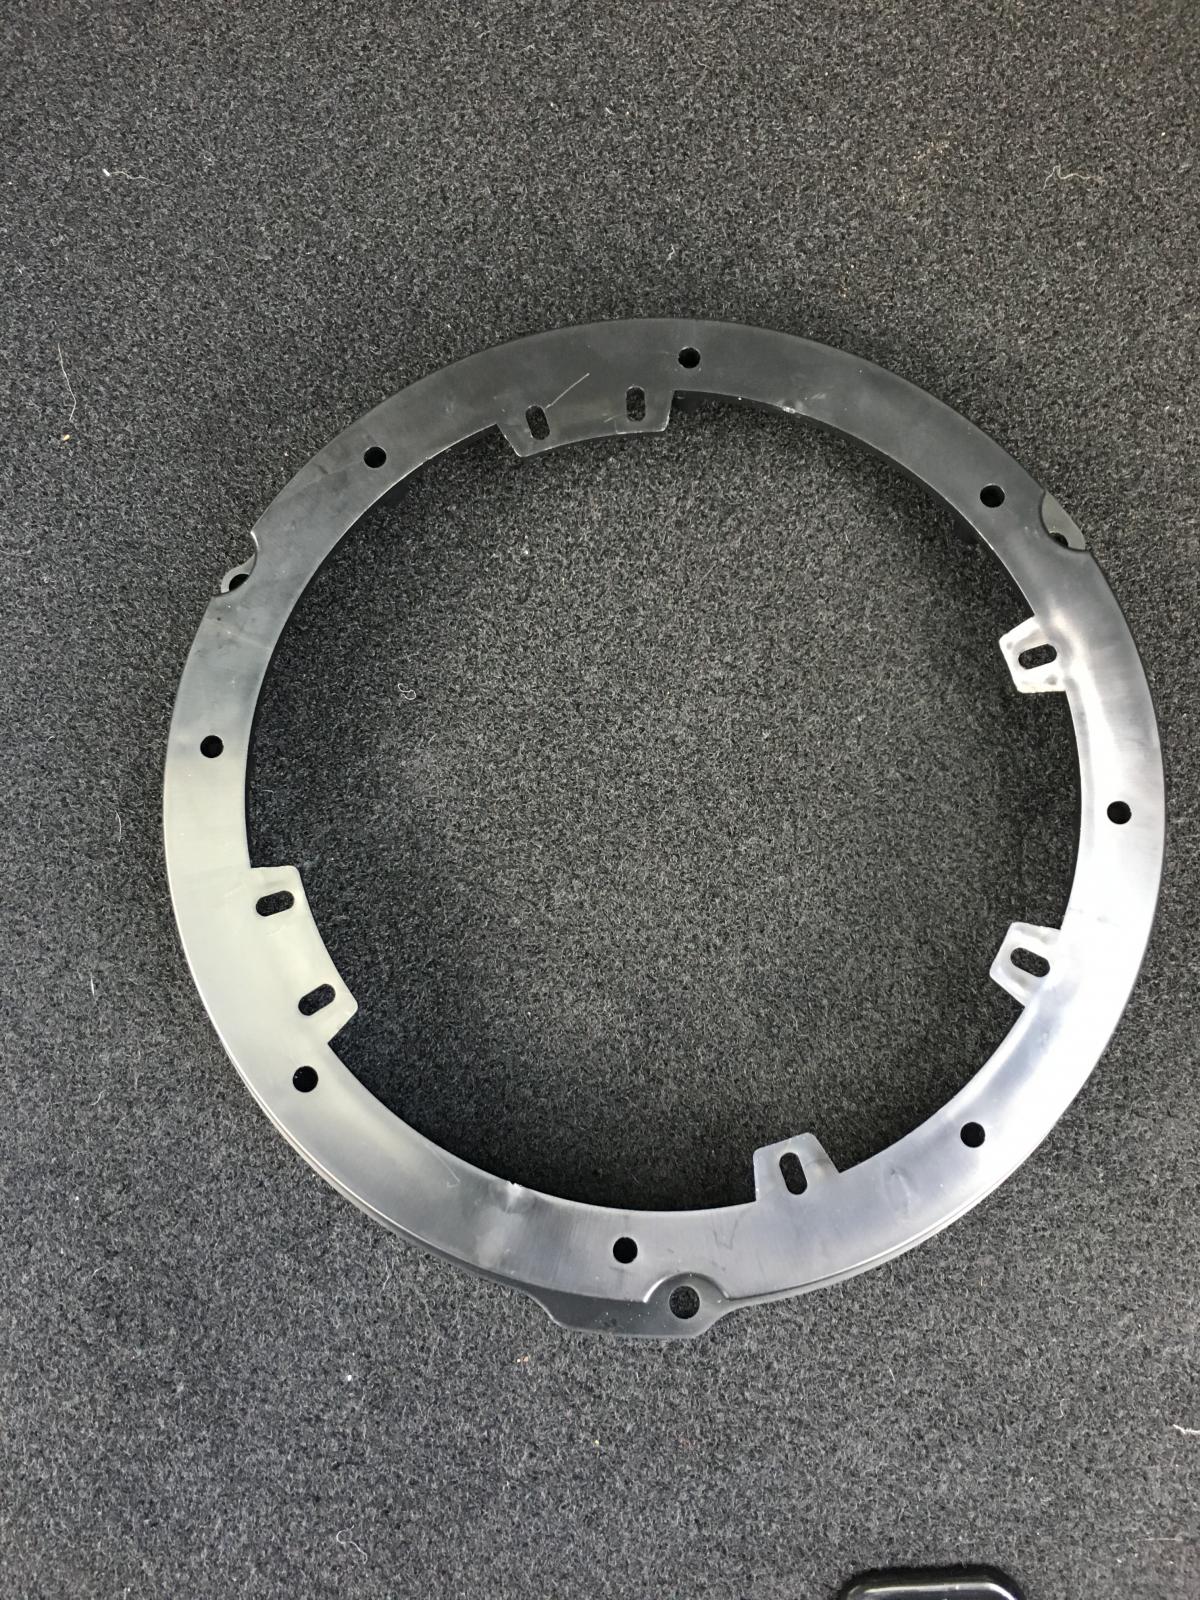
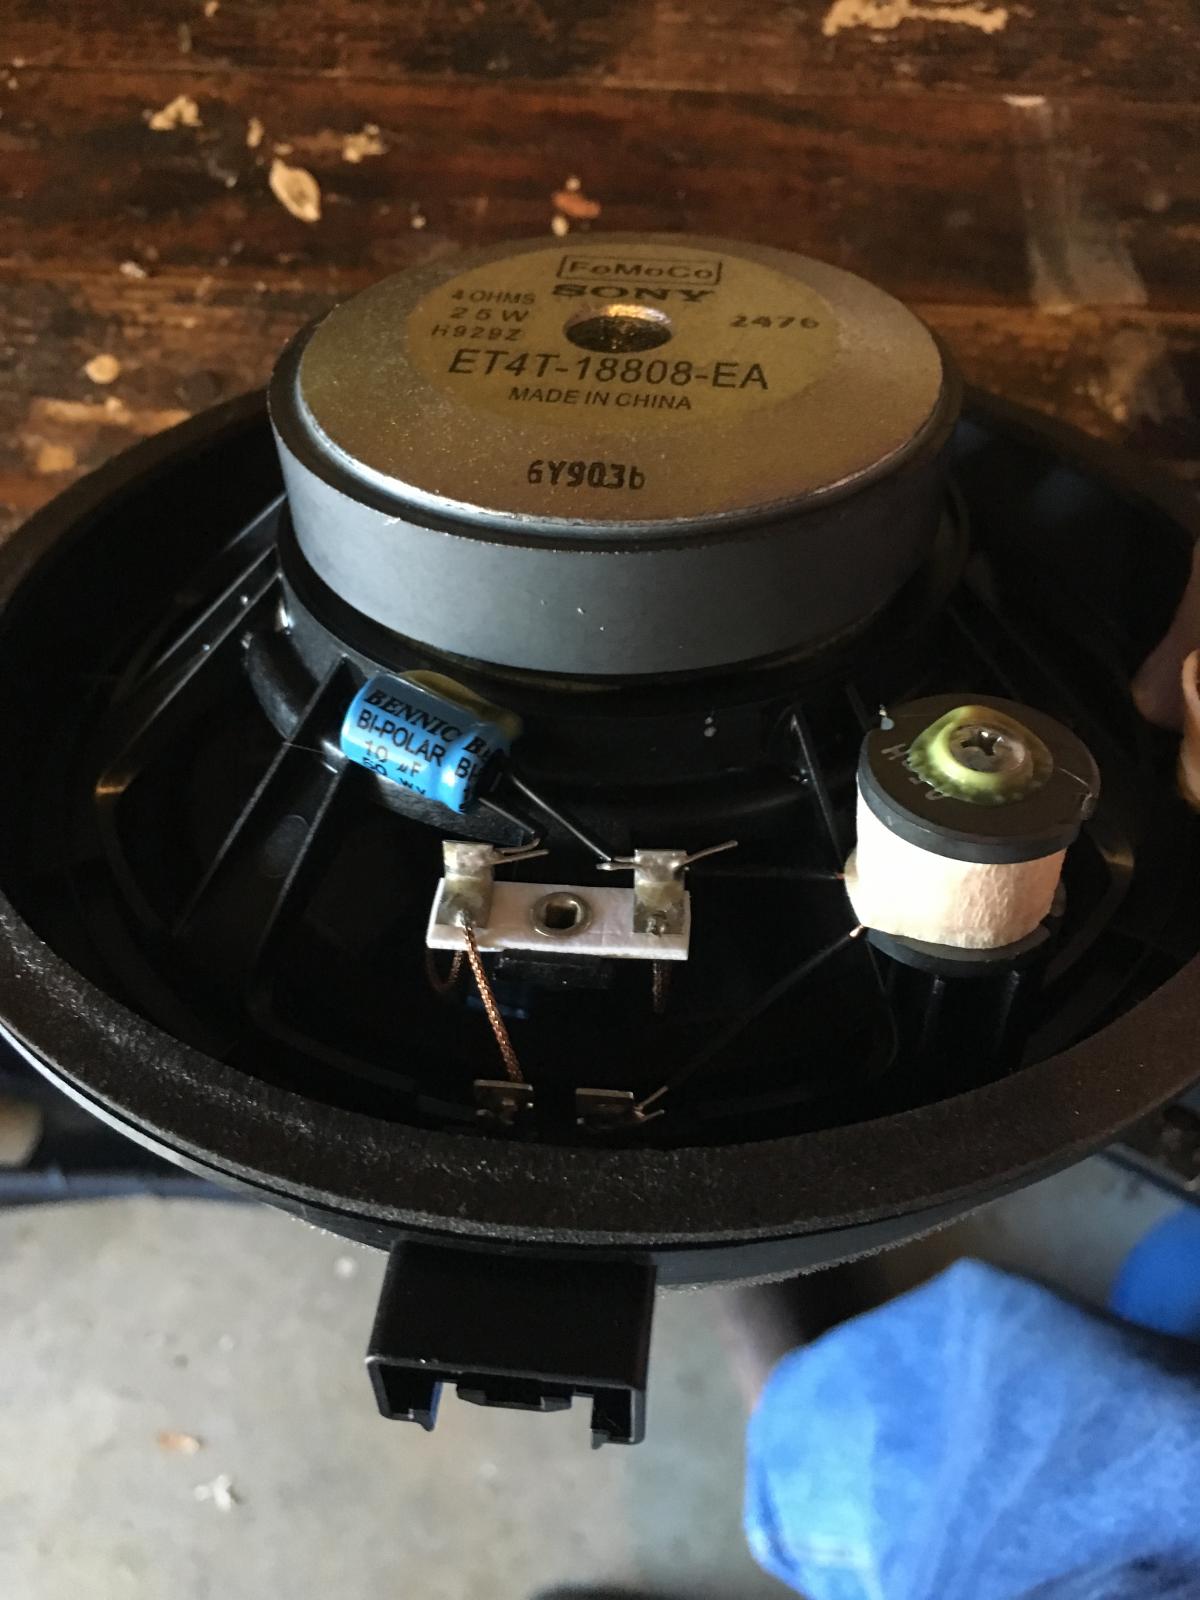
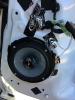
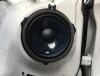
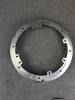
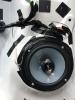
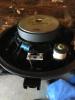
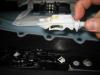
Alrighty, I have the left rear speaker in. As can be seen in the photos, the factory wiring is all on the outside of the door frame, not inside. I had to modify the speaker adapter to route the speaker cables, but all in all this went well. In the first set of pictures, you can see the factory speaker and the connector. There are 4 wires, 2 of which lead to the tweeter, which I am bypassing and not using. Going by the diagram previously posted here, the leads for the lower speaker are white/green for positive, brown/yellow for negative. The wires remaining go to the tweeter: green/brown and gray/brown. The tweeter wire colors were confirmed via its own harness, seen in the photos below. The inner tabs on the mounting adapter kept the speaker from sitting flush on it, so I used vice grips to simply snap them off. I then had to drill holes in the side of the adapter to run the speaker wires through. I re-assembled it all and used electrical tape to seal up the edges. I may go back and re-do this with DynaTape when I do the other door to ensure I have a good seal. Getting it all back together was mostly easy. The door handle was a bit of a pain and I wound up having to get the piece that the handle is supposed to grab onto pulled forward and off-track a little so it'd stay in place while I snapped it back into the panel. Below is a photo of the original speaker from the backside. I did a sound test using the fader/balance controls to isolate the speakers. It's hard to get a good idea of the difference like this since the left and right tracks aren't "identical". That said, it seems a little cleaner with the vocals and maybe slightly better bass. It's not dramatic, though I do still have to replace the other speaker. I doubt that will lead to a dramatic difference to be honest and for the effort involved, maybe not worth it for most people.
-
JL Audio TR650-CXi. These are 2-way speakers rather than components. To do components right, I'd have to find a place to mount the passive crossover and do some re-wiring, something I don't care to do. So I'm mounting this in the lower door and leaving the tweeter in the upper door disconnected. I picked these because they were in the price range I was looking at; get GREAT reviews; and their power requirements seem to be a good match for what the factory amp should be putting out. https://www.crutchfield.com/p_136TR650CX/JL-Audio-TR650-CXi.html?tp=105&avf=Y
-
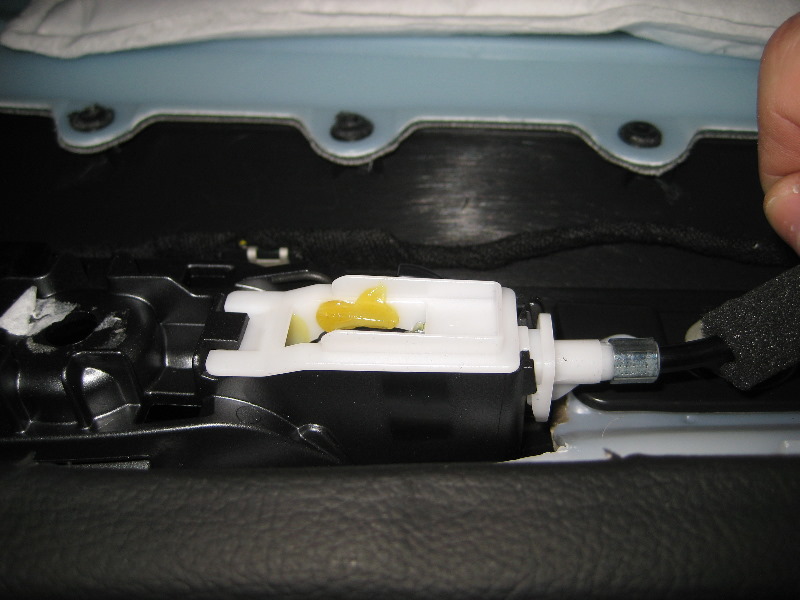
Ok, I believe I have discovered the trick here. I found a guide for removing the door panel on a late model Ford Fusion. It appears to have the same mechanism for the door handle as the 2017 Edge. I'll post his pics here to demo it. I'll post back when I'm able to get back to working on the speaker replacement again. Now that I know how to remove the panel completely, that part of the job shouldn't take more than 15 minutes. I may not be able to finish up here until next Sunday due to our work schedules here, but I'll update with photos and impressions of the replacement speakers. 2013-2016-Ford-Fusion-Interior-Door-Panel-Removal-Guide-022 EDIT: Got it off. As you push on that clip as shown in the photo, you'll also need to pull on the interior door handle to release it completely. It was a little tricky, but I was able to handle it solo.

-
2017 Edge - dash speaker replacement done
Lifeisabeach replied to Lifeisabeach's topic in Audio, Backup, Navigation & SYNC
Glad the difference wasn't just my imagination. :D. If you think about what's going on here, the original speaker was just a 3.5" woofer cone with no tweeter. Since the replacement speakers we are now using are 2-way speakers and are now putting out crisp highs thanks to a high-quality tweeter now in use, it's clear that the signal going to the dash is completely unfiltered. That means the old speaker, which was a relatively poor one to begin with, was trying to reproduce a greater range of audio than it's capable of doing well. So it's no wonder the audio was so "muddy". This does make me wonder if the door speakers are similarly unfiltered.