Mikula
-
Posts
554 -
Joined
-
Last visited
-
Days Won
24
Content Type
Profiles
Forums
Gallery
Everything posted by Mikula
-

How To: HID Headlight Installation from Drive Bright
Mikula replied to Mikula's topic in Accessories & Modifications
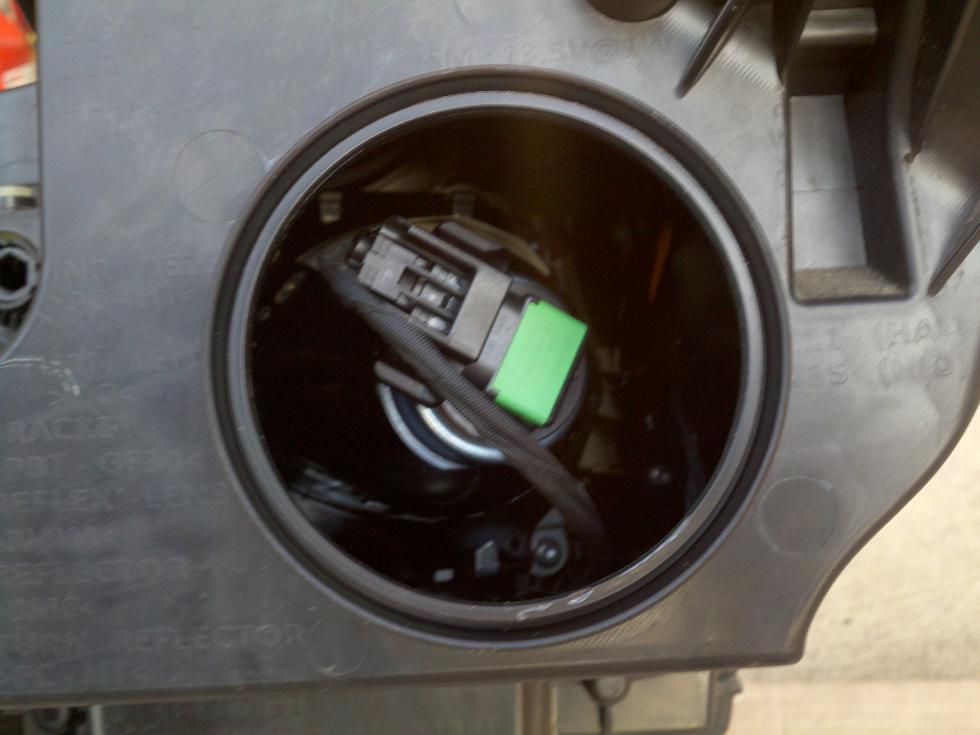
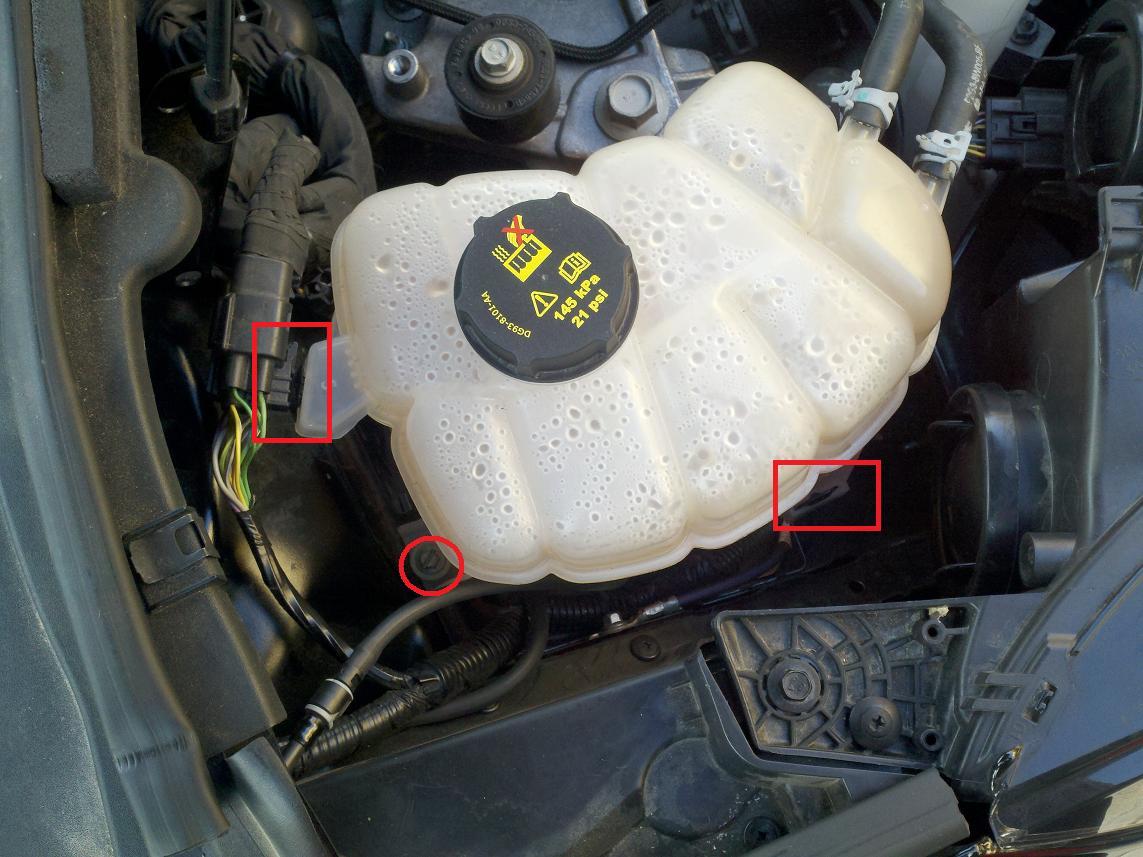
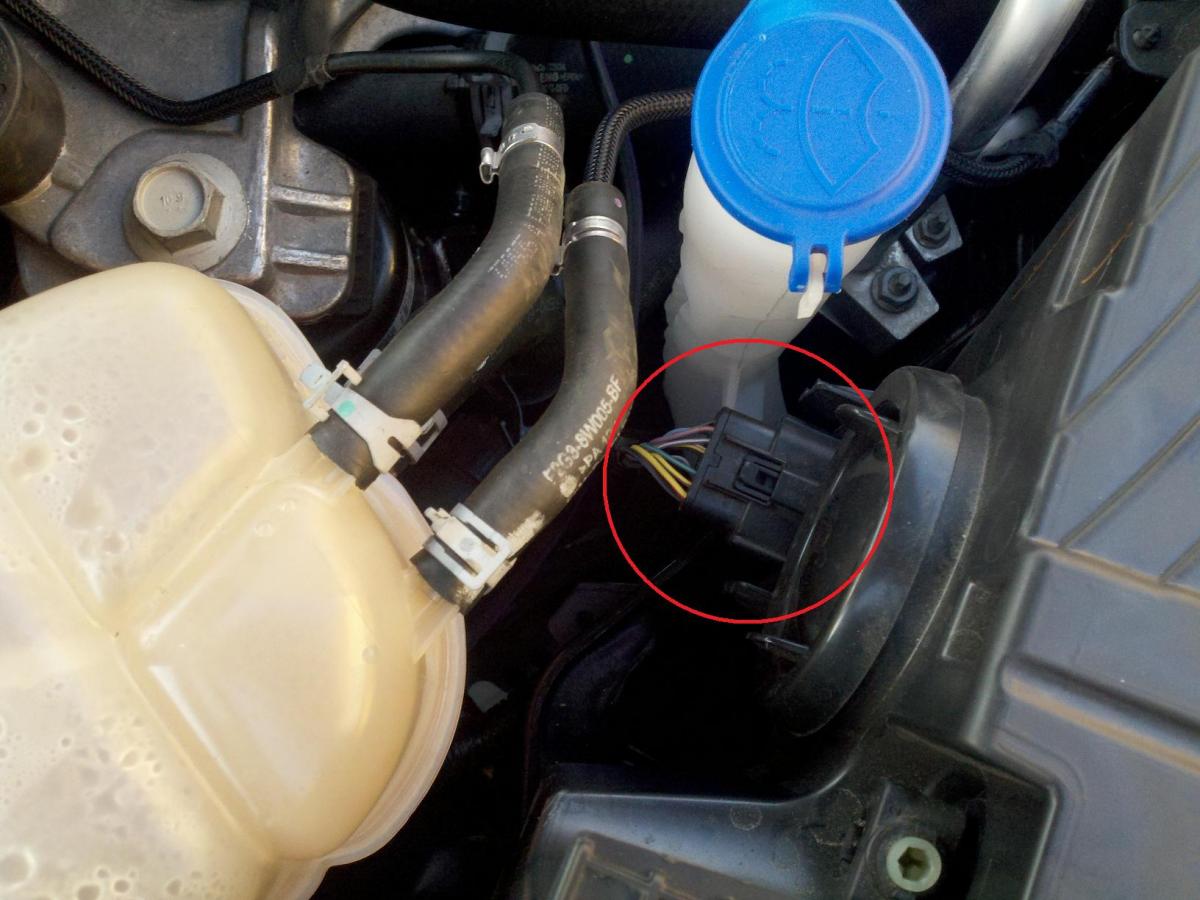
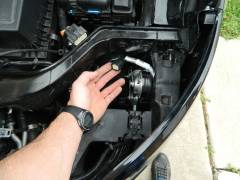
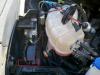
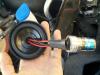
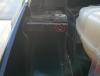
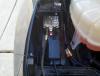
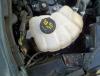
Remove the stock bulb from your headlamp housing. it was easier for me to undo the connector first, then remove the bulb. A 1/4 turn of the bulb should release it from the housing. note: make sure you are removing the correct bulb... I'm an idiot and removed the hi-beam bulb, and then wondered why the connector didn't fit.. Jeesh, what an amateur. The correct bulb is the one toward the outside of the headlamp. Now replace your headlamp assembly, reversing the previous steps. Be sure to reconnect your main harness to the lamp assembly, or you'll be scratching your head, wondering why it doesn't turn on! For ease of access, and to gain more clearance (clarence) I removed the coolant reservoir. pull off the connector that is attached near the strut tower, then remove the bolt. 8mm socket with extension does the trick here, or a flat head screwdriver will do the job. pull up on the reservoir to remove it from the remaining tab. gently move it out of the way (toward the engine)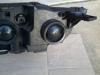

-
How To: HID Headlight Installation from Drive Bright
Mikula replied to Mikula's topic in Accessories & Modifications
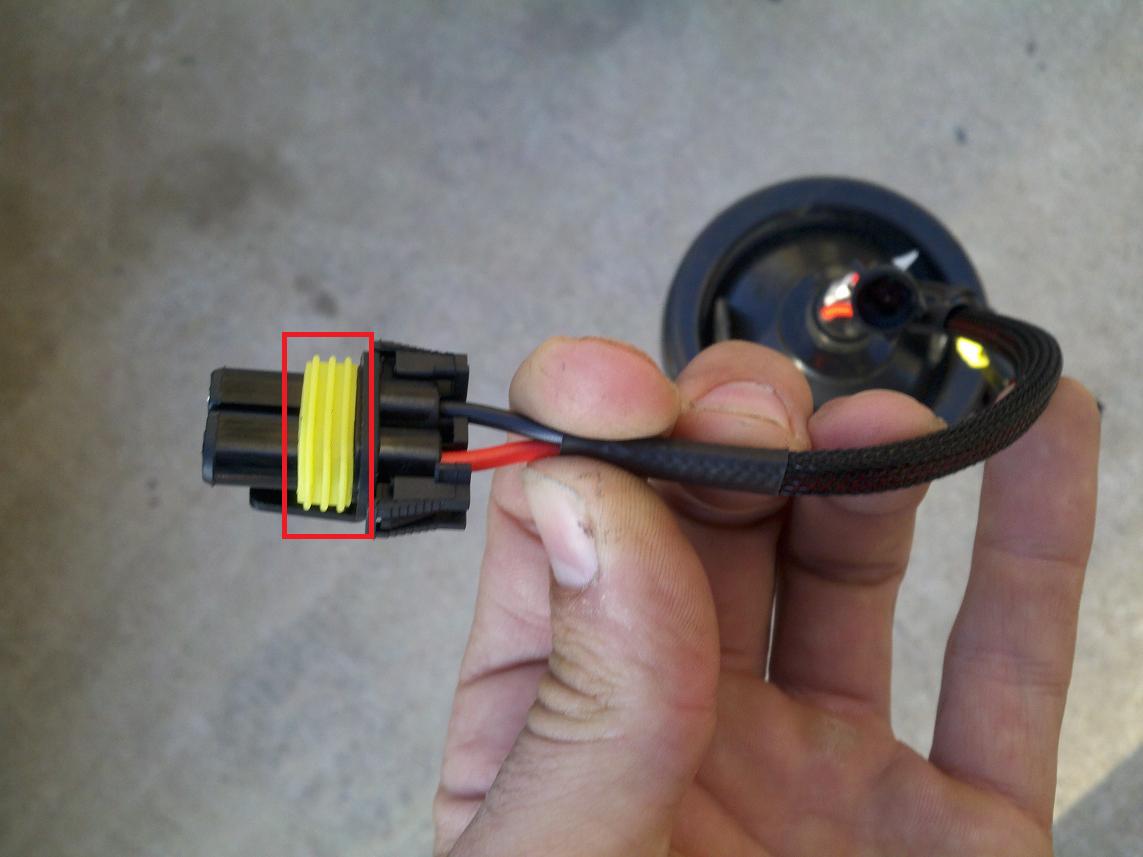
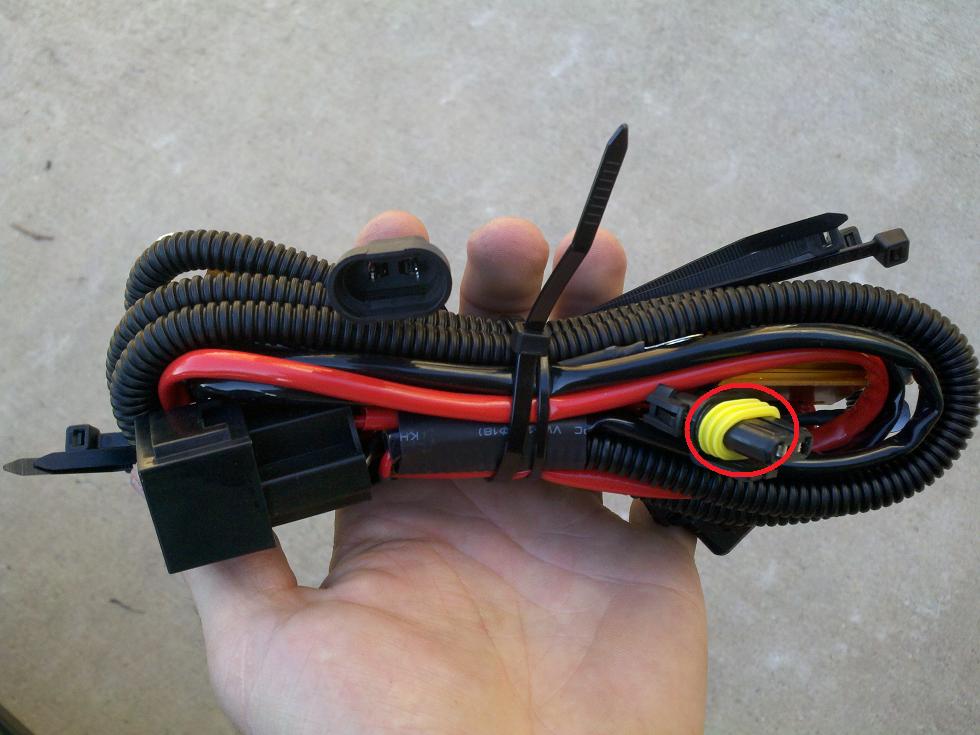
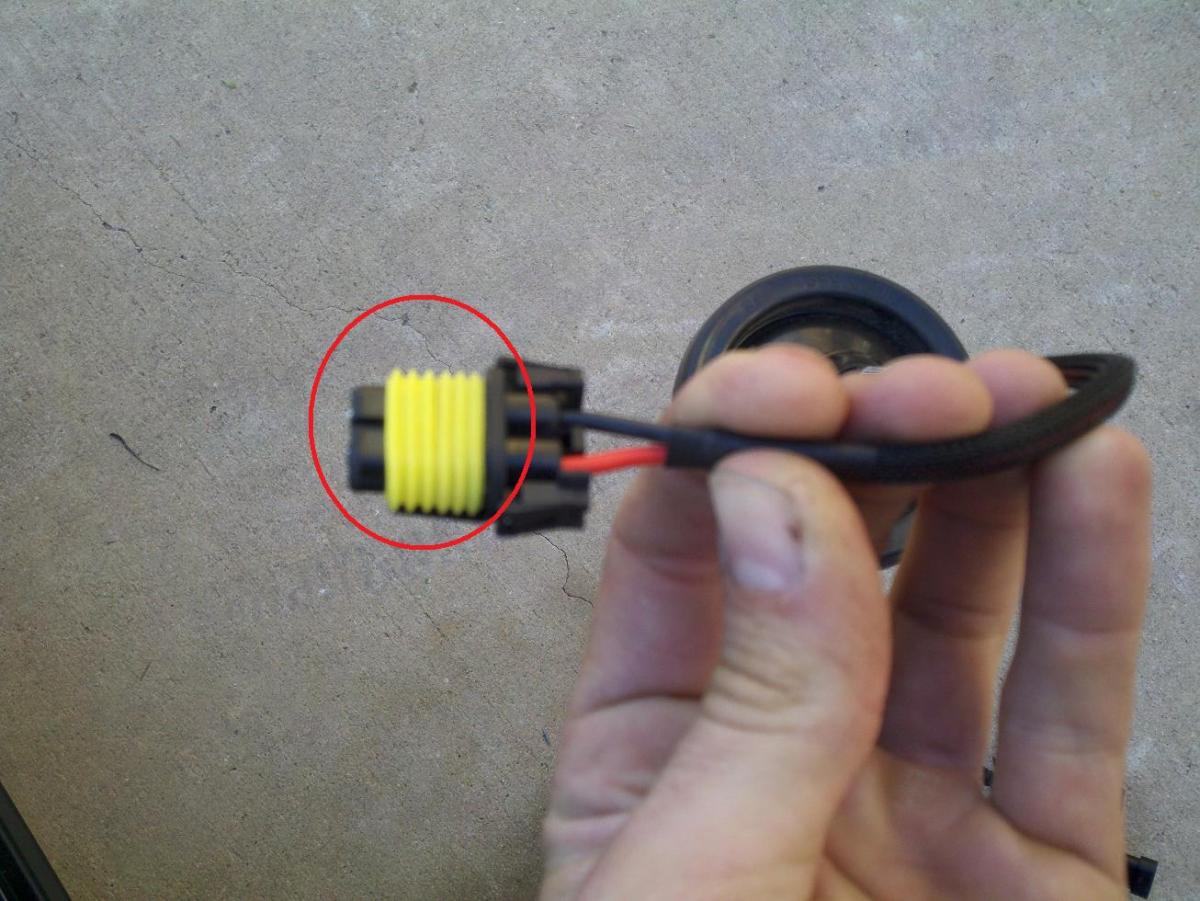
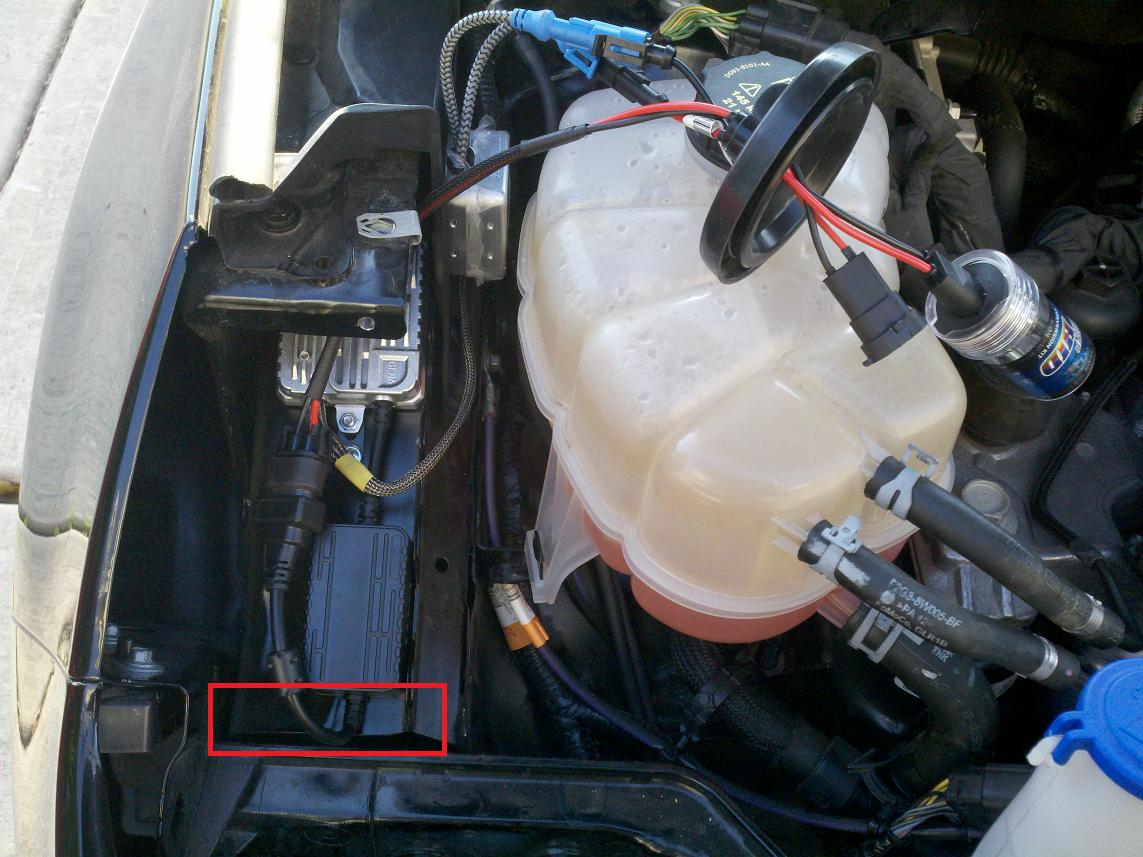
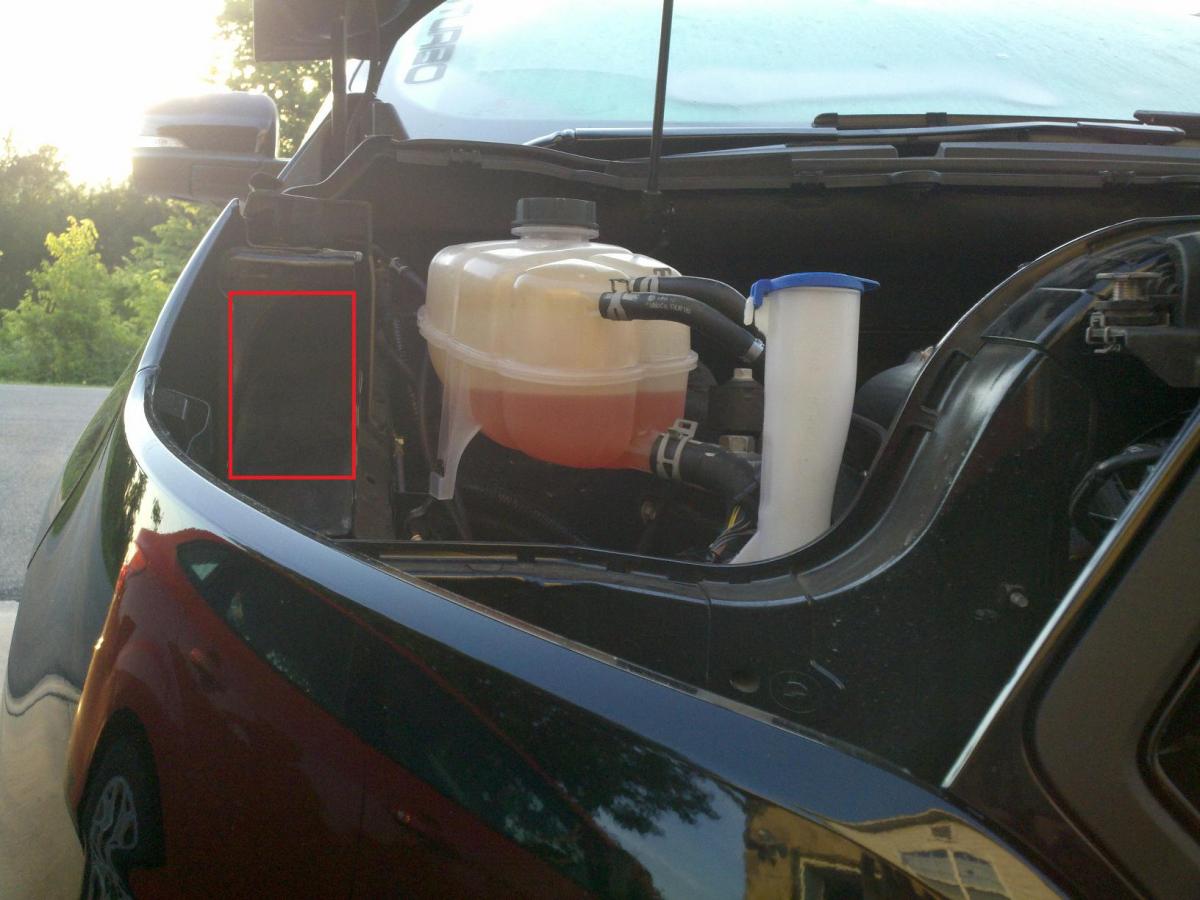
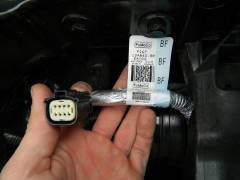
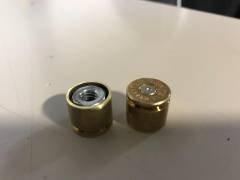
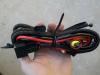
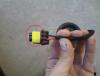
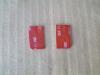
Here is where I thought I could improve a little bit. Since we will not be using the "golden harness" as it is called, I stole a few of the rubber insulators off of those connectors, as illustrated in the next few pictures. in my opinion it gave it a better, water tight seal on the connector. first pic is the connector as it comes Next is the golden harness, where I robbed the yellow seal off another connector and here is the rubber, doubled up onto the original connector Connect all harnesses and plugs together and lay them out of the way, making sure you keep them clear of where your headlight is going to be re-installed (i drew a red rectangle of the area to keep clear)
-
How To: HID Headlight Installation from Drive Bright
Mikula replied to Mikula's topic in Accessories & Modifications
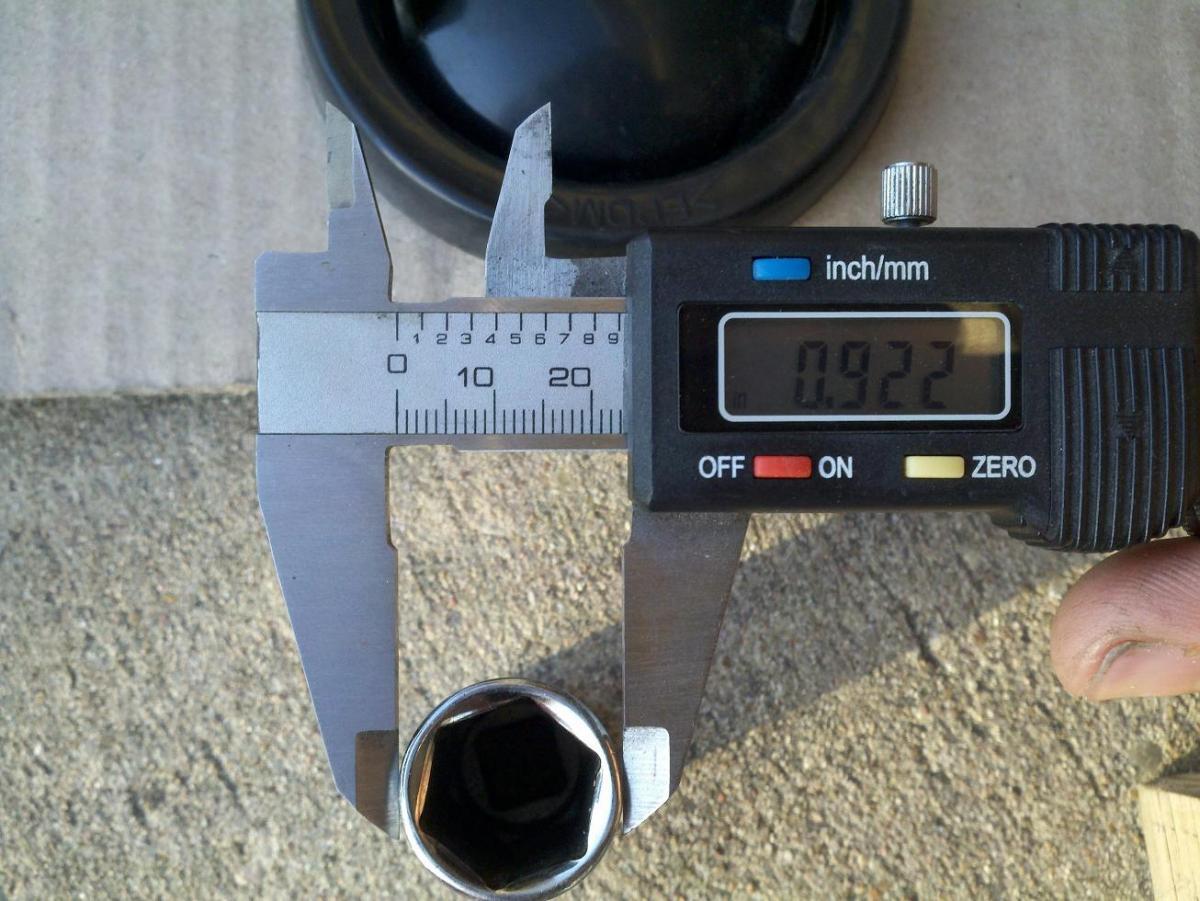
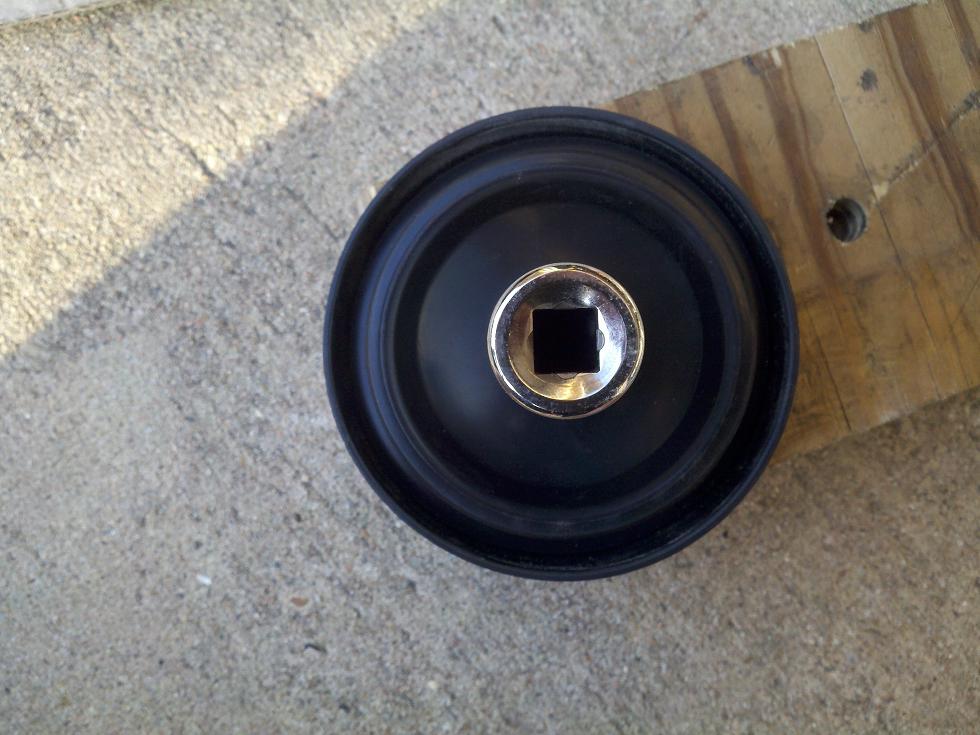
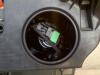
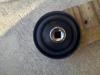
In the original instruction video, he drilled a 7/8" hole in the back of the dust cover. ours, however aren't plastic, making it much more interesting. could you just cut a slit and feed the wires? sure, but I was concerned with condensation getting into the lens, so i wanted it as air tight as possible. Following his lead, I needed to make a hole in the rubber dust cover somewhere near .875" in diameter, so I started measuring sockets in my tool drawer. well, my 17mm craftsman was just about the closest I could find, and in the end, it was a PERFECT fit at .922 Next, place your dust cover on a piece of wood, and put your socket in the center, holding it tight while you cut around the socket with a good sharp blade. TADA.. a hole Feed your wires and grommet through your dust cover and make sure it is a good seal on both sides Now would be a good time to mention, that i left the plastic cover over the new HID bulb. You will not be able to get the plastic cover off over the wires without breaking it off with a pair of pliers. it was simple to do, but keep this in mind. You could remove the plastic cover before feeding it through the dust cover.. but just a heads up for you!

-
How To: HID Headlight Installation from Drive Bright
Mikula replied to Mikula's topic in Accessories & Modifications
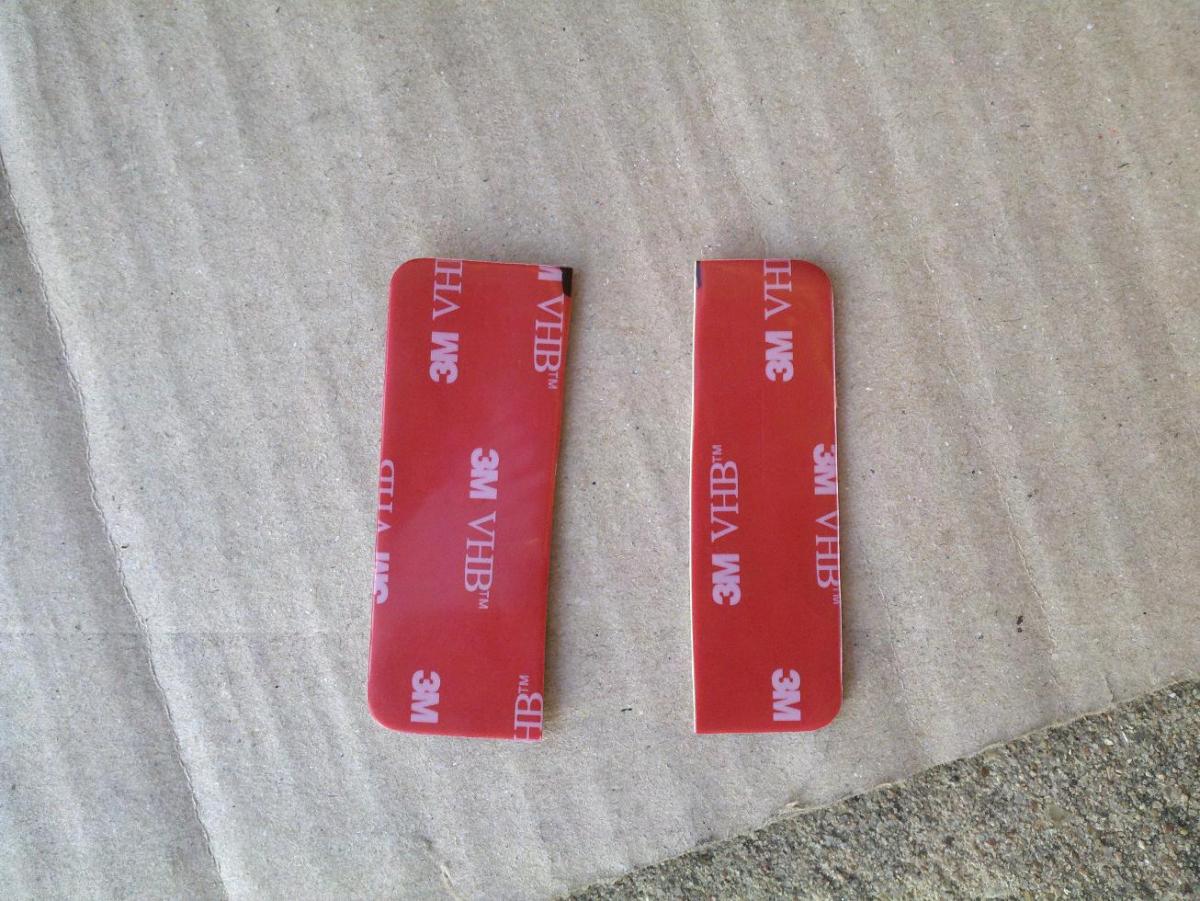
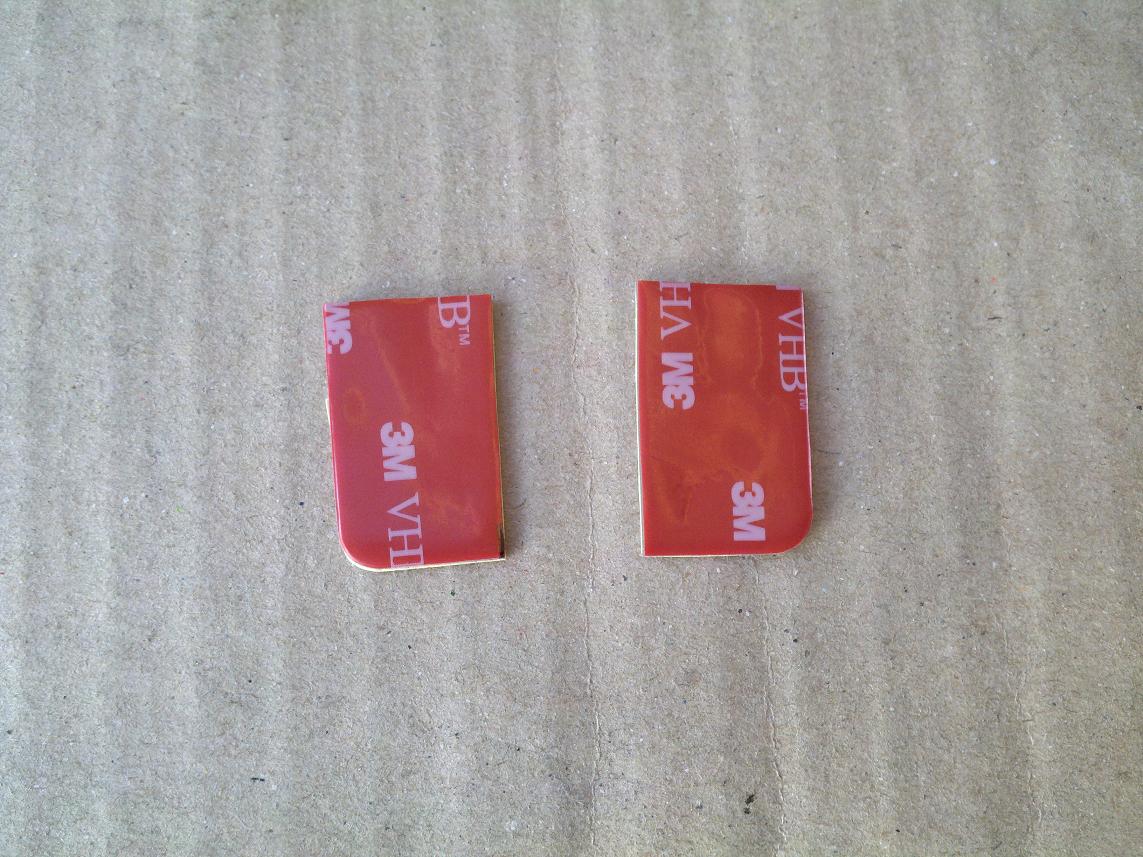
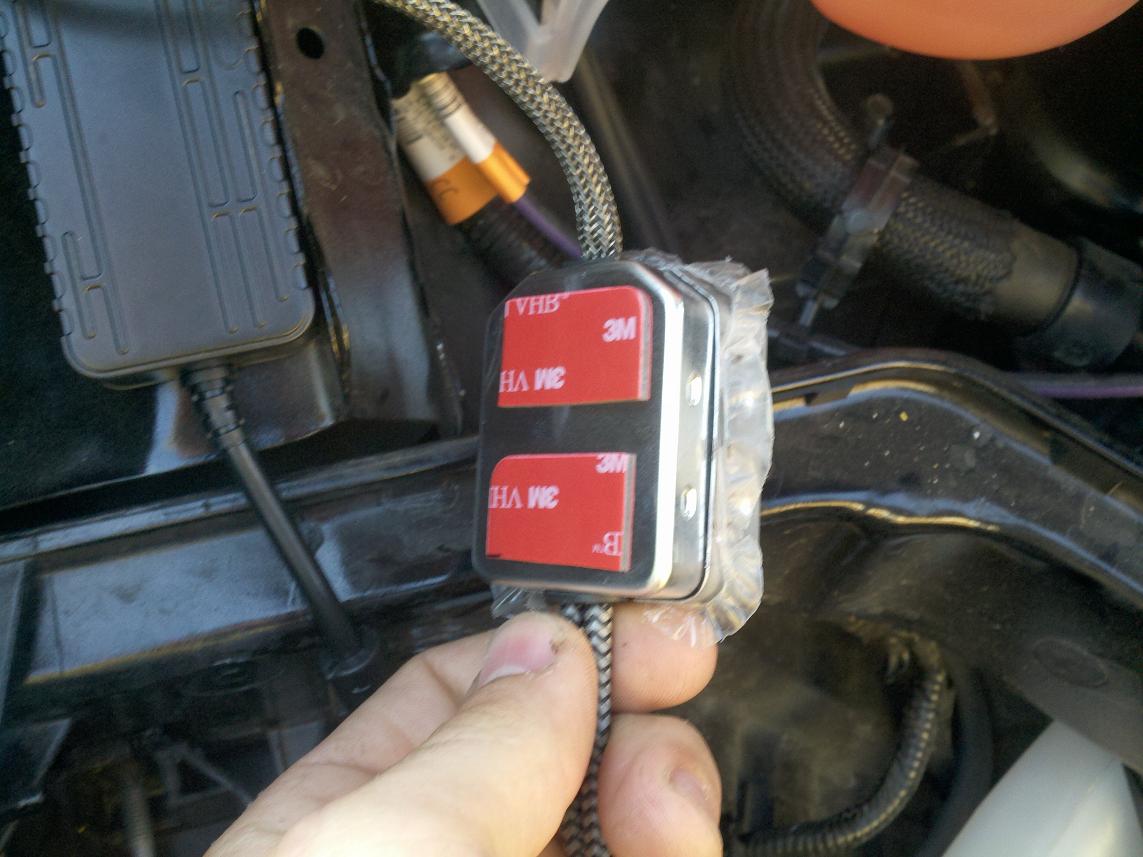
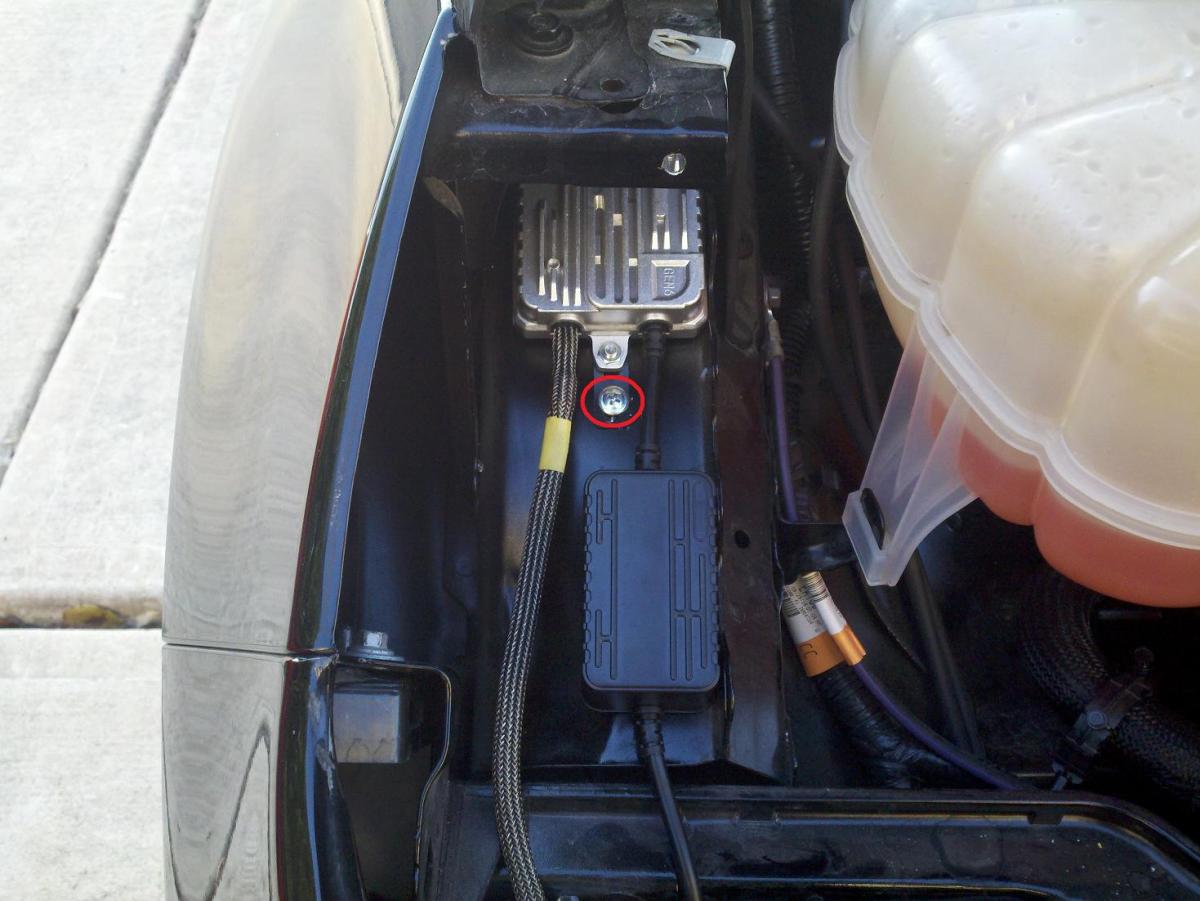
Using the supplied 3m tape, I cut it the long way, slightly less than in half. The reason for this was because the flat area left for you to place the "black thing" (as i have no idea what its actually called) isn't very large, and you'll need some of that 3m adhesive later. Place the LARGER piece of adhesive on the back of the "black thing" and push it into place. Leave about 1" of clearance as shown in the next photo: Cut the remaining piece of adhesive in half, as we will be using it to mount the "silver box" remove the plastic from the back side of the silver box, and put the remaining 2 pieces of adhesive on there Place this silver box on the plastic piece next to your coolant reservoir, with the 2 wires oriented up toward the sky Moving on!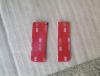


-
How To: HID Headlight Installation from Drive Bright
Mikula replied to Mikula's topic in Accessories & Modifications
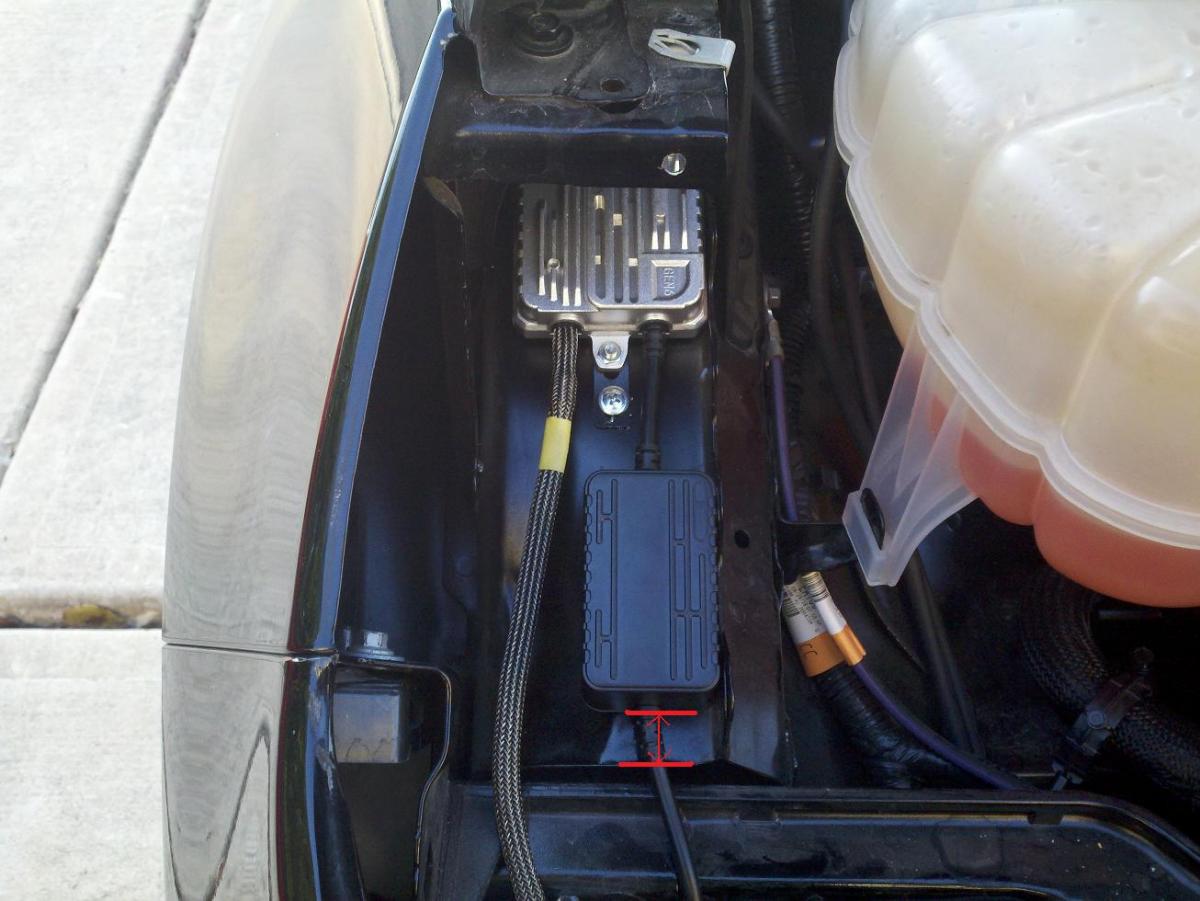
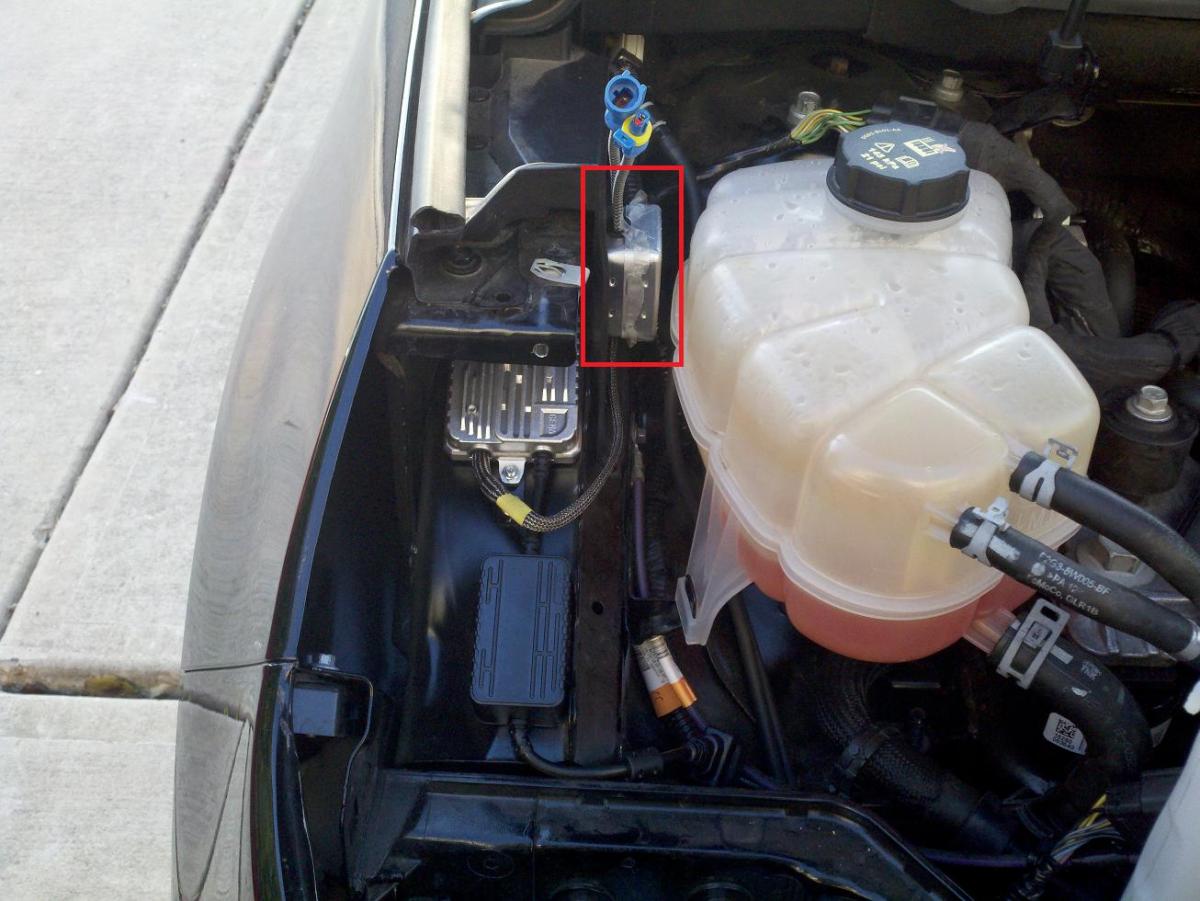
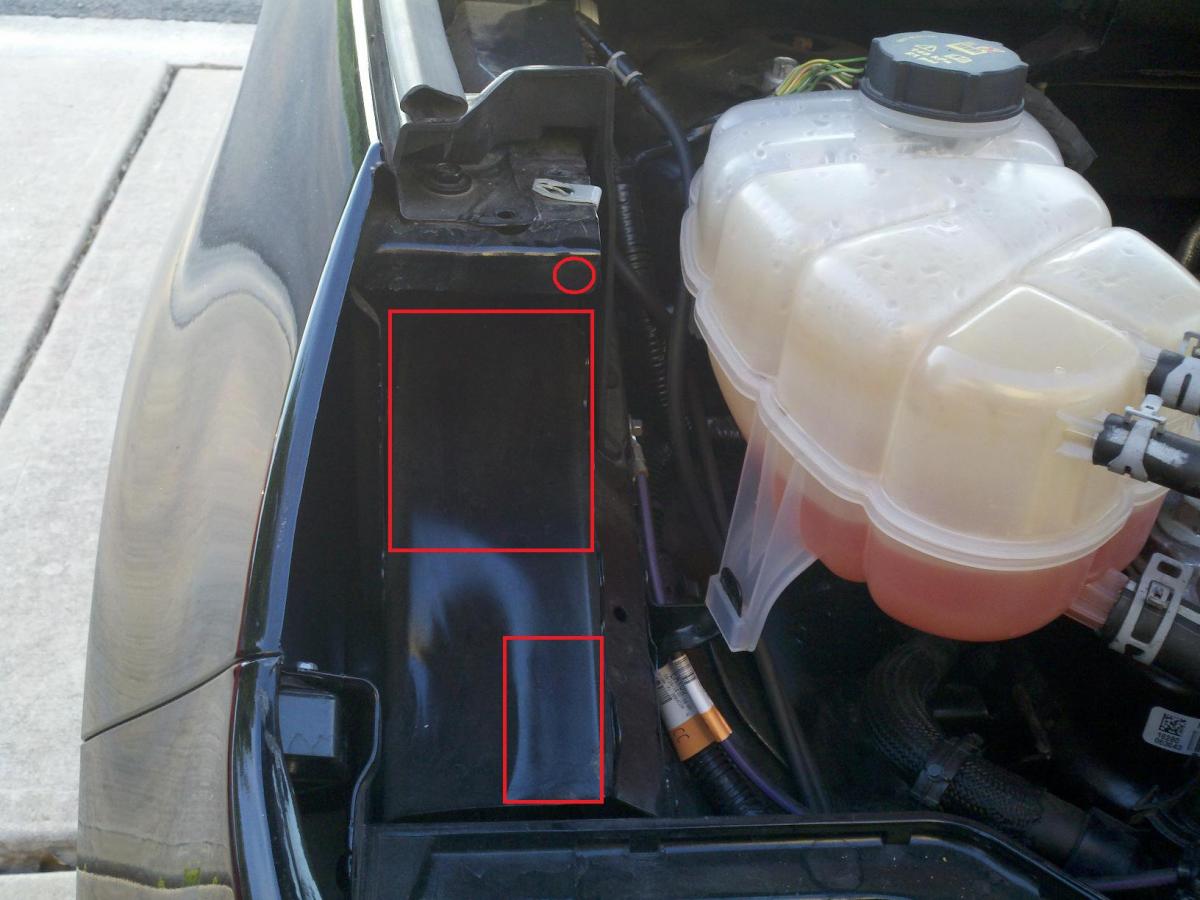
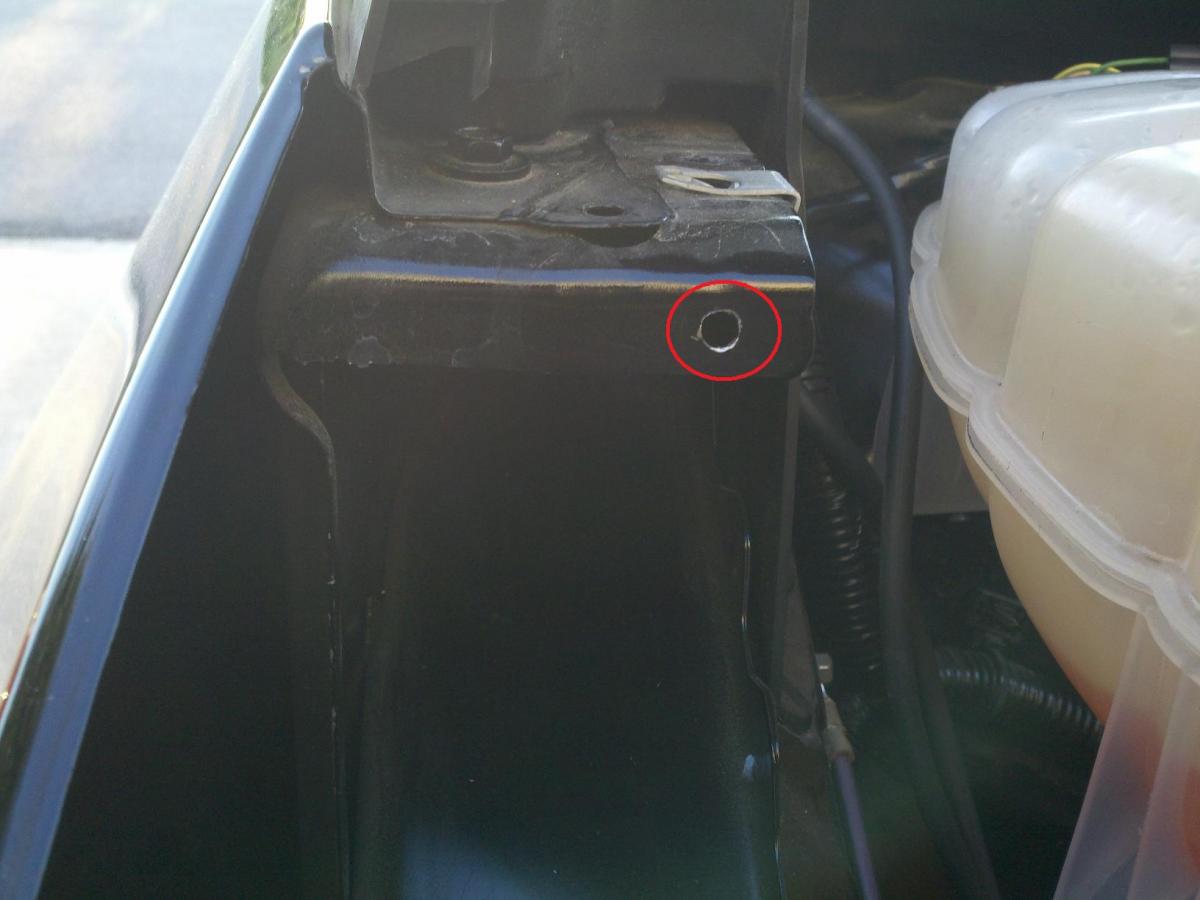
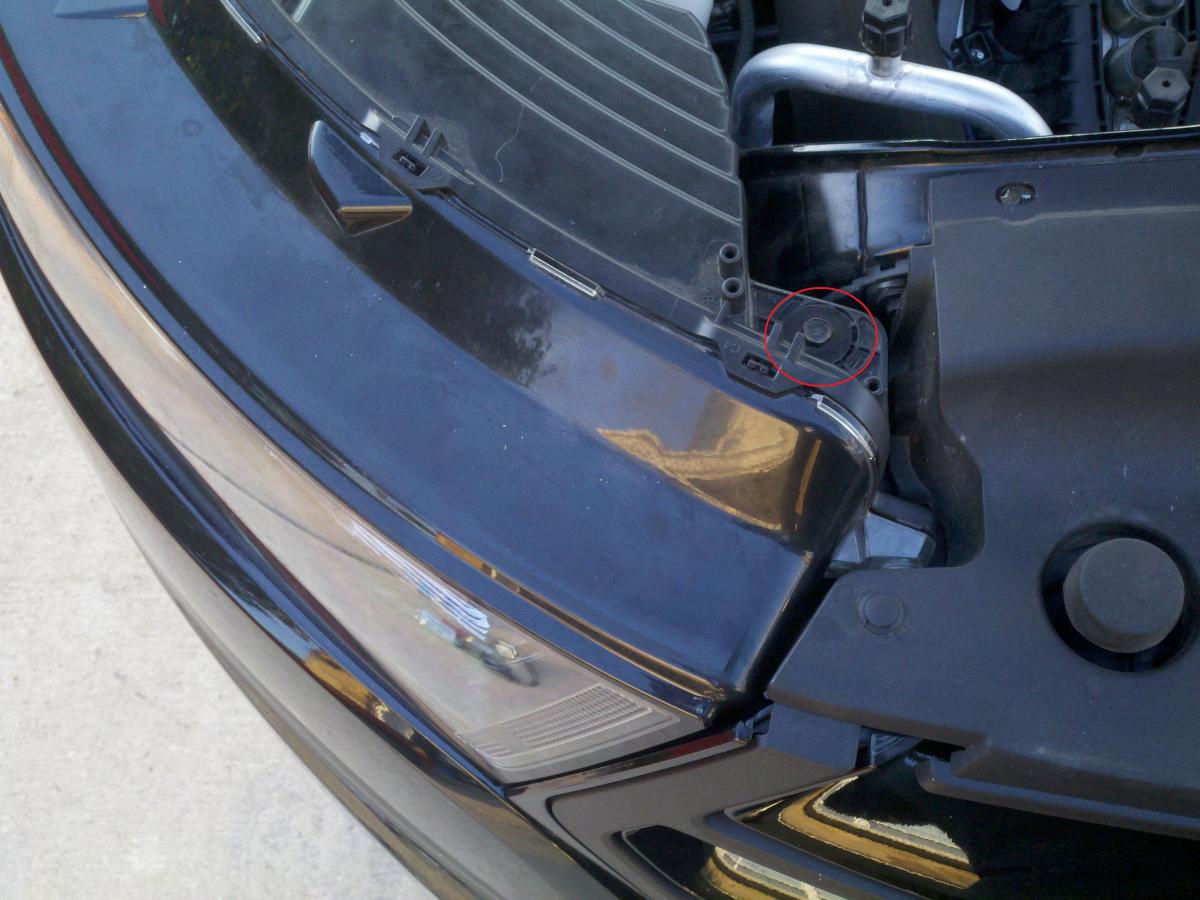
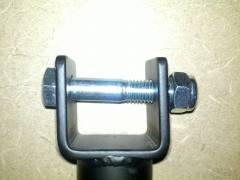
Here is a close up of where we will be mounting the hardware from your kit. Rectangles represent the flat areas we will be using, the red circle is where I drilled a 1/4" hole. The hole is not necessary for any other purpose other than to create an area to put a zip tie to keep the wires from bouncing around. Close up shot of where I drilled the 1/4" hole Next, I attached the mounting bracket to the back of the ballast as instructed in the instructions from drivebright. I did put the head of the bolts on the back side, with the nuts facing up, allowing it to sit a bit flatter. Test fitment of where you would like to mount the ballast. I pushed mine pretty far up into the cavity, leaving just enough room for me to put in the self-tapping screw: here is a top view to show how far back I installed it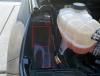
-
How To: HID Headlight Installation from Drive Bright
Mikula replied to Mikula's topic in Accessories & Modifications
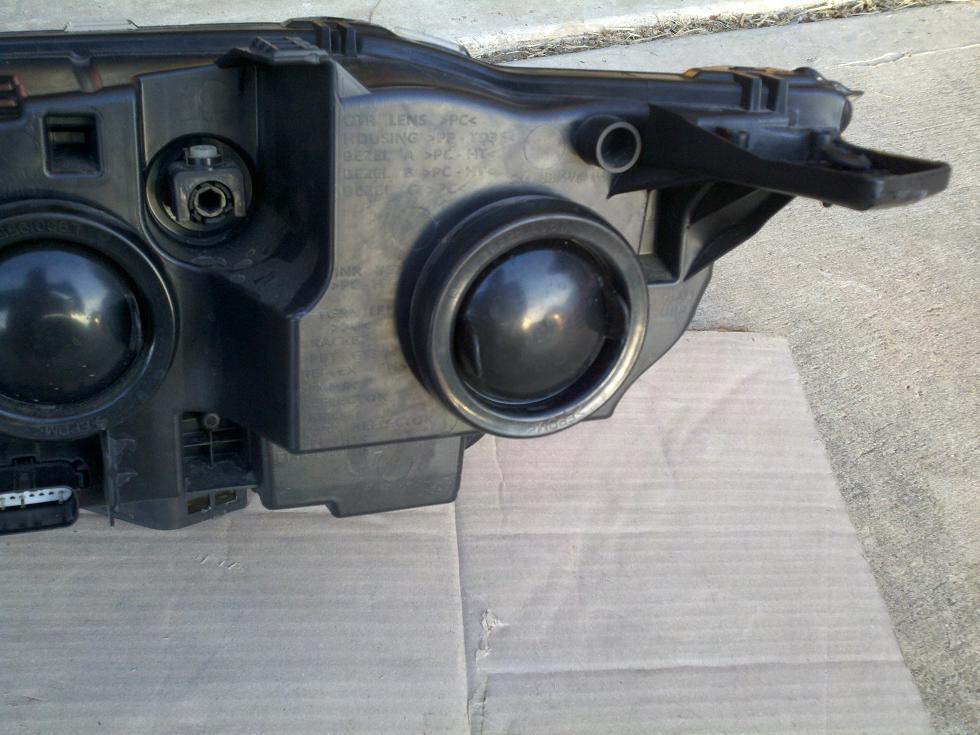
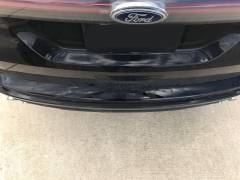
Be sure to remove the main connector to the headlamp assembly. The easiest way I've found to remove the headlamp assembly, is by pushing slightly on the part of the lamp closest to the center of the vehicle, while lifting up slightly, on the side that is toward the outside (or toward fender). The headlamp is a bit stiff, as it is pressed down into a sort of friction clamp, so some effort is necessary here. You'll now be free, exposing the area on the rail where we will be mounting the ballast and wires.

-
How To: HID Headlight Installation from Drive Bright
Mikula replied to Mikula's topic in Accessories & Modifications
Remove your negative battery cable. At this point, I started with the passenger side, as there is an extra step coming later. I removed my headlamp assembly. There is a very nice area to hide all the wires and ballast behind it, which is why I went this route. 10mm socket will remove the 2 bolts, and a phillips screwdriver for the remaining screw.
-
How To: HID Headlight Installation from Drive Bright
Mikula replied to Mikula's topic in Accessories & Modifications
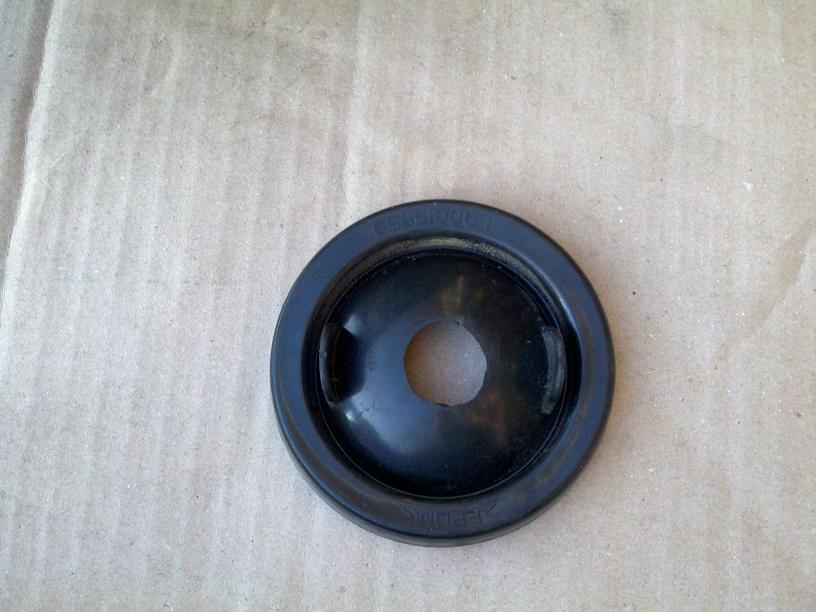
First thing I would do, is watch the installation video provided by the man that makes these lights. Unfortunately, his installation is for the previous model, but a lot of the basics still apply. Getting familiar with the procedure in video form is a good idea. Next thing I would recommend doing, is check the dust covers on the back of your headlight. This is one of the differences from the video you just watched, and the gen 2 edge. our dust cover is not plastic, but rubber. pull them off and make sure the rubber is not brittle, dry rotted, or cracked. If you find that yours is less than stellar, give your dealer a call and score a couple. at $9 each, they are worth having new to ensure when you're finished no condensation gets into your headlight housing. Ford part number 4S4Z13N019AA When i tried cutting mine (which I will show you later) it cracked and was just not in good shape: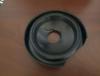
-
I'm going to run through how to install the DTBL-35W HID Kit on a Gen II. Mine is a 2016 Edge Sport, and although I would assume it is similar across the board for the 2015-2018 model years, I cannot be certain. I purchased mine from drivebright.com A few things to note before I start. I am mechanically inclined. This kit does not require much automotive knowledge, but the basics sure help. This kit can be installed without doing a lot of the things I'll be showing you to do, but I really wanted a clean hidden look. Since I had the tools and know how, I figured I'd post my experience. Tools to help you along the way: -very sharp razor blade -Ratchet with 10mm socket -8mm socket (with extension) -phillips screwdriver -cordless drill with phillips bit -1/4" Drill Bit Some other things you may need: -Small block of wood -Zip Ties - #8 x 1/2" Small self-tapping screws, home depot #21520 - New rubber headlight dust cover (One of mine was dry rotted a bit, which you will see later, so check yours before you start the install, and buy some if needed. They were $9ea at my dealer. Part number for those is 4S4Z13N019AA)
-
Drivebright HID's Anyone?
Mikula replied to Mikula's topic in Glass, Lenses, Lighting, Mirrors, Sunroof (BAMR), Wipers
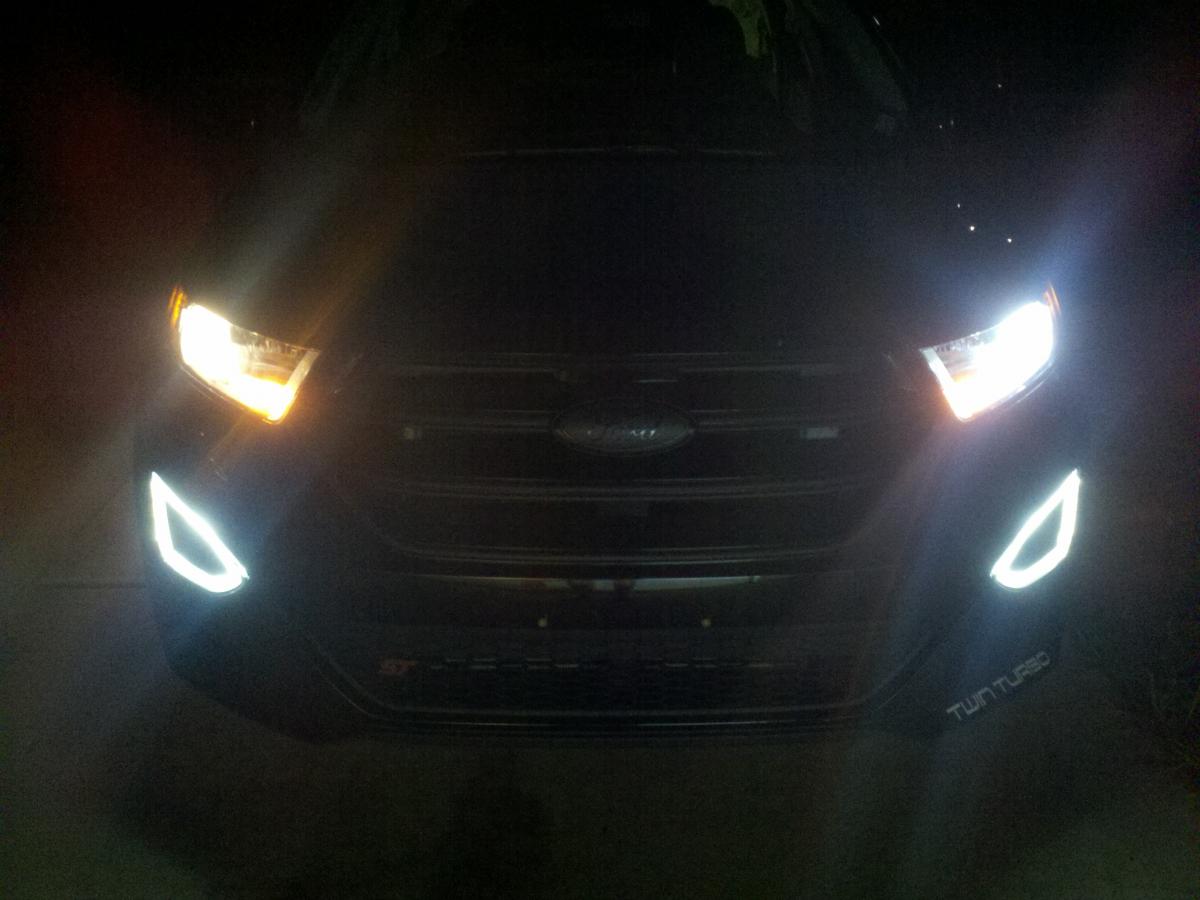
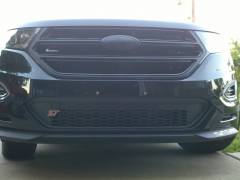
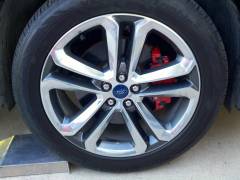
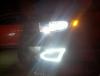
Here is a few pics. you can clearly see which one is the HID...
-
Drivebright HID's Anyone?
Mikula replied to Mikula's topic in Glass, Lenses, Lighting, Mirrors, Sunroof (BAMR), Wipers
I installed the 6000k today. it is a damn close match. They take a second to warm up apparently. when I first fired them up, they were a bit blue, and I was quite disappointed. by the time i went in to the house to get the wife and show her, they looked spot on. really REALLY happy with them. I'm going to post a "how to" tomorrow. I found a nice little spot to hide everything, and a few tricks along the way. -
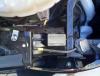
I'd like to edit or add my own "How To" in this thread, for those that do not want, or are having issues with removing the motor mount as suggested in post 46. Start by removing the plastic cover underneath the vehicle. There is more than one cover, so to be clear, do not remove the one attached to the front bumper. We are removing the cover that is covering the passenger side of the oil pan. The reason for doing this is so that when you remove the tstat, you have a place to catch the coolant with oil drain pans, or those throw away aluminum pans people cook turkeys in! a secondary option (and my preference) is to not remove the lower cover, but to buy some pig mat (amazon has some rolls for pretty cheap). This stuff is incredibly absorbent. I've been using it for years in a machine shop and I swear by the stuff. Take the pads and jam them underneath the area you will be working in. covering your pulleys, belts, and sensors when you can. next, remove the bolt on the coolant reservoir (it is on the back side). remove the plug on the rear of the reservoir (it is just a push pin style to keep it from bouncing around). Now the reservoir is held in place on the front passenger side corner near the bottom. lifting up on that corner will make it come free. Moving the reservoir out of that area (carefully of course) will allow you to get your arm in there and remove the thermostat the way DTMF suggests in post 47. However, there is no need to drain the radiator. I removed the bottom bolt from the thermostat housing first (because that one is a bit more difficult. Smaller hands will help you out here. I had to get the wife) You will begin to lose fluid here. keep pressure on the tstat housing whenever you can. You will not be able to use an extension or deep socket to get to the bolt. there is just enough room to use a regular "short" socket (8mm I believe) and back it out all of the way. Then move on to the top bolt on the housing. keeping pressure on the housing with one hand, while removing the bolt with the other hand, will minimize the amount of coolant lost. One thing to mention, have your new thermostat lying nearby. The quicker you do the swap, the less fluid you will lose. Also, make sure the "nipple" on the thermostat is facing up when you assemble it. Pull the housing back, remove the old tstat, and remove the o-ring gastket. It may still be attached to the t-stat, or it may be on the housing. put the new t-stat in place (again with the nipple facing upward, and the spring toward the motor). Then place the o-ring onto the thermostat, making sure it seats in there, then put the housing in place. Put your bolts back in and move back and forth when tightening to be sure it puts even pressure on both sides. Torque to 89 inch pounds. remove your rags if necessary, put your reservoir back in place, fill the reservoir between "min" and "max". leave the cap off at this time, and start the vehicle. If the fluid goes down, add to get into range again. Here is where I've heard differing opinions. Because the system is self burping, you can put the cap back on and let the vehicle idle until it gets to temperature. that obviously makes it difficult to add fluid if necessary, so i prefer to leave the cap off (or very loose) for the first 15-20 minutes, again adding fluid if necessary. I will also turn the heat on full blast after about 10 minutes of idle. Put the cap on the reservoir about the 20 minute mark. Total idle time was a half hour (which my vehicle automatically shut off at this point) let it cool, add fluid if necessary, check for leaks, replace the cover underneath if you removed it, and go for a test drive around the neighborhood. Make sure you get it up to temperature during this drive. Keep your eye on the gauge as it may fluctuate as air moves through the system. If it spikes to hot, just be sure it is a bubble, and not a failure of some kind. park it, and let it cool again. add fluid if necessary, and you should be good to go. Hope this helps someone!
-
emergency help anyone have the 160* thermostat from livernois
Mikula replied to Mikula's topic in Accessories & Modifications
It was the wrong one. Livernois sent the correct one. Overnight shipping, no charge to me. Stand up guys so far in my experiences with them. -
Interestingly enough, this picture is incorrect. I just went to the dealer to buy a new o-ring. He initially printed me this exact same photo on the placement of the o-ring. Then I asked him for the torque specs of the 2 bolts. get this... when he brings up that info, the picture shows the o-ring on the outside. Asked twice to confirm we were looking at the 2.7L ecoboost for 2015+ ford edge on both photos, and we were. After installing the o-ring the way this photo shows, it is leaking. Evidently it is incorrect. To those taking on this job, please ignore the photo in post 43.. and wizard, maybe add an edit in there stating that as well. Also, the torque specs for the 2 bolts on the housing are 89in lbs (that is inch pounds in case you missed it) 89 inch lbs
-
Strange feature i didn't know existed, leading me to another question. After installing a 160* thermostat, I started the car to let it get up to temperature and burp the system. after 30 minutes of idle, it automatically shut the car off. No, I did not use the remote start feature, as I know that does have a limit (which you can change) Which leads me to this. I remember reading somewhere that if I wanted to update sync via a thumb drive it would have to be done while the vehicle was running. If this takes more than 30 minutes to install, will it still shut itself down? or is something programmed with the update to bypass the auto-shutdown while uploading? Me personally, I planned to start the update then drive to work, so I won't run into this issue, but some others might.
-
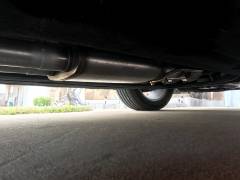
Just remember (and anyone else running a turbo blanket) to check them every so often. If they absorb any kind of oil, from turbos or otherwise, they can turn into kindling and burn it down. They are not flammable by themselves, but oil can certainly change that. I was told something years ago about blankets, so i'll pass the info along and let you guys be the judge. Because the turbos keep heat in, that also means that they are retaining heat after shutdown. With oil cooled turbos this can be a bad thing. it could produce some coking and cause premature wear. running synthetic is recommended to help with that. On the good side, turbos should spool faster, and obviously under hood temps should be better. I would recommend wrapping the exhaust down to the flex pipes while you're at it. or use some kind of additional heat shielding to dissipate some of the heat from exhaust as well. BUT... for me, on any kind of aftermarket application, such as xtra, I would absolutely use a blanket. Right now with my stock turbos, I don't think I'll see any measurable gain to justify it. But they sure look awesome!
-
Rear Motor Mount (RMM) (2016 Edge Sport)
Mikula replied to snmjim's topic in Accessories & Modifications
1000hp sounds awesome. Perfect application to run a bushing like that. Do they have any pics or vids of this 1000hp vehicle running one of their mounts? should i call them or pm you for the info on it? -
You, instead, went for... Tucking the turbos in for a nice bed time story. Please give them a kiss goodnight for me!
-
Oh poop... the principal stepped in. everyone rustle some papers and grab your pencils!
-
Damn those look good. You'll have the best looking setup on the road!
-
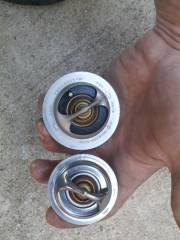
Pulled out the stock tstat from my 2.7 and it is a different size than the evenflo one that was sent from livernois. did they send me the wrong one? They are closed and just need someone who has done the job already. see pics. the livenois tstat is a smaller diameter. HELP!
-
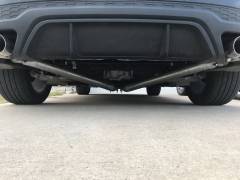
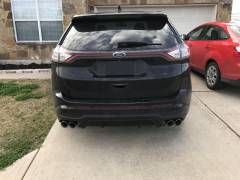
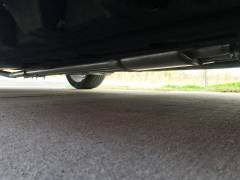
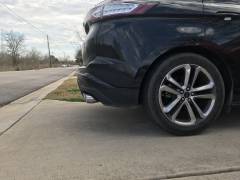
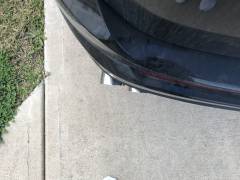
Custom exhaust
-
-
From the album: Exhaust
-
I guess I'm here to reiterate, that this will NOT come off. I had 2 jacks under the car attempting to support the engine. What is happening is when I remove the nuts off the studs, the engine sinks down putting it in a bind. i have 2 jacks, how is this possible. so I had the wife come out and loosen the last nut while i take a look at what happens. the car is lifting when she is taking the nut off, still putting it in a bind.. What am i missing here? I have pressure on the jacks, but why would the body lift? it has officially defied the laws of physics just to piss me off. I'm going to have to try your method. I'm having a hell of a time here. How did you manage to thread the lower bolt on the housing back in? that is my main concern with doing it your way. Top bolt is simple enough. Edit: I had the wife come out with her tiny hands to get that lower bolt. she had no problem, and called me "fat hands". That's real nice...
-
07edge check engine light flashing
Mikula replied to Melissa1015*'s topic in Forum Help & Site Suggestions
^^^^All of that! As cheap as plugs are, it is always good insurance to swap them like he said!