


12Edge
-
Posts
107 -
Joined
-
Last visited
-
Days Won
5
Content Type
Profiles
Forums
Gallery
Everything posted by 12Edge
-
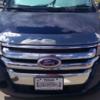
Hi All, I have a 2012 Ford Edge SE with manual A/C that looks like this: Living in Texas the blower motor usually stays on maximum. In winter its usually below medium. It was not until i purchased my daughter a 2012 Ford Focus that I noted her car's blower when on maximum just about blows your hair back pretty well, certainly way more than my edge. So I started testing mine by changing speeds and realized that the max setting and the second from the top are nearly identical in speed. The sound the motor makes changes nearly imperceptibly when switching, outside of that I would not say the air speed changes in a noticeable manner. So my question is for those who have a similar system, is that comparable to what your system does or have I gotten use to a defective blower/control? Thanks for feedback!
-
2011 Edge limited Driver door ajar issue
12Edge replied to Racerb0y's topic in Recalls, TSBs & Warranty
Yes I am aware. I was just ranting that a SECOND door has now had this issue. This is my work to home and back car so I'm generally the only one in it. The only reason the rear door duty cycle is higher than the passenger side doors is I open it to put my things in the car to go to work. As a result of this increased use it failed. I took the first one apart and the thing isn't even serviceable. I note that the new part is now a "B" part so it means even they know something is wrong :/ -
2011 Edge limited Driver door ajar issue
12Edge replied to Racerb0y's topic in Recalls, TSBs & Warranty
This is a crock of $h!t problem Ford. I now have had TWO doors with this failure. The duty cycle for your part is woefully inadequate to the normal customer. Ripping people off for hundreds of dollars per door after the fact due to defective parts is making me stray from Ford on my next purchase :/ My wifes car just switched from Ford. Mine will be next. -
How To: Replace Door Latch Module for Door Ajar Warning
12Edge replied to 12Edge's topic in Exterior & Body
Good Call HotRod, I actually have a pair of those type of clamps. Guess I will get to try it now that my driver side REAR door is now door adjar'ing ! Ford has a DEFECTIVE part here and the price has gone up since I bought the front one by $50. What a racket :/ I guess putting my stuff in the back seat on the way to work and opening the door as much as the front door has taken its toll on that switch :/ Full Retail do it yourself this is $1000 worth of parts for 4 doors. Come on Ford, Own your mistake. I have a note on a fixya account of 3,897 people helped with my link to this tutorial. If that doesn't indicate a defect/problem I don't know what does :/ -
How To: Replace Door Latch Module for Door Ajar Warning
12Edge replied to 12Edge's topic in Exterior & Body
kkrace, Thanks for the feedback. I had suspected that the bolt for the handle might just have to be loosened. At some point I edited post 1 to include try loosening it. I didn't have an issue with the door module perimeter bolts. I just tightened them with a ratchet until they felt good and snug. I didn't see a torque spec in the service manual. Just the one on the window. Great video! Always good to have corroboration. There is enough info here we should be able to get folks through a replacement if they are adventurous enough. -
Here is the "How To" on replacing it: http://www.fordedgeforum.com/topic/14262-how-to-replace-door-latch-module-for-door-ajar-warning/ I am going to do a postmortem on the old module after a bit and see what is actually failing and post it on you-tube if its something glaring to embarrass Ford.
-
55w HID Relay Buzzing Loud
12Edge replied to briandye's topic in Glass, Lenses, Lighting, Mirrors, Sunroof (BAMR), Wipers
Yeah, keep the OEM bulbs on hand and that relay. Assuming the relay is accessible. That way if you have any issues you can just pull over and revert the bulbs or try the other relay -
HID Bulbs draw HUGE power when igniting then settle down to less power than halogens when operating. Therein lies the problem. Capacitors are recommended by many sellers to work around this problem but I find the battery to be the ultimate capacitor Folks have posted on here that they have used capacitors and it worked while others say it didnt do any good. Considering the Body Control module provides the power for the headlights I would rather not fry that thing over not wanting to install a harness with a relay.
-
How To: Replace Door Latch Module for Door Ajar Warning
12Edge replied to 12Edge's topic in Exterior & Body
Saved -
How To: Replace Door Latch Module for Door Ajar Warning
12Edge replied to 12Edge's topic in Exterior & Body
The service manual recommends that the window be programmed for auto up and down. If you find the auto up/down not working the way to set it is to put the window all the way up manually then pull power after you press the auto down. I had left the button control piece hanging loose out of the door and inserted the plug under the windows buttons but not snapped it in. Then I set the window in motion and pulled the plug out. Plug it back in and put the window all the way up. Press and hold down until the window hits bottom and hold it for 1/2 second longer and release. Do the same going back up. Auto up/down should work. -
I made a quick post verbally explaining how to take apart the door to get at the latch module. Since then I have tried the lubricant and cleaner sprays but the problem does now go away. I finally bought the latch module itself, Levittown had it for $75. What follows is a photographic explanation on how to take apart a door to get at the driver door latch module. These instructions were made with my 2012 Edge that has keyed locks on the drivers door, not the remote sensor lock mechanism and a keyless entry pad on the door. At some point I will take apart the old door module and put up a postmortem. You can actually see the micro switch and I could hear it "clicking" as I moved its mechanism so I don't know what it could be Step 1: Remove Trim and window buttons to gain access to screws: Step 2: Remove perimeter door trim screws: Step 3: Disconnect window switches and main bolts attaching door trim: 4: Remove Door Trim and disconnect internal wires: 5: Loosen the window saddle bolts. You will need to raise/lower the window to bring them in to view of the access ports. When installing Torque to 7Nm or 63 lb-in or just over 5 lb-ft, this is out of the Ford service manual 6: Separate window glass from door module and tape closed: 7: Remove bolts for door handle and door latch: EDIT - You may only have to loosen the bolt in the center photo as I think it just presses against the plastic of the handle, it didnt actually go through it?! Try that first? 8: Remove the door handle: Video of how to take out door handle: http://s645.photobucket.com/user/SparkyDClown/media/EdgeLatchModule/VIDEO0069_zps9213ecfd.mp4.html 9: Detach wires from mirror and door so it can move freely: 10: Removal of door module. This was a bit tricky. I had to wiggle and shift the module around as the latch parts are still recessed towards the edge of the door. The window regulator arms also protrude and can scratch so do this carefully and don't force anything! I got the best results by sliding it to the right and down slowly: 11: Removing the Latch Module from the Door Module: 12: Linkages on latch module: TIPS for reassembly: ORIGINAL FULL SIZE/QUALITY PHOTOS CAN BE VIEWED HERE: http://s645.photobucket.com/user/SparkyDClown/library/EdgeLatchModule/EdgeLatchRaw?sort=3&page=1
-
The relays are common enough at auto parts stores for about $20. You shouldn't have to spend the money on it but if you want to rule it out....
-
Where does one install Blinker Fluid?
-
Headlights in my 2013 EDGE
12Edge replied to The Ripper's topic in Glass, Lenses, Lighting, Mirrors, Sunroof (BAMR), Wipers
The only way the ballast would be "Buzzing" is if it were powered. Is it possible the relay was mis-configured and the ballast was always getting power regardless of the light switch state? I assume you had the relay power switching lead connected directly to the battery? So basically the relay was tripped/triggered by powering cars light circuit and that made the relay make contact from the battery connected wire to the ballast power in? I was able to make mine buzz when I ran it off AC to DC converted power and the inverter was at the lower limit of the amperage the ballast demanded. -
Having read about these issues on these threads it seems the most common occurrence of the problem is when you do not have the relays and/or capacitors. Having said that, last night when I was heading home for the first time since i installed the lights several months ago I had a bulb not light. The system was on auto. Moving to manual on did no good. In the end I made a quick stop at a store (about 3 minutes) and when i came out and got in they both came on and have started 4 times since. For a few minutes there I thought I had lost a bulb or ballast. Yes, I have relays AND capacitors.
-
Headlights in my 2013 EDGE
12Edge replied to The Ripper's topic in Glass, Lenses, Lighting, Mirrors, Sunroof (BAMR), Wipers
Based on your question above.. did you run with the relay or connect ballasts to factory wiring? The point of the relay is to provide direct battery power to the ballasts. The factory wiring is running a lower amperage fuse than factory HID bulbs do meaning they draw more power. The relay and direct to battery connection wiring harness allows you to switch the lights on and off when the switch is used, triggering the relay to pass power to the ballasts from the battery. It also prevents the ballast noise from interfering with the Body Control Module as they are not linked together. So how did you hook up the kit? -
Shaking HID light pattern
12Edge replied to normcloutier's topic in Glass, Lenses, Lighting, Mirrors, Sunroof (BAMR), Wipers
The aftermarket bulb portion is installed in a 9006 style base. depending on how it may have wiggle room and this could be what you are seeing. With the whole vehicle moving I am surprised it is discernible. -
All HID kits for the edge I have seen are "converted" HID bulbs installed in to a 9006 (or similar) base. Taking that in to consideration there is no HID kit that is equivalent to factory bulbs. Having said that I am PERFECTLY happy with my aftermarket, conversion kit. It cost about $50 + $25 I spent to build a second harness to have independent bulb circuits like factory. I could have probably bought a second harness from the company for a lot less.
-
This isn't the best worded explanation of Canbus I have seen but give it a read to understand what it really is/does: http://www.skeenway.com/auto-led-bulbs/what-is-new-can-bus-led-light.html I know people think Canbus is the answer but it has less to do with power draw and more to do with control modules. It is also more prevalent in foreign expensive cars with a "bulb warning system"
-
I have a concern. Why are so many door latches malfunctioning? What is ford doing about it? 40K miles, just out of warranty and BOOM $120 part failure.
-
I hear what you are saying but I have no idea why it would work. There isn't anything to spray but the latch components in the opening. Where they move the switch is inside the plastic housing not anywhere that is exposed in the latch. Let me find your post.
-
Ok so I took a look at mine this weekend because I have been getting the dreaded "Door Ajar of Death" message on my drivers side door. I am going to say this early on... there isn't a way to really service the door latch module that is part of this system so don't take it apart thinking there is something to adjust of tinker with. In the end I smacked mine around a bit and its working so far but I expect it to start failing again soon. For my 2012 (should be same 2011-2013): 1. Remove the outer door trim panel. 2 Phillips screws on the bottom edge, 1 on the inside edge closest to the hinge about half way up. 2. Pop off the plastic panel (mine is silver) just above the rubber grip on the door handle. Its a pry off type. 3. Remove the bolt (10mm head) in the hole uncovered by above cover (Its in the deep hole). There was also a torx screw above the deep hole that I took out but don't think it was necessary to remove. 4. Pop off the window control buttons by prying up at the edge closest to the rear of the vehicle. The front hooks in so don't pry there. Unplug the two connectors underneath to completely remove it. 5. Inside the opening from the windows buttons there is another 10mm head Bolt to remove, take it out. 6. Start from the bottom edge and pull the trim panel away from the door to make the push pins release. Some may break or stay in the door it is normal. You may want to get some more to replace broken ones. I find them in the "Help" section at my auto parts store. 7. Once all the push pins are released gently lift the panel upwards to unhook it from the lip at the top by the window. DO NOT pull it completely away once its off the top, there are two wires to disconnect for the mirror control and door lock switch. Reach in between the panel and door trim and disconnect those first, then you can take the panel completely away and put it somewhere safe and clean. 8. Look at the end of the door where the latch is. I had two small rubber plugs near the top close to the window. Remove the lower rubber plug. There is a torx bolt deep in there that holds the handle in place. Remove it with a magnetic bit. BE CAREFUL! YOU DON'T WANT TO DROP IT IN THE DOOR ESPECIALLY DURING INSTALLATION! 9. Take the 3 torx bolts out of the latch, 2 above the latch one under. They were all black on my car. 10. Pull the outside door handle like you are going to open the door. You should be able to pull at the rearmost part of the handle that is still attached to the body that is around the door lock (assuming you have a lock like I do). As you pull it away from the body at the rearmost edge it will kind of "roll" out. In other words the rearmost part should come out and allow the lip at the front edge of that little piece to come out easily. 11. The rest of the handle is one piece and the way I got it out was to gently encourage it to slide in the holes towards the rear of the car. I tugged it out some and back towards the rear of the car some and it just disengaged and came out of the hole. 12. With the handle out of the way there is a torx screw that you can loosen but do not have to remove as it is in a slotted opening in the body of the car and will just slide out if you push it towards the front of the car. 13. With the outside handle completely removed and the latch disconnected at the edge of the door it is time to detach the window. On the inside of the door there are two large black rubber plugs near the top of the black plastic door module. Pop them out. If your window is all the way up slowly lower it a bit at a time (yes you will have to temporarily plug in the window control box in to the harness) and you will see a torx bolt appear in those two holes. Loosen them a about 4-6 turns but DO NOT remove them. They simply release the window from the rubberized saddle that holds it in place. Pressing inwards with your palms on either side of the glass lift it up until it is at the top of the track and looks like it would if you had closed it. Use some tape to hold the window up. DO NOT skimp here. I used a little tape and while I was re-installing the tape released (about an hour after installing it) and fortunately the door module was back in place and the glass just dropped back in to the saddle. 14. Looking at the black plastic "Door Module" there are about 12 - 15 silver 10mm headed bolts all around the outside perimeter of it. I took all of them out but left two at the top outside holes in a couple of turns so the door module hung from them. 15. There is a rubber flap that the wires go in to close to the hinge. Lift it up to give the wires room move so you can maneuver around the module. 16. Removing the door module. Make sure the Torx screw has not re-seated itself on the outside handle as you are now going to remove the module and its all one piece, handle, latch window tracks and all!. Take out those last two bolts you left in at the top of the module. You will have to wiggle the door module down and towards the inside bottom corner of the door (corner under the hinge). This was more art than exacting for me. I kept working it and eventually it all came loose and out. DO NOT pull it all the way out, when there is enough room reach up inside the door where the code entry module is (assuming you have a code entry pad on the outside) and unplug that wire. Once you get the wire unplugged and the entire door module free you can lay it on a stool/low box on its side with the door open. ( it is still of course attached to the wire harness at the door) 17. The latch module is the big white/black plastic part that was at the edge of the door module. It has several linkages attached for handle cables, the lock button and the key etc... This is where my information is going to be a bit thin. I remember there was a tab where the pull cable attaches from the inner door handle to the latch. When the plastic tab is released on one side of the hole the cable goes in there is a cover that comes off and you can see the curved Z-Bend end on the cable attaches to the hole in the latch mechanism. Similarly the other things are attached with S or Z bends so you have to wiggle them around to get them out. There are a couple of plastic latches at the top and bottom and if I am not mistaken along the edge holding the latch to the door module. Once all linkages and latches and the one plug is unplugged you can remove the latch. You will find it pretty much impossible to take apart. There are metal pins with flattened heads that will have to be ground off to open it etc... I finally realized that I was probably going to break something and be unable to use my car while I waited for the latch so I quit trying to open it. I banged around the outside with a plastic screwdriver handle and put it all back together. About 100 opens so far, no failure. The part is around $120 online before shipping/tax so I will probably order one when I can for when it acts up again. Installation is the reverse of the above. I would recommend not bolting down the entire door module (dozen or so bolts around its perimeter) until you have that bolt that goes in the edge of the door for the handle parts to be held in place in case you drop it. Don't want to take all that apart again. Also don't overtighten the glass window saddles or you might break the glass. I can try to find the torx spec later. OK.. Straight out of the ford service manual: To install, tighten to 7 Nm (62 lb-in).
-
Like I said they are 50Watts each for turn signals/breaks and no problems here. I have no idea what Dan is selling.
-
I am running these from different ebay sellers: 3157 Amber 50W:http://www.ebay.com/itm/50W-OSRAM-CHIP-USA-AMBER-10-SMD-3157-DUAL-FILAMENTS-LED-LIGHT-BULBS-TAIL-SIGNAL-/221371455040?pt=Motors_Car_Truck_Parts_Accessories&hash=item338ac45640&vxp=mtr 3157 White 50W: http://www.ebay.com/itm/NEW-50W-2X-JDM-10-SMD-OSRAM-CHIP-WHITE-3157-4157-DUAL-LED-LIGHT-BULB-TAIL-SIGNAL-/321318231792?pt=Motors_Car_Truck_Parts_Accessories&hash=item4ad00f1ef0 Backup Lights 30W: http://www.ebay.com/itm/30W-High-Power-T10-921-912-194-Xenon-Cree-XB-D-LED-Backup-Reverse-Light-Bulb-/290984985165?pt=Motors_Car_Truck_Parts_Accessories&hash=item43c00e824d&vxp=mtr No rapid flashing, no problems. I was trying to find the modifications post I made with pics before/after but I cant seem to now. Add: Found the post: http://www.fordedgeforum.com/topic/13442-comprehensive-mod-lists/?do=findComment&comment=105126
-
I hate to bring up the elephant in the room but if you are having a problem with "Dan's" light kit shouldn't you be talking to Dan?
