Tacyon
-
Posts
417 -
Joined
-
Last visited
-
Days Won
12
Content Type
Profiles
Forums
Gallery
Everything posted by Tacyon
-
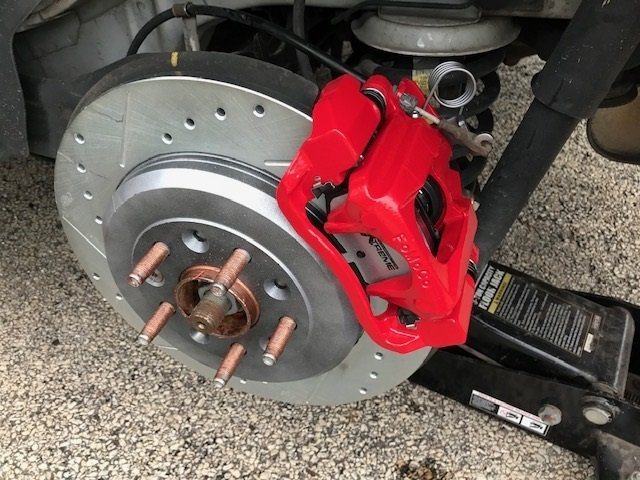
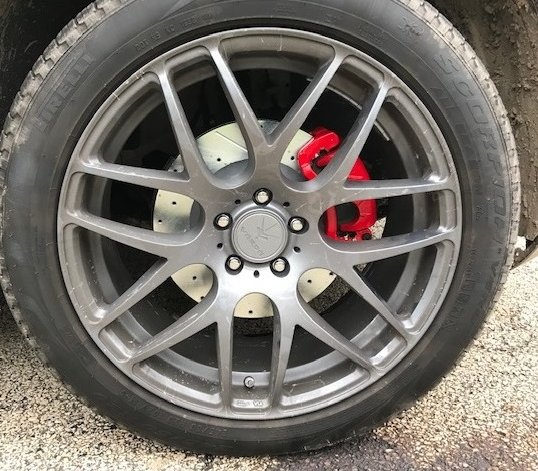
Next on my list of needed maintenance/about time for change out are the brakes. On my 2011 I'd ordered a set of slotted and cross drilled rotors and new calipers. When they arrived, I used my die grinder with a abrasive pad on it to remove all the flashing from the casting process and other gross irregularities then obtained this G2 kit and painted them. I did this partly because the cast flashing was going to mess with my zen and no one offered ready power coated calipers for the Edge. This time around, I located a local shop that would power coat them for $25 ea if I prep'd them. However ... Power Stop now has these and this saves me some money and time. I'll just have to deal with my zen over the castings not being smooth. Full set front and rear with carbon fiber/ceramic pads and slotted/cross drilled rotors from Rockauto is a few drinks under 7 bills. 175/corner .. not bad. I'll update photos once that lil project is completed. Update: got some time (and cooperating weather) this weekend to install. I'd really like to go with big brakes. Larger rotors and 4/6 piston brakes .. but, meh .. It's not a X5 with a V8 HEY, reminds me, I was a bit surprised to find (or not find as the case was) no rear brake harmonic dampeners. The bolts didn't even have the threaded stud to attached it to had I had a pair (of harmonic dampeners) Was this not a thing on 2013 Limited AWD's ?
-
As for the "auto battery disconnect" feature, I can tell you that on my 2011 and 2013 Edge, I've left the dome and/or parking lights on before and in the morning, they're off and the battery is fully functional. I know I've left them on because as soon as I start the Edge, they all come on. Haven't tried with the headlights. Another "ignition wire" that is even more convenient is the power to the rear view mirror. My 9500ix and Garmin 2555 LTM are both wired into it.
-
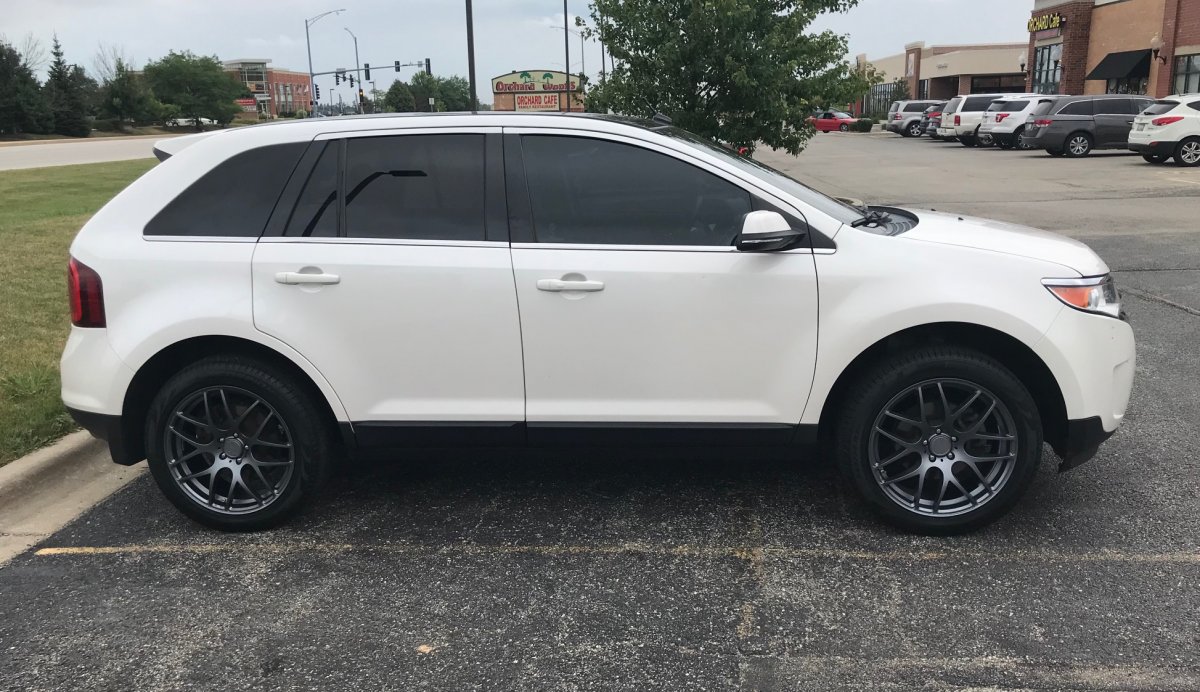
I'm one of those angst purchasers. When I decide I want something, I research it for months, mull it around in my head. Worry about the cost and if I'll realize the value of it. So, finally I pulled the trigger on my 2nd Edge upgrade to aftermarket wheels and new tires. (4) Empire Verde in matte graphite silver + a needed new set of Pirelli Scorpion Verde plus. I know that there has been a lot of negative opinions of the stock Pirelli Scorpion's but these are the next model up and they've improved the compounding and tread pattern a few times hence the "Plus v3". I've been thru several sets on my first 2011 Edge Limited AWD and this is the 3rd set on my 2013 Edge Limited AWD. The wheels were the "angst" part of this purchase. I don't care for chrome and everyone does black. Didn't want 5 spokes, didn't want "turbine" bike spokes. These are everything in between all that and since beautiful is in the eye of the beholder, I love em! I still have the OEM rims that are in good shape if anyone is interested. If not, they're going to host my winter skins (Chicagoland winters) I left them skinless with the TPMS sensors still attached so pick out winter rubber (BFG Advantage T/A's ??) and I'm good to go.

-
Silly rabbits - tricks are for kids ... when will they learn. February 13, 2019 Dear Tacyon Get the new 2019 Ford Navigation System Map update for just $149.00* by May 31, 2019 and receive complimentary Shipping** Now, first note the usage of "*" which usually means conditions or strings. And "just" $149.00 and we'll also include "complimentary Shipping" [cough, cough] ummm Ford -> Garmin - Drive 51 LM 5" GPS with Lifetime Map Updates (2-4/year usually) for $130.00 And I would also add, any location can be looked up in less than 30 seconds vs an argument with MFS over not really wanting wherever it decided she wanted to direct you to. Hell - even for a few dollars more - Garmin - DriveSmart 61 LMT-S 6.95" GPS with Built-In Bluetooth - Lifetime Map and Traffic Updates @ $190.00 OR ... your smrt fone on google maps! Just sayin ... Ford.... what the market will bare.
-
yea - not a fan of this software either. There are a few other forums I've bumped across and I either don't join or drop off shortly there after. Question for whomever is controlling the strings behind the scenes, how do I disable or not have double spacing?? Specifically in my signature.
-

Front turn signals - puzzle
Tacyon replied to Tacyon's topic in Glass, Lenses, Lighting, Mirrors, Sunroof (BAMR), Wipers
hmmm .. I figured if I let this post bake a few days, someone would come up with a bright idea (HA! See what I did there) So. let me ask this of someone who has Oasis access .. the two turn relays in the engine bay fuse panel, where does their N/O contacts go to? (FETs in the BCM?)- 1 reply
-
- 1
-

-
The front turn signals stopped working. Mirrors, rears, tap to turn, all work fine. Just zero voltage at the light socket when turn is engaged. Relays are kicking and I've got voltage on their outputs (measured on the bottom of the engine bay fuse panel. If I jumper to the wire loom for the turns and give it 12vdc, they light up when they're suppose to. I have the DayTime Bright lights control module for the gill lights/turn signals installed but they're NOT the cause of this. When I swapped out the control module, I tested the Edge while it was disconnected and still no voltage at the back of the turn plug. F13 & F14 (fuses on the cabin fuse panel) for turns L & R. They're good. Front marker/parking lights are working normally. From the diagram I think my next step is to look for voltage on the output connector of the BCM for the turn signals .. Does anyone know where the wires for the front turns go after they leave the relays in the engine bay fuse panel?
-
Cargo area lights
Tacyon replied to tmarsh's topic in Glass, Lenses, Lighting, Mirrors, Sunroof (BAMR), Wipers
The idea I haven't executed on yet was the puddle lights from daytime bright lights because I know just how bright they are. One on each side of center about a foot out should cover it. -
Thank you gentleman. Look slike there are three or four sources of power in the rear lift gate. None of which I want to use as they're associated with specific manually triggered functions. Looks like I'll be tapping into another loom point and running my own wire. Photos to follow.
-
Does anyone have a 2013 Edge limited's liftgate wiring diagram. Got an idea and I'm looking for what power is there that I can tap into. hint: puddle light.
-
iDatalink Maestro + Aftermarket touchscreen?
Tacyon replied to James McGill's topic in Accessories & Modifications
Well .. I can tell you from the other way around. I just did a sound system buff with the iData Maestro RA which a keep the "head unit" (which is not really a head unit) but replace the anemic stock Sony amp and DSP. I used the iData Maestro HRN-AR-FO2 T-harness, iDatalink Maestro AR Universal Amplifier Replacement Interface, Kenwood Excelon XR600-6DSP Advanced Integration Amplifier. For those who don't know, what happens with this gear is that until last year (2017) There was no way to get the "control signals" from the stock system to tell a 3rd party amp what to do. You were stuck with the high 2 low level converted which did nothing for the neutering of the sound envelope that Ford/Sony did to protect they factory speakers and the children's ears. Since my ears are shot, I want to feel the music via SPL. What iData did was to work with Kenwood and iData takes the CANBUS computer signals that normally to the Sony amp in the back passenger side of the Edge (2013) and tell it what to sound like and how loud, and send to instead to the Kenwood AMP that was specifically designed to be a DSP that only works with the iData products. What you get is 6 channels of 100w sound to the factory location AND two channels of real honest to goodness low level outputs for say ... oh, 1200 watt sealed subwoofer box that you've been dying to install in your Edge. I'd already replaced the factory speaker .. and they can handle the 100w (300w peak) but I wanted the "window delamination" amp option. Oh yea ... this works. So, now a few weeks later and I'm still tweaking and tuning and discovering what is not working. Like, I have collision avoidance, when I'd trigger it (false alert) it would mute the phone or music to almost zero so I could hear the BONK-BONK, BONK-BONK, BONK-BONK. Now that mute no longer happens .. not sure if I like this or not. The screen press sound feed back is also gone. Same here, I was accustomed to that feedback. hmmmm. I've see the iData Maestro RR with Kenwoods and Pioneers and its basically the same thing in reverse. Only from your Pioneer's head unit, there will be a screen icon called ... car ?? and pressing it takes you into the car's functions like, HVAC, Seat controls etc. Looks similar .. but not 100% copy. If your research hasn't brought you to these guys .. check them out. I like their personalities and they do top notch work. And they're entertaining to watch. . You'll be interested in this video This is their main channel. -
Yep .. got the same one today as well and came up here to post .... ya beat me. Same thoughts ... used a few times. Was very underwhelmed. Still, I don't like it when freebies are removed. I wonder why the official reason they made the decision. Cost, lack of use, both?
-
Removing Roof Rails and Antenna Delete
Tacyon replied to BLK14AWDEDGE's topic in Accessories & Modifications
As WWWPerfA_ZN0W said .. stubby antenna. But be warned, I've noticed a drop in signal strength since I installed mine. If you have a station that was not rock solid clear before, it'll be staticy now. If it was sketchy before, it'll be unusable now. Satellite's antenna IIRC is in the dash just under the surface. So nothing to do with the shark fin up on top ahead of the moon roof. (if you have one) -
Jhead85, along with the question of budget, you've got to ask yourself are you fine with a line level converter (speaker outputs -> DSP -> low level for an AMP) which won't solve the severe neutering of the audio that Ford/Sony does on its stock configuration. OR, if you want to opt for what is behind door two and go with a solution like iData Maestro + Kenwood XR600-6DSP which kills 3 birds with one albeit large stone. I have a 1200 watt ole skool Phoenix Gold Ti 600.2 amp connected to two, Diamond Audio D612D4 in a sealed box with no way to connect it to my Sony "Premium" sound system in my Edge. IMO Line level converters don't count. Until mid 2017 it was relegated to the corner of my garage. By opting for the Maestro/Kenwood configuration I not only bypass the anemic and heavily neutered Sony stock amp but also get 2 sets of real line outputs from the Kenwood's XR600. I just about have all my hardware in hand and will do a thread on my install here and my design reasons. The Maestro/Kenwood solution is going to be ~$1000.00 on the cheap IF you have all the install materials in hand and the install skillz. (cabling, fittings, etc) And this is without the consideration of a sub-woofer (not a german shepherd living on a submarine) and loosing the "center ch fill speakers" on the stock configuration.
-
Rotora big brake kit for 2011-2014 Edge.
Tacyon replied to Tacyon's topic in Brakes, Chassis & Suspension
yea... my thought was, for a non-race, daily driver that see the expressway 70% of its life, I just couldn't rationalize $1700 vs ~$400 for front brakes. In my mind I also question that radical of an upgrade to the front might bring on the need to upgrade the rear or adjust its bias at the very least. For me, maybe if they would come down to the $1000 or below range, I'd consider it. -
Think the coined acronym born from the phrase - Cannot Understand Normal Thinking is fairly accurate. Fortunately for me, a major upgrade was all it took to fix.+ we need to steer this thread back on course speaking of driving, noises, and tracks.
-
I have to pick up a U-Haul trailer this evening and decided to do a quick maintenance check on the Edge's trailer light plug. Good thing I did as it wouldn't have worked had I not serviced it first. I didn't take a before pic, sry. But trust me, it wasn't pretty. Here's what I did, took about 10 minutes and it's better than new. 1) a can of spray electrical contact cleaner. I had a can of CRC Cleaner and it worked great. 2) a small, short strip of fine grit sandpaper. Doesn't have to be much, ~1/4" x 1" long. 3) a small cotter pin. (had several in my tool box) small enough to easily fit inside the connector jacks. Mine only filled about 70% of diameter of the jack in the rubber connector. 4) take the sandpaper and place its short edge in the open end of the cotter pin, like a tiny flag. Then spin the cotter pin wrapping the sandpaper around it. 5) spray some cleaner in the jacks and insert this cleaner wand like this and spin around. 6) Once clean and looking shiny, flush with more spray cleaner and inspect. 7) Use some dielectric grease (I had a tube of permatex dielectric grease) and use the same cotter pin to push the grease into the now clean jacks. 8) and finally, place a lil dab of dielectric grease on the tip of your finger and smooch around inside the lid of the cover that snaps back over this to keep water and other debris out of. So, looks like I've created an 8 step program to get clean and conductive! Thus endeth the lesson
- 1 reply
-
- 5
-
-
Just thought I'd pass this along since I've decided to pass on it myself. While checking out various ideas I've been having about doing big brakes on the front of my Edge, (ex: Cadillac CTS calipers, rotors, and a bracket - can't be done at this time, but you get the drift) I visited the Rotora people who HAVE a big brake kit that are similar to the Brembo system but a tad less expensive. They have a "clearance" page and low and behold, this -> comes with two 14.9" rotors (stock is like 12.6 iirc) two 6 piston calipers, pads, SS lines, banjo bolts and the copper washers. That is a great deal, but for my daily driver on the highway and no mountain roads to play on, $1700 (almost 1/3 of list price) is still a bit outside my rationale. So, here is the info, better that someone from here gets these than not. FORD FORD EDGE 2011-2014 (U387)Front: 6-Piston | 380x32mm | Street Pads | Stainless Lines System Type: Street Challenge Caliper Finish: Red Disc Type: 3-D Drilled | 2-Piece Disc (I asked about service parts after the fact.) Hello Lane, Rotora will always have replacement/service parts available. Give me a call when you are ready to take this set. Thank you. Regards, Loren 626-813-7900 (ext: 115) http://www.rotora.com https://www.facebook.com/rotorainc https://instagram.com/rotorainc
-
ok .. just checking cuz as Akirby pointed out, that is also a whining noise which at times can sound similar to what you described. Took me almost two years to figure out where that noise was coming from. Located it, got rid of it and installed "wife v 2.0". WAY better now. Instead of whining when I step on the gas, I hear, "is that all she's got??, Faster, Faster!"
-
is your wife in the car ?
-
Comprehensive List of Possible Forscan Mods?
Tacyon replied to ben senise's topic in Accessories & Modifications
Omar302 ... which series of Edge? the 11-14 are different from the 15+ What I can tell you is the F150 info was very different from my as-built 2013 data so I didn't trust the info. -
Comprehensive List of Possible Forscan Mods?
Tacyon replied to ben senise's topic in Accessories & Modifications
ForSCAN codes ... 2013 Ford Edge Limited. After a lot of searching, cross referencing and verifying, I've come up with these codes that I'm going to apply to my Edge today. I'll report back on the success of them once tested. Not to say we don't have some knowledgeable and talented members here in our forums, but dam, some of the other forums (Ford Fusion) are off the hook with their ability to mod the various Ford systems. Ex: One guy found on the ACM (audio control module) where to cause the stock Sony Prem. sound system to disable the built in DSP and how to reroute the voice nav and other verbal output back to the ACM. Doing so cause the "head unit" to be just that, flat, low level outputs for use in an external amp configuration. He also confirmed (with an oscilloscope) what I've always heard and suspected that the Sony system neuters the sound as you increase the volume. Anyways I digress. Much of what I was finding for ForSCAN codes for my 2013 (2011-2014) were not matching up with my "As Built" data. (factory defaults). They were saying you'll find this and change it to that. Only I wasn't find "this" at the specified address. Thus, my confidence in the info was low. I did see that my series of Edge shared much (all?) of the electrical configuration as the Explorer 2011-2018 series. So with that I found this -> FORScan 2011-2018 Explorers and noticed that they called out the differences when the systems changed over in 2015/2016. More over, at each address that I was interested in, the expected "as built" or factory settings were exactly what I have for as built data per Ford. Confidence in the info is HIGH. Even where there are additional settings at the same address but different bits, the "what you'll find" info matched what I had and knew on my as built. So, changing the following - FINALLY !! module address d1 d2 d3 change what it does SCCM 724-01-01 8080 07D3 07 -> xxxx xDxx xx 6 turn signal flashes (confirmed, works as expected) BCM 726-16-01 0111 56 -> xx0x xx Double honk disable (confirmed, works as expected) BCM 726-13-01 0101 0000 43 -> x0x0 xxxx xx Hyper Flash disable front (confirmed, works as expected) BCM 726-14-01 0000 0101 44 -> xxxx x0x0 xx Hyper Flash disable rear (confirmed, works as expected) And yes .. I did do my happy dance! -
-
-
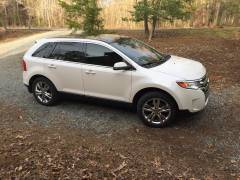
From the album: Tac's Ride
2013 Edge AWD Limited, White Platinum Tri-Coat, 302A, Tow Package 3M FX Premium 30% ● 3m Crystalline 70% LED interior replacements ● Puddle lights drivebright.com ● LED Switch back turns, ● Tail and Gill lights from drivebright.com Infinity KAPPA 682.11cf (front/rear doors) ● Infinity Reference REF-3022CFX (dash and D-Pillars) ● *Infinity Reference REF-275tx (A-Pillars) xB bumper protector. ● Redline Tuning Hood QuickLIFT with 20% increased lift option. Garmin Nuvi 2595LMT and Escort 9500xi hardwired and custom mounted. ForScan mods: SCCM 724-01-01 8080 07D3 07 -> xxxx xDxx xx 6 Turn Signal Flashes BCM 726-16-01 0111 56 -> xx0x xx Double honk disable BCM 726-13-01 0101 0000 43 -> x0x0 xxxx xx Hyper Flash disable Front BCM 726-14-01 0000 0101 44 -> xxxx x0x0 xx Hyper Flash disable Rear -
window sticker lookup for used Edge?
Tacyon replied to bamabob's topic in Buying, Leasing & Ordering
bamabob - I'd still try the link. Plug it into a browser URL field at the top and see where it takes you. Its possible that the URL you've copied will take you to a forwarded page with the VIN more clearly discernible. You've got nothing to loose other than time.