NeuroBeaker Posted August 31, 2020 Report Share Posted August 31, 2020 (edited) 17 hours ago, enigma-2 said: 4th year + going on five on this Motorcraft battery. I typically get 6 to 7 years on them. IMO they are one of the best on the market. (I used them in all of my cars, Ford or not). Two years means something is wrong. Have you ever checked your charging system? Belts? My Edge is a 2015 and I think this is the original battery, so 5 years old. I'm doing a lot of VERY short journeys in it and I think that's what knackered it. My negative terminal is completely corroded now, so it seems to have suffered a failure in that regard. On 8/29/2020 at 5:12 PM, Duece McCracken said: No worries on the Q's, mate. Sounds like its a good time to pull the OEM and get some measurements. Well, actually, you can just measure off the OEM, just be careful of the terminals, lmfao! No need to practice welding with a tape measure. I'm trying to remember where I got the information to upsize. Whether is was a f150/Expedition forum or not. Let me give it a googles and see if it jogs my memory. Well I cross referenced the battery tray, and It's only in the edge, but based on engine and accessories the battery size changes within the model. Sorry I dont have much more information. A few measurements should sort you out though. Theres actually three battery tie down locations, but im not sure if the most forward one is usable. Just something to double check/keep in mind as you get adventurous. Please keep me in the loop on what you come up with. Would be beneficial to all of us. I measured the space and although the NSB-AGM24F (10.87L x 6.77W x 8.86H) will fit in the space, I don't think I'll be able to put the terminal connectors on and off (or get jumper cables onto it) while it's in place if I ever need to. I think I'm going to give myself the extra bit of headroom by getting the NSB-AGM48 (10.91L x 6.87W x 7.42H) like you did. You've had a good experience with it and that's confidence-inspiring, so I'm off to go buy one today. Thanks so much for your help, I really appreciate it! All the best, Andrew. Edited August 31, 2020 by NeuroBeaker 1 Quote Link to comment Share on other sites More sharing options...
Duece McCracken Posted September 24, 2020 Author Report Share Posted September 24, 2020 So I was beating on the Edge today, and something seemed off. As soon as I started building more than 5 psi of boost I could hear a rushing whooshing sound in my undercowl type area. I may just be going crazy, I normally have music, or A/c running. So maybe I just never noticed it before. I did a quick visual inspection. Intake piping is all attached, charge piping is looking fine. Nothing screamed out at me. As monitored via my SCT BDX, I was still hitting good peak boost, 20.99psi at 63 degrees F just a couple hundred feet above sea level. Tires were squealing some, so torque is there. With all this, I just ordered the GFB diverter plus, to beef up the BPV, and see what that does for me. Leaning towards insanity with this one. Lmfao Quote Link to comment Share on other sites More sharing options...
Duece McCracken Posted September 25, 2020 Author Report Share Posted September 25, 2020 Well, I wasnt crazy. Turns out I didn't seat the PCV tubing from the valve cover that goes right to the intake manifold. So under boost I've just been blowing air out that tube. I snapped it back down, need to take the edge for a spin, but it makes all the sense, lmfao! I still have the GFB dv+ coming, and I bought a boomba BPV spacer, that turns it into a VTA BOV. If it gets super annoying, I'll ditch the spacer. Quote Link to comment Share on other sites More sharing options...
enigma-2 Posted September 27, 2020 Report Share Posted September 27, 2020 On 9/25/2020 at 9:13 AM, Duece McCracken said: I still have the GFB dv+ coming, and I bought a boomba BPV spacer, that turns it into a VTA BOV. If it gets super annoying, I'll ditch the spacer. English Duece. Care to translate this? Quote Link to comment Share on other sites More sharing options...
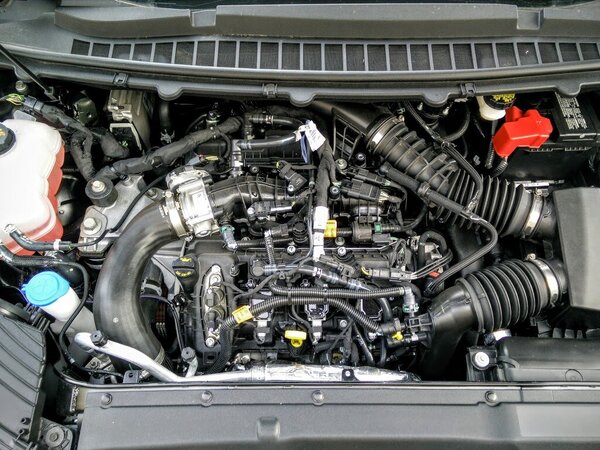
Duece McCracken Posted September 27, 2020 Author Report Share Posted September 27, 2020 1 hour ago, enigma-2 said: English Duece. Care to translate this? Lol, sorry! We have a plastic bypass valve (BPV), which is the air valve on the hotside charge pipe that comes from the rear (closest to firewall) turbo. This is the pressure release for the charge piping to prevent compressor surge when the throttle body closes in off throttle situations. The BPV vents this pressurised air into the intake piping. BPV has plastic components, and has been documented on here to have issues holding higher boost. Which being tuned, I run around 21.5 psi peak, and I'm always romping on it, lol. So you either replace the original equipment manufacturer's BPV with an aftermarket BPV, a Blow Off Valve (vents the air to atmosphere aka VTA), or you go with the Go Fast Bits DV+ BPV upgrade kit. It removes the plastic sealing bits with metal ones and a new spring, that holds more boost. The Boomba bypass valve spacer just raises the BPV up off its flange, to a raised location with a vent window. Now the pressurised air released by the BPV will now vent to atmosphere instead of recirculating into the intake tract. Creating that turbo "whoosh" air dump on throttle release after building boost. So this is just for my enjoyment, lol. The Ecoboost lineup uses a Manifold Absolute Pressure setup aka speed density, so this charged air is not metered like in a Mass Airflow ecu setup. Dumping this air with our MAP setup is fine. Dumping it with a MAF setup would then cause the vehicle to run rich and stutter some, due to the ecu measuring fuel in response to an air volume that is no longer as large. 1 Quote Link to comment Share on other sites More sharing options...
Duece McCracken Posted October 2, 2020 Author Report Share Posted October 2, 2020 (edited) So the GFB dv+ is in and the Boomba spacer is getting me that with whoosh. Luckily I had some longer bolts on hand. Super easy install. like 10 min job. I used This is the perfect length, and proper size/pitch. Just wish it wasnt a zinc plated phillips pan head, a hex head in stainless would have been better. I used antiseize on the threads because of the brass, aluminum, and steel it passes through/interfaces with. As a reference for this install. Super easy. Very straightforward. Edited November 15, 2020 by Duece McCracken added bolts 1 Quote Link to comment Share on other sites More sharing options...
Duece McCracken Posted October 2, 2020 Author Report Share Posted October 2, 2020 This was a video of that air sound I previously had, which was a valve cover to intake manifold hose that was disconnected. Lmao Quote Link to comment Share on other sites More sharing options...
Duece McCracken Posted November 4, 2020 Author Report Share Posted November 4, 2020 I'll upload pics later. Installed the Goodrich SS brake line kit for all 4 corners. Theres no instructions, no line designations, included hardware is two different sizes when OEM is the same all 4, front line support bracket is upside down, and rear line is a little shorter than I'd like. Additionally, the rear line utilizes the OEM roll over crimped support, which requires some good bending to get to work. Used a power motive to bleed, always great. Bad news, passenger rear caliper is hanging up. Gotta pull the banjo bolts on the rears and either grind them shorter, or install the OEM bolts. They were too long, and appear to be restricting backflow of brake fluid. Calipers bled well, but street testing has proven otherwise. I am running Wilwood EXP fluid, and had just enough for the job, so im waiting on more from amazon, before I can fix the banjo bolts and re-bleed. So back to DD'in the racecar till the weekend. Overall, Goodrich lines are super quality, but for the money I was expecting instructions(for their hardware positions F/R), side designations(seems relevant for the rears only) and proper orientation of the mounting bracket on the fronts. So not thrilled. Waited like 2.5 months for these lines, and a smidge dissapointed. 3 Quote Link to comment Share on other sites More sharing options...
NeuroBeaker Posted November 15, 2020 Report Share Posted November 15, 2020 That is disappointing. I was considering ordering today same lines, given the open unaddressed recall on the brake lines from Ford. Were there any other alternatives you considered? All the best, Andrew. Quote Link to comment Share on other sites More sharing options...
Duece McCracken Posted November 15, 2020 Author Report Share Posted November 15, 2020 1 hour ago, NeuroBeaker said: That is disappointing. I was considering ordering today same lines, given the open unaddressed recall on the brake lines from Ford. Were there any other alternatives you considered? All the best, Andrew. There are not many options, especially for a full kit. I'd still get them, let me throw up those pics and do a little install how to. Will save you the small headaches. 1 Quote Link to comment Share on other sites More sharing options...
Duece McCracken Posted November 15, 2020 Author Report Share Posted November 15, 2020 You can see the height difference to the clamping/sealing surface. This does not work in the rear caliper, not sure if it fits fronts. Not worth the risk, lol Like a clown, I sank her deep in the rears. Leading to a checkvalve situation. Swapped back to OEM, no issues. Just had to rebleed. Front installed, you can see the line support bracket is off the strut mounting point. This is bent at an angle due to the bracket being installed on the line 180 out. Not allowing it to seat properly. It's not a huge deal, but geez Goodrich. Here's the OEM rear line support, had to pry this open to replace the line. You can see how sharp that angle is from the frame hardline to the support bracket, I tweaked it some here, but not enough. Had to tweak the angle big time. Two tie wraps to keep the parking brake wires secure, the OEM lines had clips, but they are not usable in this situation. Rear lines angle bends. Not sure which way they wanted them to run, In my config the rear bleeder was accessible, but not super easy, had to flex the line a smidge to get on it. WRONG BANJO BOLT INSTALLED IN THIS PIC. She's all good now, but wish I had this info beforehand, lol. The years on this kit are odd too, like 2011-2015 awd Sport. So maybe they are for G1 not G2 Edges, and thats part of the problem. Idk, they do fit pretty well. Maybe a tad short at full suspension travel, but unless im road jumping it everyday I doubt its an issue. 2 Quote Link to comment Share on other sites More sharing options...
Duece McCracken Posted November 15, 2020 Author Report Share Posted November 15, 2020 Swapped these into the high beams. 1 Quote Link to comment Share on other sites More sharing options...
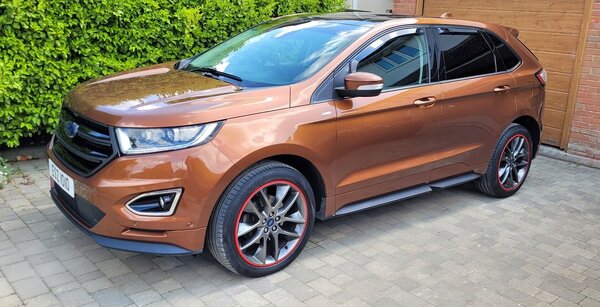
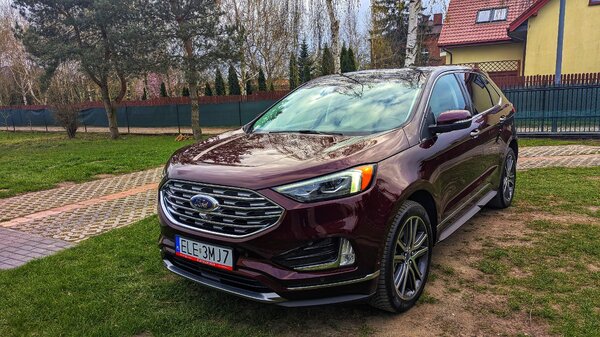
Duece McCracken Posted November 15, 2020 Author Report Share Posted November 15, 2020 275/40-R20 Michelin Pilot Sport All Season 4's. I am waiting for the new rims to ship. All said and done, I should have 55lbs rim/tire configs. Maybe a bit less. People on here say our OEM setups are like 70 lbs a corner. If thats true, then this is a huge upgrade in unsprung weight reduction and rotational mass. I currently have the 20"rim package with some 245/50-r20 Yokohama Geolandars, which suck. I have found myself pushing them out in turns here and there. They suck in the rain too. They do not inspire driving confidence. So swapping to the 275 wide MPSAS4 will be a huge improvement in a lot of conditions. I am concerned going this wide with potential for snow, but who knows. Going to jump that hurdle when I get to it, lol. The superior tread pattern and rubber composition may counterbalance the width and still outperform those crap Geolandars. 1 Quote Link to comment Share on other sites More sharing options...
Xtra Posted November 18, 2020 Report Share Posted November 18, 2020 Nice job ? Should look good when done, and those tires will make a big difference. 1 Quote Link to comment Share on other sites More sharing options...
Duece McCracken Posted November 18, 2020 Author Report Share Posted November 18, 2020 Awwwww schnapp! Rims should be here today!! I have tpms, hubcentric rings, and the rubber. Just have to select lugnuts, wanted to see how concave the rims are first. 20×9.5 and i forget the offset. Either 30 or 40, lmao. 23lbs each advertised. 1 Quote Link to comment Share on other sites More sharing options...
Duece McCracken Posted November 19, 2020 Author Report Share Posted November 19, 2020 Well, tracking lied, should actually be here today. 3 of them anyway... Idk wtf happened, but they left one rim, which is grouped as part of the 4 package shipment, at customs or something. Or they just havnt scanned it like the other three, which doesnt make sense across a few transit points too. These rims are coming from Canada, and we'll see today if they are screwing me. Geez. I will at least get a better idea of what lugnuts to buy. I have a red G2 kit for the calipers. Additionally, one of my two piece OEM lugs, has a spinning outer sleeve. I use hand tools on these lugs, and at 44k one is now fudged. SO I bought an extractor, and I hope I can get it to work. Not sure what size the lug, under the cap is really sized. Quote Link to comment Share on other sites More sharing options...
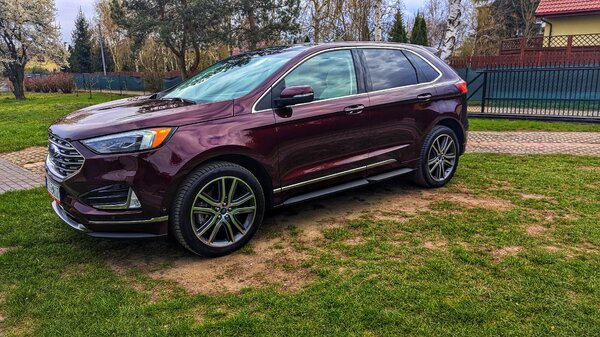
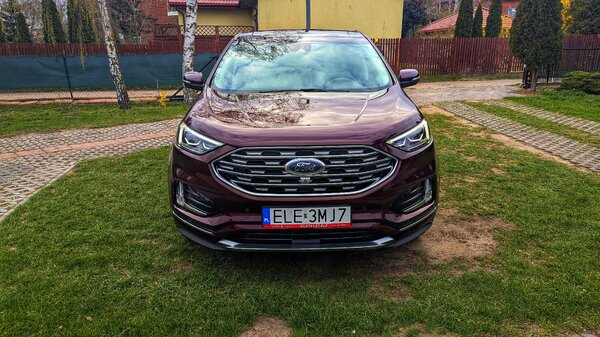
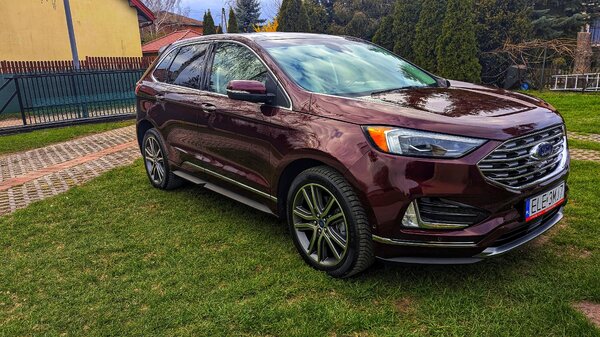
Duece McCracken Posted November 26, 2020 Author Report Share Posted November 26, 2020 (edited) Fast Wheels FC04 in titanium color. 20x9.5 +35 offset. Like 23 lbs a rim. Edited November 26, 2020 by Duece McCracken 1 Quote Link to comment Share on other sites More sharing options...
Duece McCracken Posted November 26, 2020 Author Report Share Posted November 26, 2020 Got the slipping lug off. Bashed the extractor on, hit it with the 1/2 impact, and she came right off, lol Should receive my new lugs and valve stems tomorrow. Then finally get to mount, balance and what not. 1 Quote Link to comment Share on other sites More sharing options...
Duece McCracken Posted November 26, 2020 Author Report Share Posted November 26, 2020 G2 caliper paint kit. Gotta freshen things up since you are actually going to see them now, lol. 2 Quote Link to comment Share on other sites More sharing options...
Duece McCracken Posted November 26, 2020 Author Report Share Posted November 26, 2020 Noticed the rear Panoramic glass is cracked. Yey!! Ugh, now I have to get safelite out here to fix it. In which they will probably wreck my trim, like they did on my focus. Wish I had all the gear to do it myself. I really hate other people touching my cars, lol. 1 Quote Link to comment Share on other sites More sharing options...
Duece McCracken Posted November 30, 2020 Author Report Share Posted November 30, 2020 I'll try and get some better pics when it's not raining out, lol Went with Sick Speed Aluminum lugs, black, with neochrome caps. Rim manufacturer wanted 90 ftlbs clamping, I talked with Sick Speed, and we kinda like 110-120 ft lbs. 150 would be a bit much on the lugs, lol Right off the bat, steering is much much more responsive. Also, the vehicle is way less floaty. So handling is already improved. I need to put some more miles on her, and beat on them some, but wow. Huge increase in performance from those two aspects alone. Going from a 245 heavy setup, to a 275 light setup is just great. On a side note, I totally could have gone 285 wide for these rims. 3 Quote Link to comment Share on other sites More sharing options...
Duece McCracken Posted December 1, 2020 Author Report Share Posted December 1, 2020 Contacted Torrie, and got another tuning map. Pretty noticeable in the lower acceleration. 1 Quote Link to comment Share on other sites More sharing options...
Duece McCracken Posted December 3, 2020 Author Report Share Posted December 3, 2020 https://www.vleds.com/shop-products/puddle-lights/ford-puddle-light.html Sum'B! Full replacements. I may get these. I like my upgraded puddle lights, but the ford housings kind suck. Decisions... 1 Quote Link to comment Share on other sites More sharing options...
CrackedDSM Posted December 3, 2020 Report Share Posted December 3, 2020 (edited) How is dry weather traction with TC off on those tires? Dry weather traction for me is a straight struggle with a brake boost launch on my terrible 245 tiger paws. Those wheels look great too I must admit. Edited December 3, 2020 by CrackedDSM Quote Link to comment Share on other sites More sharing options...
Duece McCracken Posted December 3, 2020 Author Report Share Posted December 3, 2020 (edited) 20 minutes ago, CrackedDSM said: How is dry weather traction with TC off on those tires? Dry weather traction for me is a straight struggle with a brake boost launch on my terrible 245 tiger paws. Those wheels look great too I must admit. I'm always on Sport, traction control off, lol Well, i had traction issues on the 245 Geolandars. Then I installed the CPE rear motor mount. Dramatically better traction after that, on the 245 Geolandars none the less. So going with literally the best Sport All season tire made, jumping up to 275 width, while much lighter rims work against traction, this setup seems to just have tons of grip. All with a much sportier ride from the stiffer sidewalls which is awesome. Probably going with H&R springs, Bilstein adjustable shocks/struts, and an Addco rear swaybar at some point. Edited December 3, 2020 by Duece McCracken 1 Quote Link to comment Share on other sites More sharing options...


Recommended Posts
Join the conversation
You can post now and register later. If you have an account, sign in now to post with your account.
Note: Your post will require moderator approval before it will be visible.